Thursday, November 24, 2011

A Thankful Thanksgiving...


I couldn't decide what kind of pies to make--so I made a plethora of minis!

On Thanksgiving, whether we're together or not, my daughters and I watch "Pieces of April"--it's our tradition.  This is the second year without Kelly, but I can't help putting on the movie while my morning centers around baking; it's a good memory.

The movie came out in 2003--I was living in Connecticut, Erin lived in California, and Kelly lived in Colorado--and stars Katie Holms, Patricia Clarkson, Derek Luke, with Sean Hayes and Oliver Platt.  It centers around April, a rebellious daughter of a dysfunctional family from suburbia, who lives in the lower East side of Manhattan and wants to recreate Thanksgiving dinner for her family as amends and maybe the last dinner for her mother, who is dying of breast cancer.  It begins with her discovering her oven is broken and since her boyfriend has gone out to buy a suit (from a friend), she has to handle this disaster on her own, relying on neighbors in her building.

Now, you might be wonder why Erin and I still put ourselves through this after losing Kelly to breast cancer?  Well, like so much we do, it's tradition, and it defines us, but also makes us thankful for all the family and friends we have around us that has been by our side through this loss.  And, this movie does have it's funny, uplifting side that brings us back to why we all were drawn to it from the start. 

So, as I begin preparing our Thanksgiving meal, wishing I was with Erin and Kelly watching this, I am comforted by what this day means and the blessings I am thankful for.
  • A strong, supportive family, especially my husband and daughters, who have always made me feel loved and important
  • Beautiful, sweet grandchildren that continue to make me laugh and bring warmth to my heart
  • Wonderful parents, who inspired me to pursue my dreams and ambitions
  • Dear friends, I've known most of my life and the ones I have gotten to know through our travels, our children, and without question, this blogging world
  • Health and strength to continue my life's journey

And, at 3:10 a.m. this morning, when our electricity went out...thank you PSE for getting it back on quickly so that this day of thanks is filled with the aromas of baking and being able to watch the movie that is so much a part of our tradition.

What are you thankful for...


Tuesday, November 22, 2011

Cardamon~Cranberry Crescents


I love to read cookbooks and food magazines, mostly for the stories--it's what gives my creations their meaning, but occasionally, even I learn something new.  I'll be the first to admit, even this old dog can learn a new trick (or technique) so with the holiday baking fast approaching, I wanted to pass on what I learned recently.

This has to do with the way I have occasionally had to soften butter.  I've come to rely on the microwave to "nuke" the butter 12-15 seconds, depending on how many sticks I was doing at once. Since I'm always rushing to get the most out of a 24-hour day, this always seemed the best way when the baking-urge hit me...LOL!  Well, that's a big NO-NO and I'll explain why.  Butter, if you read your packaging, has a fat content of 83-85%, but what we tend to forget is the remaining percentage is water.  By softening the butter to a lower temperature than about 66-degrees, we cause the butterfat to separate.  Oh, it may not be apparent when you're creaming the butter, but it's why most recipes call for refrigerating the dough or even in the case of cut-out sugar cookies, refrigerating the tray for about 30 minutes before they go into the oven.  This phenomenon is why cookies spread, sometimes too much, if you haven't properly chilled the dough.

To alleviate the problem, it will take a change in my habit of microwaving to soften, but since I already do this technique for biscuits and scones, it shouldn't be too hard.  Simply, cut the butter into 1/2-inch pieces and let it set out about 20 or 30 minutes.  (Remember, even when you're creaming it in the stand mixer, the butter is heating up.)  And, heed the recipe when it says the dough should be refrigerated.

To test out this theory I have decided on one of my favorite cookies.  My mother called these "Russian Teacakes," but when Matt and Kelly had them as gifts for their wedding, they were "Mexican Wedding Cookies." Whatever you want to call them, they're for sure, delicious bites of a shortbread cookie that melt in your mouth and are sure to please your family and guests.  Today, I've chosen a couple of flavors that will go nicely on my dessert table for Thanksgiving--Cardamon & Cranberry, but feel free to experiment with your favorite combination.

Cardamon~Cranberry Crescents
1 1/2 cups (3 sticks) unsalted butter, cut into 1/2-inch pieces and softened to room temperature (about 20 minutes)
3/4 cup confectioners' sugar (more for dusting after baking)
3/4 tsp. ground Cardamon
1/2 tsp. cinnamon
3/4 tsp. salt
1 T Vanilla extract
3 1/4 cups King Arthur all-purpose flour
1 cup dried cranberries, chopped finely


Preheat oven to 350F-degrees.  Line baking sheets with parchment.

In a stand mixer, cream the butter and sugar.  Scrape down the sides and add the next four ingredients.  Beat until thoroughly combined.  Add 2 3/4 cups of flour to the bowl and mix the cranberries with the remaining 1/2 cup.  Mix on low speed just until the dough comes together.

Measure about 1 tablespoon of dough (about the size of a walnut) and roll in a ball, then, a rope about 2 inches long.  Curve the ends and place on the parchment lined cookie sheets.


Bake in the preheated oven for 10 to 12 minutes--until cookies are a light, golden brown.  Remove from the oven and allow to cool 5 minutes before transferring the cookies to a rack.  
Notice--the cookies kept their shape!

Let the cookies set several minutes, then, roll in (or spoon over) additional confectioners' sugar.  Repeat the rolling again and let set before storing in an air tight container.
You'll need an additional 1 to 1 1/2 cups of confectioners' sugar
First rolling

2nd or 3rd Rolling
Another important technique is to allow your baking sheets to cool completely before baking additional batches.  (For me, it's placing the sheets on top of my granite counter top for 5 to 7 minutes.)

These cookies are a "staple" in our house for the holidays, but honestly, I love baking them anytime.  Some of the flavor combinations I've done are: 1 cup of finely diced dried cherries with 1/2 cup of Dutch-process Cocoa substituted for 1/2 cup of flour, 3-tablespoons of molasses, 1/4 cup light brown sugar, packed (reduce confectioners' sugar to 1/2 cup) and add 1 tsp. ground ginger with 1/4 cup mini ginger chips, or simply, 1 cup mini chocolate chips, but instead of rolled into a crescent-shape or ball, I flatten the ball, using a criss-cross method with a dinner fork and adding toasted walnuts, pecans or pistachios, finely chopped.   These are the perfect cookie to bake for those gift boxes you make up or just to have on hand for family and friends who stop by.  They last a few weeks, if stored in a cool, dry place and are a perfect for sending to family and friends far away :(!


Over the next few weeks, in addition to the recipes, I hope to share some baking techniques and what to stock in your pantry (my daughter, Erin's suggestion) to make your holiday baking joyful, as well as, memorable.  Enjoy!


Saturday, November 19, 2011

November's Give-Away Winner...

I said I would be drawing the name early since I'm going to be away after Thanksgiving.  Congratulations Tobi!  Your name was chosen for this month's Give-Away.  Please email me your address so I can send it to you ASAP!

I will have December's Give-Away up when I return and lots of Cookies! Thank you all for posting--I love the comments, suggestions, and most of all the connection.  Happy Thanksgiving to All!

Friday, November 18, 2011

Ginger~Pear Scones

The calendar may still say it's Fall, but if you go by the cold temperatures, early snowfalls, and frosty mornings, you'd swear we're already into Winter.  I know that's what I'm feeling as a icy rain falls this morning...not to mention my next-door neighbor has already lit up their house with Christmas lights-LOL!

Also, you may have noticed the changes of fruits in your local markets.  Apples, cranberries, and pears are bountiful, replacing the stone fruits, and  since I like to use what is local, I turned to pears to create a warm scone for my breakfast.  The cultivation of pears in cool temperature climates may date back to prehistoric times, although earliest notes of the use of pears is found in early Roman "cookbooks," where it was stewed with herbs for meals.  Our present day pear is thought to have originated in Western China, in the foothills of Tian Shan and spread to the north and south along that mountain range.  What we know as the Asian Pear is often confused with apples, but one bite will tell the difference.  This morning, I had a ripened Bartlett, but a Bosc or even Asian Pear would have been just as delightful.

Ginger~Pear Scones
4 cups (+more for kneading) King Arthur all-purpose flour
1 T + 1 tsp. baking powder
1/2 tsp. baking soda
1 tsp. Kosher salt
2 tsp. ground Ginger
1 tsp. Cinnamon
1/4 tsp. ground cloves
1/2 cup brown sugar (light or dark), packed
2/3 cup (10 1/3 T) unsalted butter, cut into 1/2-inch pieces


3 T Molasses
1/3 cup Ginger Mini Chips (or diced candied ginger)
1 cup + 1 T Half & Half
1 large egg
1 pear, peeled, cored, and cut in 1/2-inch pieces

Preheat oven to 375F-degrees.  Line a baking sheet with parchment paper and set aside.

In a stand mixer, using a paddle attachment, combine 3 1/2 cups of flour and the next seven dry ingredients.  Add the butter "cubes" and mix on low speed to incorporate.  The mixture will still have some same pieces of butter, but be mostly mixed to a rough state.
Add the molasses and ginger chips and mix about 1 minute to incorporate.  Whisk together the egg into the measurement of the half & half and with the mixer running, slowly pour the egg/milk into the dry ingredients, reserving about 2 Tablespoons of it for brushing the tops of the scones before baking.

Stir 1/2 cup flour into the diced pears.  Use a spatula or dough blade to incorporate into the scone mixture.
Place dough on a floured board and lightly knead until smooth--do not overwork the dough.
Roll dough out to about a 10-inch circle, 3/4 to 1-inch thick.
Use a 4-inch scalloped cutter to cut the dough.  Place on the parchment lined baking sheet.  I was able to get 9, but if you like them "fatter" you may only get 8.
Brush tops with the reserved egg/half & half mixture, then, sprinkle with Sparkling Sugar Crystals.

Bake in preheated oven 18 to 20 minutes or until golden brown.
There's nothing like a warm scone with a cup or tea, coffee or cocoa to take the chill off.  I know, from experience, that just baking warms the heart and these scones warm the stomach.  I had mine with some butter and my Cherry-Cranberry Jam.

Take time during this busy holiday season (that has been pushed upon us) to get back to the memories that warm your heart. Enjoy!


Wednesday, November 16, 2011

Red Velvet Triple "C" Cookies


Here's the riddle..."What do you get when you cross Red Velvet Cake with White Chocolate, Bittersweet Chocolate, and Semi-Sweet Chocolate?"  The answer is...the most decadent chocolate chip cookie I've ever made!

Red Velvet cake is typically associated as a Southern dessert with a cream cheese icing, but it's roots can be traced back to Eaton's Bakery in Canada, where in the 1940s and 50s this was a popular choice in desserts.  The red color comes from the use of Red Food Color, which was actually banned in the 50s due to the fact it was associated with health issues from cancer to hyperactivity in children.  The government changed the standards how much dye could be used in food and in the 60s a new guideline allowed companies to start using Red Dye #40 again.

I found a new product at King Arthur, Red Velvet Cake flavoring, that I used in the cookies today.  Because of the concentration I only used a teaspoon to get the color and flavor, which makes me feel a lot better than a 1 oz. bottle (2 tablespoons) of red food coloring.
Besides the Red Velvet flavoring, I decided to give a really good dose of chocolate and used three different ones to add the decadence I was striving for.
 A little chocolate goes a long way when you're having a stressful day and I know for many with Thanksgiving around the corner, these would be a nice snack with a cup of tea or coffee.

Red Velvet Triple C Cookies
1 1/4 cups (2 1/2 sticks) unsalted butter, softened to room temperature
1 1/4 cups light brown sugar, packed
1/2 + 2 T granulated sugar
2 large eggs
1 T Vanilla extract
1/2 tsp. Vanilla powder (optional)
1 tsp. Red Velvet Cake flavoring
2 T Dutch-processed cocoa
1 1/2 cups King Arthur all-purpose flour
1 1/2 cups Queen Guinevere cake flour
1 tsp. baking powder
1/2 tsp. baking soda
1 tsp. Kosher salt
1 cup each of Bittersweet, Semi-sweet (Mini), and White Chocolate Chips
1 cup Pecans, toasted and rough chopped (optional)

Preheat oven to 350F-degrees.  Line baking sheets with parchment paper.
In a stand mixer, using a paddle attachment, cream the butter and sugars until light and fluffy, about 6-8 minutes on medium speed.  Add the eggs, one at a time, beating well after each addition.  Add the Vanilla extract (and powder, if using), and Red Velvet Cake flavoring, and mix to combine.  

In a medium bowl, add all the dry ingredients (flours, cocoa, baking powder, baking soda, and salt) and whisk to combine.  Add to the batter and mix on low to combine.


Rough chop the pecans, if using, and add to the batter along with the three chips.  Mix again on low to combine.
The dough has a lovely brownish-red hue to it.  Use a 1/4-cup scoop to measure of the cookies and place about 2-inches apart on the prepared baking sheets.  Press lightly on the tops to flatten.  Bake for 12 minutes.


The cookies have a wonderful, familiar flavor that is so inviting and they would make a great cookie for your holiday baking because of the rosy color to them.  Enjoy!


Tuesday, November 15, 2011

National Bundt Day! ~ Apple/Cranberry Fritter Bundt Cake


The Honorable Governor Tim Pawlenty of Minnesota, home of Nordic Ware, has proclaimed Wednesday, November 15th as National Bundt Day.  It commemorates their 60th Anniversary of a pan that literally has changed baking cakes--in fact, there are over 60 million bundt pans across the continent!  So, how could I not celebrate the day when this cake pan has been around "almost" as long as I have. LOL!!

I learned to love the Bundt pan watching and helping my mother whip up this most beloved cake.  It was her choice in pans to use when baking the pound cakes she made over the years and certainly, when she was taking a cake to a friend or church function because of how stable it is when transporting it.   One of my favorites was the "Tunnel of Fudge" cake created by Ella Helfrich in 1966 for The Pillsbury National Bake-Off contest.  She took 2nd place, but most importantly, Pillsbury got over 200,000 inquiries as to where to find the pan she baked it in.

My choice for a unique Bundt cake to honor the day is derived from a memory I have of my mother's fritters.  Okay, you're probably saying, "fritters and bundt cake just don't seem to go together," but remember it's the pan that creates the dessert and I have found through the years, that almost anything comes out great in a Bundt pan.  Fritters are known world-wide and simply consist of an ingredient, coated in batter and deep fried, i.e., British fish (and chips),  corn, zucchini,  clams, etc. to name just a few.  For me, apple fritters are so satisfying--rings of tart, fall apples, dipped in a batter and fried, then, dusted with confectioners' sugar--and my mom made the best :D!  I'm changing this around and instead of making a batter, typical for fritters...or even a cake, I've decided to go with a yeast dough and bake it in a Bundt pan.  A drizzling of a glaze over the warm cake it finishes the dessert that maybe will make you think twice how you can use your bundt pan.

Apple~Cranberry Fritter Bundt Cake
Yeast dough:
1/4 cup milk
2 T unsalted butter
Place in the microwave and heat for 35-40 seconds, until the butter has melted.  Remove and add warm water up to the 3/4 cup mark.

In a stand mixer, using the paddle attachment, add:
1/4 cup granulated sugar
1 large egg
1 tsp. salt
Mix until ingredients have blended together.  While the mixer is running, slowly add the milk/butter/water mixture and mix thoroughly.  
Add:
2 T (or 2 pkgs) yeast
Mix again to incorporate the yeast.  Let set 5 to 7 minutes until the yeast mixture becomes frothy. (This ensures you that your yeast is good and proofed.)
Add:
2 T. shortening
1/4 tsp. mace
3 - 3 1/2 cups King Arthur Bread flour

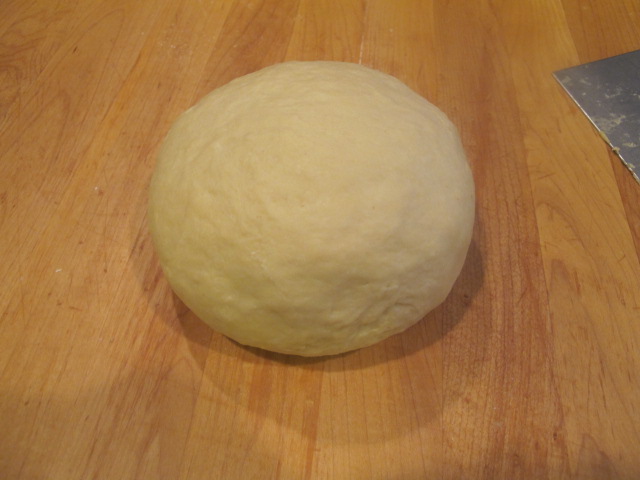
After about 2 cups of flour, change to the dough hook to finish the dough.  The dough should cling to the hook, but still be somewhat tacky.  Turn dough out onto a bread board and knead until smooth.  Use a rolling pin to roll dough out to a rectangle 8" x 10".  Place on a half-sheet pan, lightly sprayed with baking spray and cover with a towel.


To help the dough rise easier, I made a "make-shift" proofing oven.  Place the pan with the dough on the middle rack and on a lower rack add another baking pan.  Fill that pan with boiling water, then, close the door to your oven.  On these chilly mornings a little help from this method produces the right atmosphere for a good rise.  Let rise about 1 hour.


Meanwhile, make the Apple~Cranberry Filling:
2 cooking apples, peeled, cored and cut into small chunks
1 cup fresh cranberries
1/4 cup granulated sugar
2 T Boiled Apple Cider
pinch of salt


In a medium saute pan, mix all the ingredients.  Cook over med/low heat until all the liquid has evaporated and the apples have softened--about 7-9 minutes.  Transfer mixture to a shallow bowl and cool completely.


To create the "Fritter":
Remove the dough from the proofing oven and roll out, on a lightly floured board, to roughly a 12-inch square, about 1/2" thick.  Spoon the apple/cranberry mixture on half of the dough. Sprinkle mixture with 1 tablespoon of bread flour and 1/2 teaspoon of Apple Pie Spice.  Fold over the "empty" half of the dough over the mixture.  


Using a metal bench scrapper, start cutting the dough vertically, in 1-inch sections, then repeat this method going horizontally and diagonally.  

Dust the board again with flour and the cut-up dough.  With your hands, form the dough into a "roll", adding more flour as necessary to hold it together.  

Cut the roll in half and place it into a buttered 12-cup Bundt pan.  

Repeat with the remaining half of dough.  Brush the surface with butter and cover with a piece of plastic wrap. 


Place in the oven once more, and proof by pouring boiling water into a pan beneath it like you did for the dough in the first rising.  Let rise again, 1 hour or until doubled in size.  

Remove from the oven and preheat oven to 375F-degrees.  Bake for 15 minutes, then lower oven to 350F-degrees and continue baking another 15 to 20 minutes.
Remove from oven and allow to cool about 7-8 minutes, then, invert on a rack.  Place rack on a baking sheet to glaze.


Glaze:
2 cups confectioners' sugar
3 T light Karo syrup
1 tsp. Vanilla extract
1/2 tsp. Apple flavoring (optional, but well worth it!)
3-4 T boiling hot water


Whisk together all the ingredients, starting with 3 tablespoons of the boiling hot water, adding more if needed.  Pour the glaze over the warm cake.  Use a spatula to scoop up overage of glaze and add in places not covered.  Using a giant spatula, lift cake to a serving plate and allow to cool.


Yum, warm memories of my mother's fritters in this celebratory pan made my morning.  Happy Birthday Bundt and a big thank you to Nordicware.  Enjoy!