Sunday, April 29, 2012

Butter Pecan Scones

Today, while the world celebrates the first anniversary of the royals, William and Cathryn, what I'm thinking about is this would have been the 74th Anniversary of my father and mother--William and Helen.
They married in 1938 after knowing each other since fifth grade--love at first sight!  My dad stole a kiss in the cloakroom and as the story goes, he knew he would marry this barely five foot beauty one day and raise a family.

I came up with a Butter Pecan Scone that would have pleased my mother very much; it was definitely one of her favorite flavors, next to chocolate and lemon.

My dad would have bought her a present that he'd placed in the center of the dining room table with an elegant card that he chose for the occasion.  He called her "Sug" (pronounced shug) and they shared a twinkle in their eyes on their special day.  It's what happily ever after is all about:-D

Butter Pecan Scones
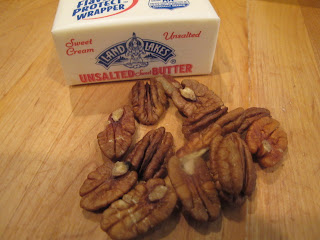
1 cup chopped pecans
4 T butter

4 cups King Arthur all-purpose flour
1 T + 1 tsp. baking powder
1/2 tsp. cream of tartar
1 tsp. Kosher salt
3 T granulated sugar
1/2 cup + 2 T unsalted, cold butter
1 1/3 cups half & half
1 large egg
1 tsp. Butter Sweet Dough flavor (optional)

Preheat oven to 400F-degrees.  Line a baking sheet with parchment paper.
In a sauce pan on med/low heat, melt butter and add the pecans.  Cook 5-7 minutes, stirring constantly until they are lightly toasted and the nuts have absorbed all the melted butter.  Set aside while you make up the dough.
In the bowl of a stand mixer, using the paddle attachment, put all the dry ingredients in the bowl and mix to incorporated.  Cut the cold butter into 1/2-inch pieces and add to the dry ingredients.  Start mixing on low and once the butter becomes incorporated, raise speed to medium.  Add the flavoring (if using).

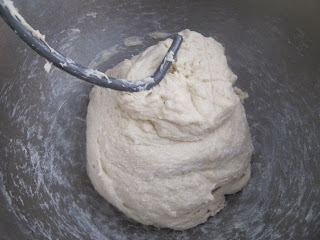
Whisk the egg into the half & half and while the mixer is running pour the liquid into the mixture, reserving about 3 tablespoons for brushing on top of the scones before baking.  The dough should just come together and not be too wet.
 Turn dough out onto a lightly floured board.  Knead slightly and roll to about 3/4-inch thick
Cut into rounds, squares or triangles...I chose rounds.
 Brush tops with reserved cream/egg mixture.
Bake in preheated oven for 15 to 18 minutes until golden brown on top.
I decided to make a brown butter glaze to enhance the flavor and make them extra special.


Browned Butter Glaze:
4 T unsalted butter, melt and continue to cook over medium heat until it foams and turns an amber brown.
1 cup confectioners' sugar
1 T Light Karo Syrup
1-2 T very warm water

Mix all ingredients together and use an off-set spatula to spread on top.

The scones have a wonderful texture and the flavor, well, if you're a butter pecan fan, these are a home run.   Happy Anniversary Mom & Dad...and of course, that other couple;-D Enjoy!


Sunday, April 22, 2012

Earth Day Banana Bread

Earth Day has been celebrated every year on April 22nd since 1970.  In 1970, I was pregnant with our first daughter, Jimi Hendrix died, the Beatles made their last record together, and Simon and Garfunkel's "Bridge over Troubled Water" was the popular album.  Protests were the theme of the day and a new enlightenment of the abuse of our Earth's natural resources led to the public's awareness to sanction a day to remember what we should protect.

As I walked around our yard today and inhaled the fresh air, I couldn't help but think how important it is to cherish this beautiful world we live in and more importantly, maintain it for future generations to enjoy as well. 
Our water supply for wildlife

Beautiful flowers


Lush foliage
...and trees


If you're wondering how banana bread figures in to this Earth Day...well, I added avocado, mashed with the bananas to represent the spectacular green all around us.

Avobanana Bread
1 cup light brown sugar, packed
1/4 cup vegetable oil
2 large eggs
2 ripe bananas, peeled and mashed
1 ripe avocado, peeled, pit remove, and mashed
1 tsp. ground cinnamon
1/2 tsp. ground cardamon
1 tsp. vanilla
1/3 cup Old-fashioned oats
1 1/4 cups King Arthur all-purpose flour
1 tsp. baking powder
1 tsp. baking soda
1/2 tsp. Kosher salt
1/2 cup chopped walnuts
1/4 cup buttermilk

Preheat oven to 350F-degrees.  Spray a 9" x 5" loaf pan with a baking spray and set aside.
Mash the bananas and avocado.
In a large bowl, mix the brown sugar, eggs, and oil together and stir to combine.  Add the spices and the vanilla and stir again.  Mix in the banana/avocado mixture.  Add the dry ingredients, the walnuts, and the buttermilk.  Stir to thoroughly combine, but don't over beat.
Pour into the prepared pan and bake for 50 to 55 minutes, until a wooden skewer comes out clean.
The bread is moist and is healthy for you--the natural oil in the avocado is a good substitution for the fat in butter.

I hope you take the time today to celebrate this day and come up with ways to preserve our natural resources.  Enjoy!   

Friday, April 20, 2012

Chocolate~Chocolate Chip & Raspberry Bits Cookies

TGIF!  What a week, with projects to finish, appointments to keep, and the everyday cleaning, cooking, and laundry that falls under my "to do" list.  CHOCOLATE is what I want and a comfy place to sit for a few hours to enjoy the sunshine that has come, after a morning of rain.  That's just what I did after sending one of my paper floral wreaths off to Japan to a company that will exhibit at their hobby show next weekend.
I came up with this recipe a couple of days ago when I literally threw some ingredients together to bring a treat to my favorite dental office.  They were kind enough to fit me in, when my temporary crown came loose.  However, I wasn't able to taste the cookies before hand and relied on them to give me feed-back--they did!  So, I decided to share the recipe for anyone else who has had "one of those weeks;-)"

Chocolate~Chocolate Chip & Raspberry Bits Cookies
1 cup (2 sticks) unsalted butter, softened
1 1/4 cups light brown sugar, packed
3/4 cup granulated sugar
2 large eggs
1 T vanilla extract + 1 vanilla bean, split and scraped
2 1/4 cups King Arthur all-purpose flour
1/2 cup Dutch-processed cocoa (I used Cocoa Rouge)
1 1/4 tsp. baking soda
1/2 tsp. baking powder
1/2 tsp. Kosher salt
1 cup Mini Chocolate Chips
3/4 cup Raspberry Jammy Bits 

 Preheat oven to 350F-degrees and line a baking sheet with parchment.
In a stand mixer, using a paddle attachment, cream the butter and sugars together for 3 to 5 minutes.  Scrape down the sides.

Add the eggs, one at a time, beating well after each addition and scraping down the sides between the additions.

Combine the dry ingredients in a medium bowl and use a whisk to combine.  Add to the batter and mix on low speed, at first, then when incorporated, mix on medium for 1 minute.
Add the mini chips and raspberry bits and mix to "just" combine.  Use a 1/4-cup scoop to measure out the dough onto the lined baking sheet.

Bake for 12 minutes.  Allow to set for at least 5 minutes before transferring to a baking rack to cool completely.  Makes about 24 3-inch cookies.


The rich, soft centers of chocolate with the hint of raspberry is a perfect combination and I can already feel a calmness while I enjoy my cookie with a glass of milk (although a glass of wine would have been nice too!) and pick up my knitting.  


Treat yourself to a sweet reward for all you do...Enjoy!

Wednesday, April 18, 2012

Bakewell Tart (tarta Bakewell)


The Bakewell Tart is a traditional English dessert native to the town of Bakewell, Derbyshire.  One of the earliest accounts of this dessert is in a book called Mrs. Beeton's Cookbook (aka Mrs. Beeton's Book of Household Mangement) from 1861.  Typically, the tart consists of a shortcrust pastry (masa), a layer of jam (mermelada de fresa), and a sponge-like filling from ground almonds (relleno), known as frangipane.

I love making this tart, first, because it's easy and secondly, you can be creative with the jam and/or nuts you choose to use.  Since I had just made a fresh batch of strawberry jam, that's what I used, but I could have easily substituted raspberry, blackberry, blueberry, etc. and this tart would have been just as scrumptious.

This isn't a tart that my mother ever made, although, if she had known about it, I know she would have.  However, we certainly picked a lot of strawberries together and made jam, so partly this does bring back memories in her kitchen.  Also, my son-in-law, Matt, who is in Madrid for the year on a Fulbright Scholarship, gave me a wonderful new cookbook for Christmas and tarta Bakewell was one of the recipes in Postres~Las Mas Irressistibles Recetas.  As you might have guessed from my first paragraph, the book is in Spanish and I'm excited to relate something I know to the language both he and now my grandson, Ari speaks.

The Spanish version of tarta Bakewell did influence my recipe by incorporating some of the uniqueness of it.  I used a combination of both granulated sugar (azucar de lustre) and brown sugar (azucar de moreno) in addition to substituting the all-purpose flour for a one-third cup of rice flour (harina de arroz).  Fingers crossed it looks and smells great baking. 

Bakewell Tart
Perfect Pie Dough
1" x 8" removable bottom tart pan

1/3 cup Strawberry Jam (or your favorite)
14T (1 3/4 sticks) unsalted butter, room temperature
1 cup granulated sugar
1/3 cup brown sugar, packed
2 large eggs
2 tsp. Almond extract
1 cup finely ground almonds (or almond flour)
1/3 cup rice flour

 About 1/2 cup Sliced almonds for the topping

Preheat oven to 400F-degrees.  Place on a baking sheet and blind-bake the tart shell for 10 minutes.

Prick the surface with a fork...

...or line the bottom of the tart with wax paper and use pie weights.
Remove from the oven and allow to cool while you mix up the almond filling.  Lower oven temperature to 350F-degrees.

In a stand mixer, using the paddle attachment, cream the butter and sugars completely.  Add eggs, one at a time, fully incorporating them into the butter/sugar mixture.  Add the almond extract and mix to blend.  Add the ground almonds and rice flour  and mix just until incorporated.

Spread the strawberry jam on the bottom of the pre-baked tart, spreading it with an off-set spatula to cover completely.

Spoon dollops of the almond mixture onto the strawberry jam and use an off-set spatula to spread over it, covering the jam layer.


Sprinkle 1/2 cup of sliced almonds on top and bake (keeping tart on a baking sheet) for 30 to 35 minutes until it's a lovely golden brown on top.

Dust with confectioners' sugar before serving.

I can't help thinking, while I was creating my version of this Bakewell Tart, with the influence of the Spanish recipe from this treasured cookbook, that maybe through baking we could have a peaceful co-existance among all cultures--it's a thought ;-D! Enjoy!


Friday, April 13, 2012

Spring, White Bread, and National Grilled Cheese Day

Since I missed mentioning it was National Grilled Cheese Day yesterday, never mind, in fact, it's actually National Grilled Cheese Month!  This comforting sandwich, that can literally be eaten anytime of day, has become one of the most ordered entrees at restaurants and diners.  I know that our grandson, Ari, asked for it to eat every restaurant we went when he was here during the holidays...and usually for lunch when we were home.

It was a gorgeous Spring day and after getting a jump start on planting my Fuschia baskets, I decided to make a loaf of bread so I could have a grilled cheese later.

The "starts" are small, but in a month or so I will have spectacular blooms that the humming birds will adore!
Of course, cheese and bread have been around since early times, but it was in the early 18th century when the 4th Earl of Sandwich came up with putting something between bread and the term "sandwich" was used.  In the 1920s, processed cheese was introduced,  but before that an open-faced version with grated cheddar cheese was the choice.  Now, with a "lesser expensive" cheese the common person/family could take advantage of this meal.  Furthermore, it is said the top slice of bread was added to make the meal more filling!

With the combinations of cheeses, breads, and accouterments that can be added (tomato, avocado, meats, etc.) this a near perfect sandwich for any occasion and should have a month devoted to it.

White Sandwich Bread
1 cup warm water (+ additional to create a smooth dough)
1/4 cup milk, warmed in the microwave about 30 seconds
1/4 cup honey
2 T (or 2 pkgs.) active dry yeast
Kosher salt
3 T Potato flour
4 1/2 to 5 cups King Arthur all-purpose flour
4 T unsalted butter, softened to room temperature (+ more for bowl and loaf pan)

In a stand mixer, using the paddle attachment, measure the water, milk, honey and salt.  Mix to combine.  While the mixer is running, sprinkle the yeast over the ingredients in the bowl.  Turn off and let set about 5 to 7 minutes until the yeast gets foamy.

Add the potato flour and 3 cups of the all-purpose flour.  Mix to combine, then, change to the bread hook.  Add the softened butter and the 1 1/2 to 2 cups of flour.  Mix on speed #2 until the dough clings to the hook, adding any additional water, one tablespoon at a time.
Turn dough out onto a flour bread board and knead 7 to 10 minutes until you have a smooth ball.
 Place 2 T butter in a bowl and microwave about 40 seconds.  Place the dough in the bowl and immediately turn it bottom-side-up.
Cover with plastic wrap and let rise 1 hour.  Turn dough out onto the board once again and roll to a rectangle.  Roll up long edges and pinch together to form a tight seam.  Place seam side down into the buttered loaf pan(s).
I used a Pullman loaf pan to make one large loaf, but this dough will easily make two loaves in 9"x5" pans.

Brush melted butter on top of the dough, then, cover again with plastic wrap.  Let rise another 35 to 45 minutes until doubled.  Meanwhile, preheat oven to 375F-degrees.

Bake for 10 minutes, then, lower oven temperature to 350F-degrees and rotate pan.  Continue to bake another 25 to 30 minutes or until a thermometer reads internally 190-204F-degrees.
 Turn out onto a bread board and let cool completely. I know...this is really hard not to slice off a "hunk" of warm bread and slather it with butter;-)


Now, for the grilled cheese...I cut two slices and used two slices of American cheese.  It's what I grew up with even though the best grilled cheese I ever had was in Los Angeles two years ago made with a combination of four cheeses!

Spread butter on top and the bottom and place, either in a large saute pan or as I did, a panini maker.

Grill until that golden crust and the cheese is oozing out the sides, which was about 6 to 7 minutes on the panini maker.

I had a great day gardening and enjoying a wonderful sandwich from my childhood.  My friend, Louise said on Facebook..."a lot of restaurants offer them on the kid's menu--what about adults!"  I agree, you're never too old or too young to enjoy a grilled cheese.  Enjoy!