Showing posts with label CHOCOLATE COOKIE. Show all posts

Thursday, September 15, 2016

Chocolate Chocolate Crunch Cookies

It's definitely a Chocolate day!  You know, you get those cravings and nothing takes the woes of the week away better than chocolate.  Did you know there are Seven (7) reasons why chocolate is good for you?

1. Very Nutritious - 11 grams of fiber, 67% of the RDA of Iron, 58% of the RDA of Magnesium, 89% of the RDA for Copper, 98% of the RDA for Manganese, and it also has plenty of potassium, phosphorus, zinc, and selenium.

2. Powerful Source of Antioxidants - Dark Chocolate is loaded with organic compounds that are biologically active and function as antioxidants.

3.  May improve blood flow and lower blood pressure - the flavonols can stimulate the endothelium (lining of the arteries) to produce Nitric Oxide which sends a signal to the arteries to relax, which lowers resistance to blood flow, and in turn lowers blood pressure.

4. Raises HDL and protects LDL against oxidation - the increase HDL can lower cholesterol and by protecting LDL it prevents reacting to free particles and damaging such things as the lining of your arteries.

5. May lower the risk of Cardiovascular Disease - studies have shown that cocoa, over a 15 year period with 470 men,  reduced the risk of cardiovascular disease by 50%!  Another study showed by eating chocolate 2 or more times per week lowered the risk of calcified plaque in arteries by 32%.

6. Protect your skin from the sun - Again, the flavonols in dark chocolate can protect against sun-induced damage to the skin, along with increasing skin density and hydration.

7. May Improve Brain Health - High cocoa flavonols increases blood flow to the brain and may, especially, improve cognitive function to the elderly with mental impairment.

Off my soap box, but lets vote for Chocolate--something I bet we can all get behind!

Chocolate~Chocolate Crunch Cookies

1/2 cup (1 stick) unsalted butter
4 oz. 62% Chocolate, roughly chopped

In a small saucepan, over low heat, melt the butter and chocolate together.  Once melted, stir well and remove from heat to cool.

Preheat oven 325F-degrees.  Line two baking sheets with parchment paper and set aside.

2 large eggs
1 1/2 cups granulated sugar
1 tsp. vanilla
1 cup King Arthur all-purpose flour
1/2 cup Dutch-processed cocoa
1/2 tsp. baking soda
1/2 tsp. salt
1 cup Bittersweet chocolate chips
12 regular sized Oreos or 17 Thin Oreos crushed

In a stand mixer, beat the eggs and sugar for 2 minutes.  Add the melted chocolate/butter mixture, and vanilla and mix well, scrapping down the sides of the bowl as needed with a rubber spatula.

Whisk the dry ingredients together and add to the chocolate mixture.  Mix on low just until combined.  Stir in the Bittersweet chocolate chips.

Crush the Oreos--You can use a rolling pin, food processor, or Moulinex Chopper.
Use a tablespoon or small scooper to measure dough.  Roll it into the crushed Oreos.

 
Place rolled cookies on the prepared parchment-lined cookie sheets.  Bake in the preheated oven for 12 minutes.  Don't over bake as they will tend to dry out.
Now, relax.  Have a glass of cold milk and let the stress of the week wash away as you bite into these cookies.  Enjoy!


Thursday, April 3, 2014

Dark Chocolate~Chocolate Mint Cookies & April's Give-Away Apron

I'm sure we've all heard and/or read about the benefits of dark chocolate; something I'm quite pleased with and lead to creating this cookies. 

1. Good for your heart~eating dark chocolate two or three times a day can lower blood pressure by improving blood flow and preventing the formation of blood clots.  It also helps prevent arteriosclerosis (hardening of the arteries.)

2. Good for your brain~not only improves blood flow to your heart, but to your brain which can have a positive effect on your mood and cognitive health.  I know you've heard the fact that it encourages your brain to release endorphins, which will make you feel happier.  Also, it contains phenylethylamine which is the same chemical your brain creates when you feel like you're falling in love.

3. Helps control blood sugar~keeps blood vessels healthy and thus your circulation unimpaired; protects against Type 2 Diabetes.  However, it may be the flavonoids in dark chocolate that benefits your cells and helps reduce insulin resistance and function normally.  It's a fact that dark chocolate has a low glycemic index, which means it won't cause huge spikes in blood sugar levels.

4. Full of Antioxidants~which help free your body of free radicals that cause damage to your cells.  Free radicals have been linked to the aging process and may be a cause of cancer, so eating dark chocolate may protect you from many types of cancer and slow the signs of aging.

5. Dental decay prevention~contains theobromine, which has been shown to harden tooth enamel and lowers your risk of cavities if you practice proper dental hygiene.

6. High in Vitamins and Minerals~Potassium, Copper, Magnesium and Iron which supports our health.  Copper and potassium help prevent against stroke and cardiovascular ailments; iron protects against iron deficiency anemia; and, the magnesium helps prevent type 2 diabetes, high blood pressure and heart disease.

Of course, like anything this good, they is a drawback. Keep in mind that dark chocolate is high in fat, so keeping tract of your calories is beneficial  to a healthy goal of weight.

Dark Chocolate~Chocolate Mint Cookies
1/2 cup (1 stick) unsalted butter) at room temperature
1/2 cup granulated sugar
1/2 cup light brown sugar, firmly packed
4 large eggs, lightly beaten
11 oz. dark chocolate, melted
1 1/2 tsp. Vanilla extract
1 tsp. espresso powder
2 1/2 cups King Arthur all-purpose flour
1 tsp. baking powder
1/2 tsp. baking soda
1/2 tsp. salt
1 1/4 cups Andes Creme de Menthe baking chips

Weigh the bittersweet dark chocolate in a bowl and place over a double boiler to melt on low.  Remove the bowl and allow the chocolate mixture to cool slightly before adding it to the sugar/egg mixture.
 
In a bowl of a stand mixer, using the paddle attachment, or a large bowl and a hand-held mixer, cream the sugars and butter together until fluffy.  Add the lightly beaten eggs and vanilla and mix on low to combine; don't worry if the mixture looks curdled that will change with the addition of the melted chocolate.

Remove the bowl from the stand and add the melted chocolate, stir to incorporate.  Add the dry ingredients and chips and stir until all the flour is incorporated.  At this point the batter is the consistency of "frosting" so place it in the refrigerator for 25 to 30 minutes to chill.
Preheat oven to 350F-degrees.  Line baking sheets with parchment paper.  When the dough is chilled and easily handled, use a 2-tablespoon size scoop to measure out the cookies.  Bake in the preheated oven for 12 minutes.  Remove and allow them to cool slightly before transferring them to a rack to cool completely.
The cookies have a familiar taste of those GS cookies we know and love oh so well.  The best thing is how moist they are on the inside.  Well worth the calories from the dark chocolate that is good for your body. Enjoy!

Now, this month's apron symbolizes the showers that April brings and the umbrellas that protect us from them.  I'm sure we've all heard the joke..."April showers bring May flowers...what do May flowers bring...!"
 Just comment on any of the posts and you could be the lucky winner of this month's beauty!


Thursday, June 7, 2012

Red Velvet Crackles


When we lived in California, in the 80s, one of our favorite restaurants was called The Back Bay Rowing Company in Costa Mesa.  I'm not sure if it still exists, but it is the inspiration for my baking today.

It's decor was set around rowing, more specifically, sculls and crewing.  They hung from the ceiling and there were photographs and jerseys on the walls of crew teams and trophies on shelves.  The food was a bistro fare and the atmosphere, was casual.  What I was thinking about today was after the meal, as we were walking out, we passed the bakery case. Both my daughters and I stared at the cookies--chocolate chip, oatmeal and chocolate crackles.  They were jumbo sized and so the first time we bought the chocolate crackles, we thought we'd be "lady-like" and share it.  That only happened the first time--after that, we each had our own. LOL!

I'm not one to do the usual, so I thought, "how could I change this cookie to be mine?"  The answer, was creating a Crackle with one of my favorite flavors, Red Velvet.  However, I didn't use red food coloring, but a product I found in the King Arthur catalogue--Red Velvet Cake Bakery Emulsion.

The cookies have that deep, burgundy color, as in the famous Southern cake, and with just a "crackling" of confectioners' sugar on top, they seem to melt in your mouth.

Red Velvet Crackles
1/2 cup (1 stick) unsalted butter, at room temperature
1 cup light brown sugar, packed
1 cup granulated sugar
4 oz. unsweetened chocolate, melted
4 large eggs
1 tsp. Vanilla extract
1 T Red Velvet Cake flavor (or you could use red food coloring, but you'll only get the color, not the taste)
2 T Unsweetened cocoa (I used Cocoa Rouge)

1 3/4 cup King Arthur all-purpose flour
1 1/2 tsp. baking powder
1/4 tsp. salt
1 cup bittersweet chocolate chips

Confectioner's sugar

Preheat oven to 350F-degrees.  Line a baking sheet with parchment paper.

Chop the unsweetened chocolate, finely and place in the bowl atop a double boiler. 

In a stand mixer, using the paddle attachment, cream the butter until fluffy.  Add the sugars and continue to beat 3 to 5 minutes to combine.  Scrape down the sides with a rubber spatula.  Add the eggs, one at a time, beating well after each addition and scraping down the sides as needed.  Add the melted, cooled unsweetened chocolate.

Add the vanilla and the Red Velvet Cake flavor to the batter and mix well.  Whisk the dry ingredients in a medium bowl and then add to the batter, mixing just until the flour is incorporated.  Stir in the chocolate chips.

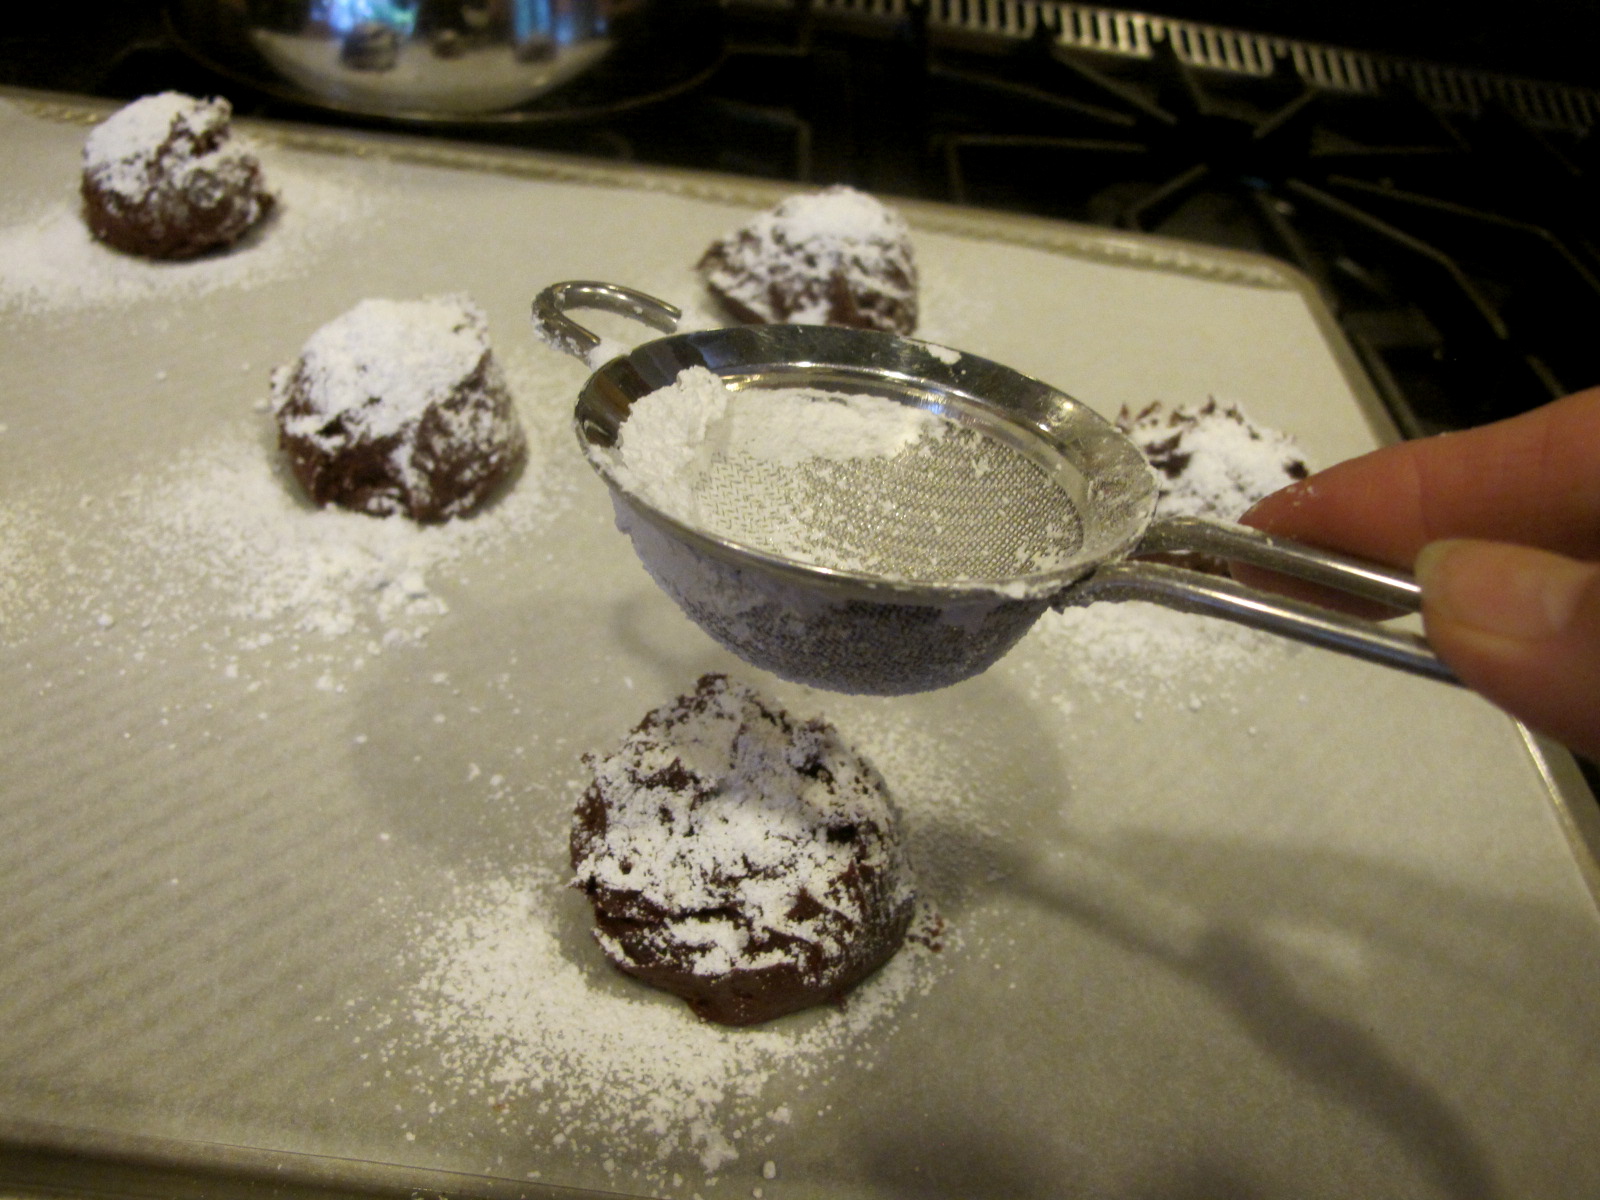
Use a 1/4 cup scoop to measure the cookie dough onto the prepared baking sheet.  Dust generously with the confectioners' sugar and allow the cookies to sit for 10 minutes before putting them in the oven.

Bake for 5 minutes, then, rotate the pan and bake an additional 5 minutes (10 minutes total).  Remove from oven and allow to rest a few minutes before transferring to a rack to cool completely.

The cookies have a lovely cake-like texture with the familiar red color and by adding the bittersweet chocolate chips, you get a gooey chocolate morsel with every bite.  

I know these would have been worth stopping for at a bakery case--even better homemade. Enjoy!


Friday, March 16, 2012

TGIF ~ Chocolate Chocolate Chip Peanut Butter Cookies

We've had a very interesting week here in Seattle; two mornings we woke up to snow and the rest of the time, it's poured.  Oh, I know what you're saying...doesn't it rain all the time in Seattle?  Actually that's not true with both New York and Atlanta having more rainfall than we do, but we do have more gray days.

Anyway, with the busy week I've had, helping a friend out who owns a spectacular online craft store (Ellen Hutson LLC),  trying to keep up with all my chores at home, and skyping with the grands, I just needed something chocolaty.  I turned to one of my favorite recipes in the Spago Desserts cookbook by Mary Bergin and Judy Gethers.  It's a wonderful combination of flavors and believe me, very satisfying.
Chocolate Chocolate Chip Peanut Butter Cookies
1 cup (2 sticks) unsalted butter, at room temperature
1/2 cup granulated sugar
1/2 cup dark brown sugar, packed
2 large eggs
1 1/2 tsp. Vanilla extract
1/2 cup peanut butter, smooth or chunky (I used chunky)
2 oz. bittersweet chocolate, melted
1 1/2 cups King Arthur all-purpose flour
1/3 cup + 1T cocoa
1 tsp. baking soda
1/2 tsp. Kosher salt
1 cup roasted peanuts, coarsely chopped
1 cup bittersweet chocolate chips
Preheat the oven to 350F-degrees.  Line baking sheets with parchment and set aside.
In a stand mixer, using a paddle attachment, cream the butter and sugars until fluffy.  Add the eggs, one at a time, beating well after each addition.  Scrape down the sides of the bowl, as needed.  Add the peanut butter, vanilla extract, and melted bittersweet chocolate.
In a separate bowl, measure out all the dry ingredients and whisk to combine.  Add the dry ingredients to the batter and beat on medium speed.  Stir in the peanuts and chocolate chips.
At this point, chill the dough about 30 minutes.
Use a scoop to measure out about 1 tablespoon of dough on the parchment-lined baking sheet.  Bake in the preheated oven about 10 1/2 to 12 minutes (mine baked for exactly 10 1/2 mins.)
 Remove from the oven and allow to cool slightly for about 5 minutes.  Transfer cookies to a rack to cool completely.  The recipe makes about 3 dozen cookies.


What's better than a glass of cold milk and these cookies to end the week.  I know they lifted my spirit. Enjoy!
 

Monday, December 12, 2011

Bittersweet Chocolate Thumbprint Cookies with Salted Caramel


My mother believed that chocolate made everything better and at times, I also believe this to be true.  Moreover, when she first tasted really good chocolate, there was no going back to the less expensive brands.  I have inherited those same taste buds and when we moved to the Pacific Northwest, I discovered Fran's Chocolates, a chocolatier founded in Seattle, who makes really good chocolates!  As Fran Bigelow states in her book, Pure Chocolate, "A few lucky people are born to chocolate. Others, like myself, fall into it later in life and spend the rest of their lives mastering its magic."  That also describes my mother and this cookie I create today is in her honor of teaching me the appreciation of good chocolate, with a twist from Fran Bigelow, who got me hooked on chocolate salted caramels.

Thumbprint cookies have been one of my favorite cookies to bake each year during the holidays.  Normally, I do the buttery, shortbread dough, rolled in finely ground nuts, then, add my homemade raspberry, strawberry, or peach jam to the centers.  My family loves them and they will be part of my cookie boxes for gifts as usual.  However, this chocolate version is my way of adding something new and keeping them on their toes ;-)! 

I've included, once more, my recipe for Homemade Caramel, which is very easy to make, but, keep in mind, you can also use a store bought brand, or even melt wrapped caramels with about 3 tablespoons of heavy cream to fill the centers.  I understand with time flying by, shortcuts may be necessary, so don't feel guilty.  If you make your own caramel, there will be about a cup or more left over.  I will be  placing my leftover in a sterilized 8oz jam jar, sealed, and shipped to my daughter, Erin.  She loves caramel over ice cream and since she's unable to travel this holiday, it will be a special homemade treat.

Homemade Caramel
1 1/2 cups granulated sugar
I use C & H's Baker's Sugar, which is an ultrafine pure cane sugar, much like caster sugar

1 cup Light Karo Syrup
1/2 tsp. Kosher salt
4 T unsalted butter, cut into small cubes
1 cup heavy cream
1 tsp. Vanilla extract


In a 2 quart sauce pan, combine the sugar and Karo syrup together, stirring to blend well, however, once you place the pan over heat, DO NOT STIR!   


Place sauce pan over medium heat.  When the mixture turns a golden brown (this takes about 7 minutes, but don't go away or get distracted doing something else), remove pan immediately from the heat and add the butter.  The mixture will bubble up and at this time, you can stir to incorporate the butter.  Now, slowly add the heavy cream--the mixture will not only bubble, but release steam.  For safety reasons, you can use a hot pad to pour the cream to protect your hands.  Don't panic if a "lump" of caramel forms; trust me, the mixture is still hot enough that you will be able to stir that lump away.  Finally, add the vanilla and stir once more.  


The mixture will be quite thin, but as it cools, it will thicken up.  (You could also pour this mixture into a square pan, brushed with butter and it will set so you can make your own soft caramels as gifts.)  I transferred the mixture to a heat-proof bowl to cool while I started the bittersweet thumbprint cookies, stirring occasionally to speed up the cooling. 


Bittersweet Chocolate Thumbprint Cookies
1/2 cup (1 stick) unsalted butter, cut into cubes, set at room temperature
1 1/3 cups granulated sugar
3 large eggs
1 tsp. Vanilla extract
3 oz. bittersweet chocolate, melted
1/2 cup Dutch-processed cocoa
2 cups King Arthur all-purpose flour
1/2 tsp. baking powder
1/4 tsp. baking soda
1/2 tsp. Kosher salt


Additional: Coarse Sea Salt 


Preheat oven to 350F-degrees.  Line a baking sheet with parchment paper and set aside.
In a stand mixer, using the paddle attachment, cream the room temperature butter and sugar until fluffy.  Add the eggs, one at a time, beating well after each addition.  Add melted bittersweet chocolate and vanilla and mix to combine.


In a separate bowl, mix all the dry ingredients (the last five listed) and use a whisk to combine.  Add the dry ingredients to the batter and mix on low speed just to combine.


Use a 2-tablespoon scoop to measure out the dough onto the parchment-lined baking sheet.  

Bake 10-11 minutes, until the tops look dry and cracked.  Remove from the oven and immediately use the small end of a pastry tamper or the rounded end of a large wooden spoon to create a "well" in the center of the cookie.  Allow to cool about 5 minutes on the baking sheet before transferring to a rack to cool completely.


Use about 1/2 teaspoon of caramel to fill the wells.  

Sprinkle with a few grains of coarse sea salt to finish off the cookie.  

Allow the cookie to set at least an hour before storing in a airtight container in a cool, dry place.

My friends know me all too well...and for my birthday this year, I received not one, but two boxes of Fran's Chocolates.  These cookies, with the deep, dark chocolate taste and combined with the salted caramel pay tribute to two women who have inspired me to find the magic.  Enjoy!