Showing posts with label BROWNIE. Show all posts

Tuesday, January 22, 2013

Recipe Found ~ Denver Brownies


Funny how things happen.  I mean, what are the chances that just a month or so ago, I was reading an interview with Julia Child and in it was mentioned these delicious brownies she once tasted.  They are called Denver Brownies and I had made a note to ask some friends, who happen to live in Colorado, if they had ever heard of them and could they get me the recipe? Something, I hadn't gotten around to doing. 

Well, this past weekend, I met up with my hubby who had a business trip to Portland, Oregon, and like we always do, we wandered up to Couch Street to visit Powell's Bookstore.  I should have taken some photos of the store because it is one of those bookstores that you can only imagine exists, but I was just so excited to wander through the Gold, Purple, Blue, Rose, etc....rooms and peruse the books that I wasn't thinking (I will try to get some photos the next time!)  In the baking section, the Rose Room, which I spent my most time in, I came across a 1977 edition of Maida Heatter's Cookies book.  As I turned the pages reading the stories she shared, there it was on page 124--Denver Brownies.  Not only the recipe, but Maida tells her story about the time she was on tour with her chocolate book and had made fudge sauce on a television program.  A receptionist tells her that when Julia Child was here, they made these brownies for her to taste and she loved them!

I think Maida and Julia would want me to share them with you.  After all, Valentine's Day is literally around the corner and these double-iced brownies would be perfect for your loved ones.  Maida does make mention that they do not ship well, but they certainly do freeze well.  You can make them ahead of time or if it's just the two of you...like my hubby and I, it's better that they can freeze and not be tempted to eat them all.

Denver Brownies
Preheat oven to 325F-degrees.  Line a 9-inch square pan with aluminum foil, shaping to fit the corners and press into place.  Brush the foil with melted butter.  (I used my 9-inch square spring-form pan and did not use foil!)

In a sauce pan, measure:
1/2 cup (1 stick) unsalted butter, but into pieces, at room temperature
1/3 cup honey
6 oz. semi-sweet or bittersweet chocolate chips (or a bar, coarsely chopped)
2 T water or black coffee

Over moderately low heat, stir this mixture until the chocolate and butter have melted.  Remove from the heat and stir in, with a wooden spoon,  the following, first the extract, then the eggs:
1 tsp. Vanilla extract
2 large eggs
Homemade Vanilla Extract is the best!

Add:
3/4 cup King Arthur all-purpose flour, sifted
1/4 tsp. baking powder
1/4 tsp. salt


Whisk vigorously with a wire whisk until smooth and shiny.  Add:
1 1/3 cups of chopped walnuts

Pour into the prepared pan and smooth the top.  Bake for about 22 to 25 minutes until a toothpick, inserted in the center, comes out cleanly.

Remove from the oven and brush the top of the brownie with:
2 T. bourbon, brandy, or rum (I used brandy!)
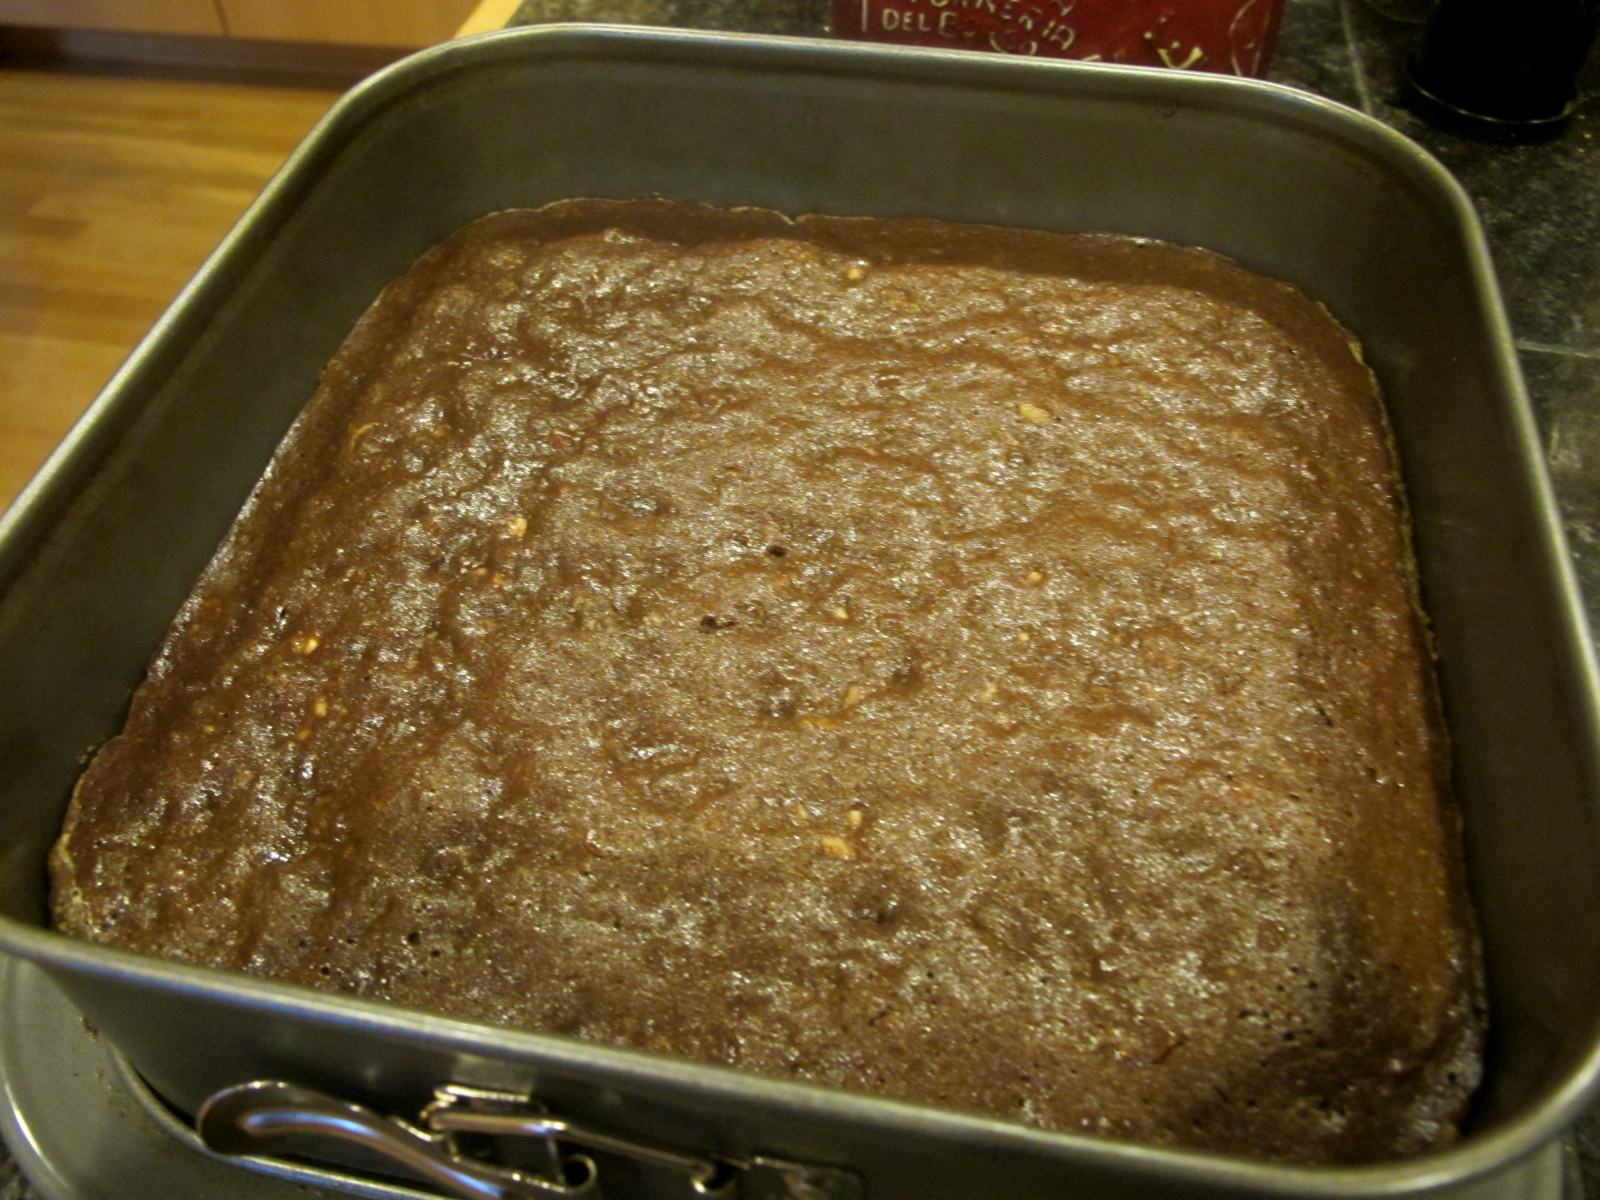
Cool the brownies, then cover the top with a rack and remove the pan and the foil.  Use another rack to turn the brownies right-side-up again.  (The cake will be about 3/4-inch high.)

White Icing

1/2 cup (1 stick) unsalted butter at room temperature
1 tsp. vanilla extract
2 cups sifted confectioners' sugar

In a small bowl, using an electric mixer, beat the butter until soft.  Add the vanilla and then, gradually add the confectioners' sugar.  Continue to beat until fluffy.  Spread the white icing over the top of the cake, using an off-set spatula, until smooth.  Refrigerate.


Chocolate Icing

6 oz. semi-sweet or bittersweet chocolate chips or coarsely chopped chocolate
1 T vegetable shortening
1 T unsalted butter

Place all ingredients in the top of a small double boiler over hot water on moderate heat. Cover until partly melted, then, uncover and stir until completely melted and smooth.  Remove from the heat.

Pour in a thick ribbon over the white icing, working quickly before the chilled white icing sets the chocolate.  With a long off-set spatula, smooth the top.

Refrigerate.

To cut:  The chocolate might "cracked" when first removed from the refrigerator while cutting, so allow the brownies to stand at room temperature and use a serrated knife to cut into 1-inch squares...or if you're feeling generous, larger than an inch...which is what I did!

Surprises in life come at the most unexpected times--this one was a good one. Enjoy!


Saturday, June 9, 2012

Banana~Brownie Squares


Coming up with interesting recipes that incorporate bananas has become a challenge for me.  And, since I always have what seems like "aged" bananas every week, there's just so much banana bread that one can bake:-)

Today, I was inspired by a photograph that my sister sent to me a couple of weeks ago of my daughters when they stayed at her house while my DH and I went to the Shenandoah Mountains for our 10th anniversary.  Her daughter, Amy, decided to play "dress up" with the girls, using crazy hats, her mother's old clothes, and a wig (yes, that is a wig that Kelly is wearing!) and of course,  a plastic lei and sun glasses to complete the ensemble.
Dressing up is always a fun activity for children and a couple of years ago, for Christmas, I made up "Dress Up" boxes for each of my grands.  All sorts of hats--cowboy/girl, police, fireman; costumes I found on sale at different costume sites--pirate, Indian, princess, boas; and I made each one a cape--Maddie had a Little Red Riding Hood and Ari's was a Superhero/magician to inspire their imagination.
Ari in his favorite Spiderman costume

Maddie in her Chinese New Year outfit to match Ivy's
Okay, if you couldn't guess the concept behind this post...I've "dressed up" banana bread with a brownie layer!

Banana~Brownie Squares
Banana Layer:
1/2 cup (1 stick) unsalted butter, at room temperature
1 cup granulated sugar
3 ripe bananas, peeled and mashed
2 large eggs
1 tsp. Banana flavoring 
1 tsp. Vanilla extract
2 cups King Arthur all-purpose flour
1 tsp. baking soda
1/2 tsp. Kosher salt
1 cup chopped pecans or walnuts

Preheat oven to 350F-degrees.  Butter a 12" x 18" sheet pan, line with parchment paper, and butter again.

In a stand mixer, using a paddle attachment, cream the butter until fluffy.  Add the sugar and beat well.  Add the eggs, one at a time, beating well after each one, scraping down the sides of the bowl as needed.  Add the mashed bananas, extract and flavoring and beat once more.  Don't be concerned that the batter looks "curdled."

Stir in the dry ingredients and then the nuts.  Pour mixture into the prepared pan and with an off-set spatula spread completely.  Set aside while you mix up the brownie layer.


Brownie Layer:
1 cup (2 sticks) unsalted butter
9.7 oz. Scharffen Berger Bittersweet chocolate, chopped

Place the butter and chocolate in the top of the double boiler and on medium/low heat, melt.  Set aside to cool.

4 large eggs
2 cups granulated sugar
1 T Vanilla extract
1/2 tsp. Espresso powder (optional, but boosts the chocolate flavor)
2/3 cup King Arthur all-purpose flour
1 tsp. baking powder
2 cups semi-sweet chocolate chips

In a bowl of a stand mixer, using the whisk attachment, beat eggs 2 to 3 minutes.  Add the sugar while the mixer is on low, gradually to the eggs.  When all the sugar has been combined, turn mixer to high and beat until the eggs/sugar are a "light, lemon color."
  
Slowly add the chocolate mixture and beat to combine.  Scrape down the sides.  Stir in the dry ingredients and then the chocolate chips.  Pour mixture over the banana bread layer and spread to cover.


Bake in the preheated oven for 10 minutes, then, lower the temperature to 325F-degrees and continue baking 22-25 minutes.  The top of the brownie layer will be shining and dry looking.  Remove from the oven and cool completely--about 1 hour.  Cut into squares and serve.

Makes 2 dozen 3" x 3" bars.
Eat plain or dust with confectioners' sugar

Dress up is a fun way to activate a child's imagination and relatively inexpensive.  I know my grands love it as much as my own daughter's did.  These Banana~Brownie Squares are a tribute to that part of childhood we hold in our memories.  Enjoy!
 

Friday, November 11, 2011

Emerald City Brownies

As many of you know, my other persona is that of a paper artist and I've written two books on creating 3-dimensional flowers, using craft punches, that can be used to adorn cards, boxes, frames, etc.  Definitely the best thing about this "job" is the wonderful, creative people in the craft world that I meet and collaborate with on projects.  One of those special people is Eileen Hull, whom I met at the 2011 Winter CHA (Craft & Hobby Association) trade show.  She is a designer and artist and is licensed by Ellison/Sizzix with her own line of die cuts.  In September, she sent me one of her newest die cuts--a suitcase and I was immediately inspired to create a project that exemplifies the last year and a half of my life after Kelly's passing and the friends who have helped me through it.
I've entitled this project "The Journey" and just like Dorothy in the Wizard of Oz, it epitomizes the friends we meet along the way in life to help us through the good, but also the bad times we may encounter.  I know, without doubt, my friends have shown me courage to look forward again,  knowledge that memories of our loved ones will sustain us, and most of all, love that has truly warmed my heart where the void of loss once was.

In addition to Eileen's unique suitcase, I used a paper collection called The Magic of Oz by Graphic 45--their perfect gingham paper for Dorothy's suitcase and the colorful character cards that surround the sides of the box adds to the story.  However, I bet, like me, your eye is drawn to the most perfect ruby slipper at the very top that acts as a vessel to hold my paper poppies.  Another dear friend I've met in this business and who happens to also live here in the Pacific Northwest is Ellen Hutson.  She has an online craft store, but is also a designer and when I showed her my drawing of what I wanted to do, she painstakingly came up with a ruby slipper done in a canvas self-adhesive paper and glitz up with an ultra fine red glitter.  I wish you could see this in person because after viewing The Wizard of Oz last Saturday evening on TBS, I can tell you this miniature version is very accurate...but then, Ellen wouldn't have done anything less!

The brownies, I've come up with to accompany this project, have a bright green center to symbolize The Emerald City, where Dorothy and her friends go to seek the help of The Wizard and happens to be the nickname of Seattle, where I live.  I've added a little bit of peppermint oil that makes you think you're eating either a Thin Mint Girl Scout cookie or an Andes Mint, then, topped it off with a bittersweet glaze to seal this scrumptious dessert that makes any rainy day bearable!

Emerald City Brownies
Cake Brownies:
3/4 cup (12T) unsalted butter, melted
1 1/2 cups granulated sugar (divided)
6 large eggs, separate the yolks and whites
6 oz. bittersweet chocolate
1 T Vanilla extract
1/2 cup + 1T Queen Guinevere cake flour
1/2 cup +1T Dutch-processed 
1 1/2 tsp. baking powder
1/2 tsp. Kosher salt
Preheat oven to 325F-degrees.  13" x 9" baking pan--line with aluminum foil, brushed with melted butter.  If you happen to have a springform 13" x 9" baking pan, like me, I brushed it with melted butter, lined the bottom with parchment paper, then, buttered again.
In a medium sauce pan, on med/low heat, melt the unsalted butter.  Remove from the heat and add the 6 oz of bittersweet chocolate. Stir until the chocolate is completely melted.  Separate the eggs--place whites in a bowl of a stand mixer and use a whisk attachment to beat.  Lightly whisk the yolks, then add to the chocolate/butter mixture.  Add 3/4 cup sugar and the vanilla extract, beat to combine.
In a medium bowl, measure the flour, cocoa, baking powder and salt.  Stir to combine.  Add the wet ingredients to the dry and stir until completely combined.

Beat the egg whites until soft peaks forms.  Gradually add the remaining 3/4 cup of sugar.  Continue to beat until stiff and glossy.
Stir in one-third of the egg whites into the chocolate mixture to "lighten" it.  Scrape the lightened chocolate mixture into the remaining egg whites and fold to completely combine.  Try not to stir and deflate the egg whites.


I know this seems strange to separate the eggs, but here's my reasoning.  I prefer fudgy brownies, but sometimes, when I want a brownie that I'm going to top with other layers, I need a good foundation that a cake brownie provides.  However, I still want a moist, light brownie, and this step gives me that!
Pour batter into the prepared pan.
Bake in preheated oven for 30 to 35 minutes...mine took 30 minutes.  Remove from the oven and allow to cool while you make the peppermint white chocolate ganache.

Peppermint White Chocolate Ganache
2 (8.82 oz) bars Valrhona Blanc, chopped
1 1/4 cups heavy cream
1/2 tsp. peppermint oil
2 drops of blue and yellow food color
3 drops of green
3 T unsalted butter, soften to room temperature

In a "make-shift" double boiler, mix the white chocolate and heavy cream.  Heat over med/low heat, whisking to combine completely.  Remove from the heat and add the peppermint oil.  Stir to combine.
Using the whisk, add the unsalted butter, one-tablespoon at a time. 


Pour the ganache over the brownies and refrigerate one hour or overnight.

Bittersweet Chocolate Glaze:
2 cups of bittersweet chocolate chips
2 T Light Karo syrup

In a double boiler, mix the chocolate chips and Karo syrup.  Once the chocolate melts completely, remove brownies from the refrigerator and pour the glaze on top.  Use an off-set spatula to spread over the ganache.  Return to the refrigerator for 30 minutes before cutting.

The brownies are scrumptious and are the perfect finish to my project.

Count your life by smiles,
not tears.
Count your age by friends,
not years.

Tomorrow is my birthday and This Journey has made me realize how blessed I am to have friends.  Love to all.  Enjoy!

Tuesday, September 13, 2011

Malted Milk~Bittersweet Brownie Bites


I love fudgy brownies, but I prefer the ends when I bake a batch.  I've tried several pans, but I think I've finally found the answer to my prayers--Williams-Sonoma Brownie Bite Pan!  This 20-well pan is perfect for that miniature bite when we need a chocolate-fix during the day.

Brownies are one of the most popular snacks made in the United States, introduced by a chef in Chicago's Palmer House Hotel in the late nineteenth century.  However, just like the Hatfields and McCoys, there has always been a feud as to what texture brownies should be--fudgy or cakey.  Either way, they make for the perfect snack in lunch boxes for your kids or when you need a lift with a cup of coffee, big glass of milk, or even a glass of wine.

I decided to add malted milk powder and chopped malted milk balls to my batter, but this basic brownie recipe could be dressed up with white chocolate chips/mint flavoring, bittersweet chips/espresso, or if you're a "nut," try chopped pecans, walnuts, or even macadamia nuts.  My Sis makes brownies and adds a white chocolate Reese's peanut butter cut in the middle and I'm thinking, since Reese's now makes a miniature peanut butter cup, that maybe my next experiment!

Malted Milk~Bittersweet Brownie Bites
1/2 cup (1 stick) unsalted butter, cut into pieces
4 oz. bittersweet chocolate, chopped or use chips
Over a double boiler, melt the butter and chocolate together.  Set aside to cool.

2 large eggs
1 cup granulated sugar
2 tsp. vanilla extract
1/4 cup Dutch processed cocoa (I used Cocoa Rouge 
1/2 cup King Arthur all-purpose flour
1/4 cup Malted Milk powder 
1/2 tsp. baking powder
1/2 tsp. Kosher salt
3/4 cup chopped Malted Milk balls

Preheat oven 350F-degrees.  Lightly spray baking pan with a non-stick spray.
In a large bowl, using a whisk, beat eggs, then, gradually add the sugar and whisk until light yellow in color.  Add the vanilla and whisk again.  Add the cooled melted chocolate/butter mixture and whisk to combine.

Switch to a spatula and add the dry ingredients, stirring to fully incorporate.  Stir in the chopped malted milk balls.

Use a 2-tablespoon scoop to distribute the batter between the 20-well pan.

Bake 20-25 minutes or until a toothpick inserted in the center comes out cleanly.  Transfer pan to a rack and cool completely.  Use a small off-set spatula to gently pop out the bites.  Makes 20!


What better way to add a surprise to your children in their lunch box or to have a snack when they come home to tell you about their day.  And, this would even be a great way to let them bake with you and maybe divide up the batter between them, they can add their own favorite additions.  Enjoy!