Thursday, May 25, 2017

Cloud Bread

So much to do and so little time before I go to the U.K. to do their craft show, Hochanda (it's like QVC or HSN).  Thanks to my good friend Jeanette who shared this recipe, I was able to "whip" up a lovely warm bread, sans flour, to have my jam on this morning.

This grain-free bread is a healthy way to start the morning with.  Just three ingredients and this recipe is not only easy, but economical.  There's apparently lots of recipes on the internet for this bread; one even adding some sugar, but this was perfect.

Cloud Bread
3 eggs, at room temperature, separated
1/8 tsp. Cream of Tartar
3 T (1.5oz) cream cheese, at room temperature

Preheat oven to 300F-degrees.  Line a baking sheet with parchment paper.

Separate the eggs.  Into the egg whites, add the cream of tartar and beat with a hand held mixer until firm.  In the yolk bowl, cream the yolks with the cream cheese until all lumps are gone.

Add about 1/3 of the egg whites to the yolk mixture and stir to lighten the batter.  Now use a rubber spatula and gently fold in the remaining whites into the yolks.
Scoop out the batter onto the parchment lined baking sheet.  Use an off-set spatula to spread the batter a bit.  It will make six rounds.
Bake in the preheated oven for 30 minutes.  Remove from oven and cool for 5 minutes.  Use a metal spatula to slide the cloud bread onto serving plates.  I chose my homemade strawberry jam, but hubby wanted an egg/cheese and veggie sausage sandwich.

It's a good way to start your day with protein.  Enjoy!

Tuesday, May 23, 2017

Berry Blitz Torte

For the past six months, I have been doing the King Arthur Flour "Bakealong."  Each month they present with a new recipe to try, with complete directions and an "800" line if you have questions.  This month the recipe was for a Berry Blitz Torte, which just looking at the photo on line, I knew I would be making this elegant-looking dessert.  After reading through the ingredients and directions, I knew it would be easy to replicate a dessert that looks like it came from the most expensive bakery!

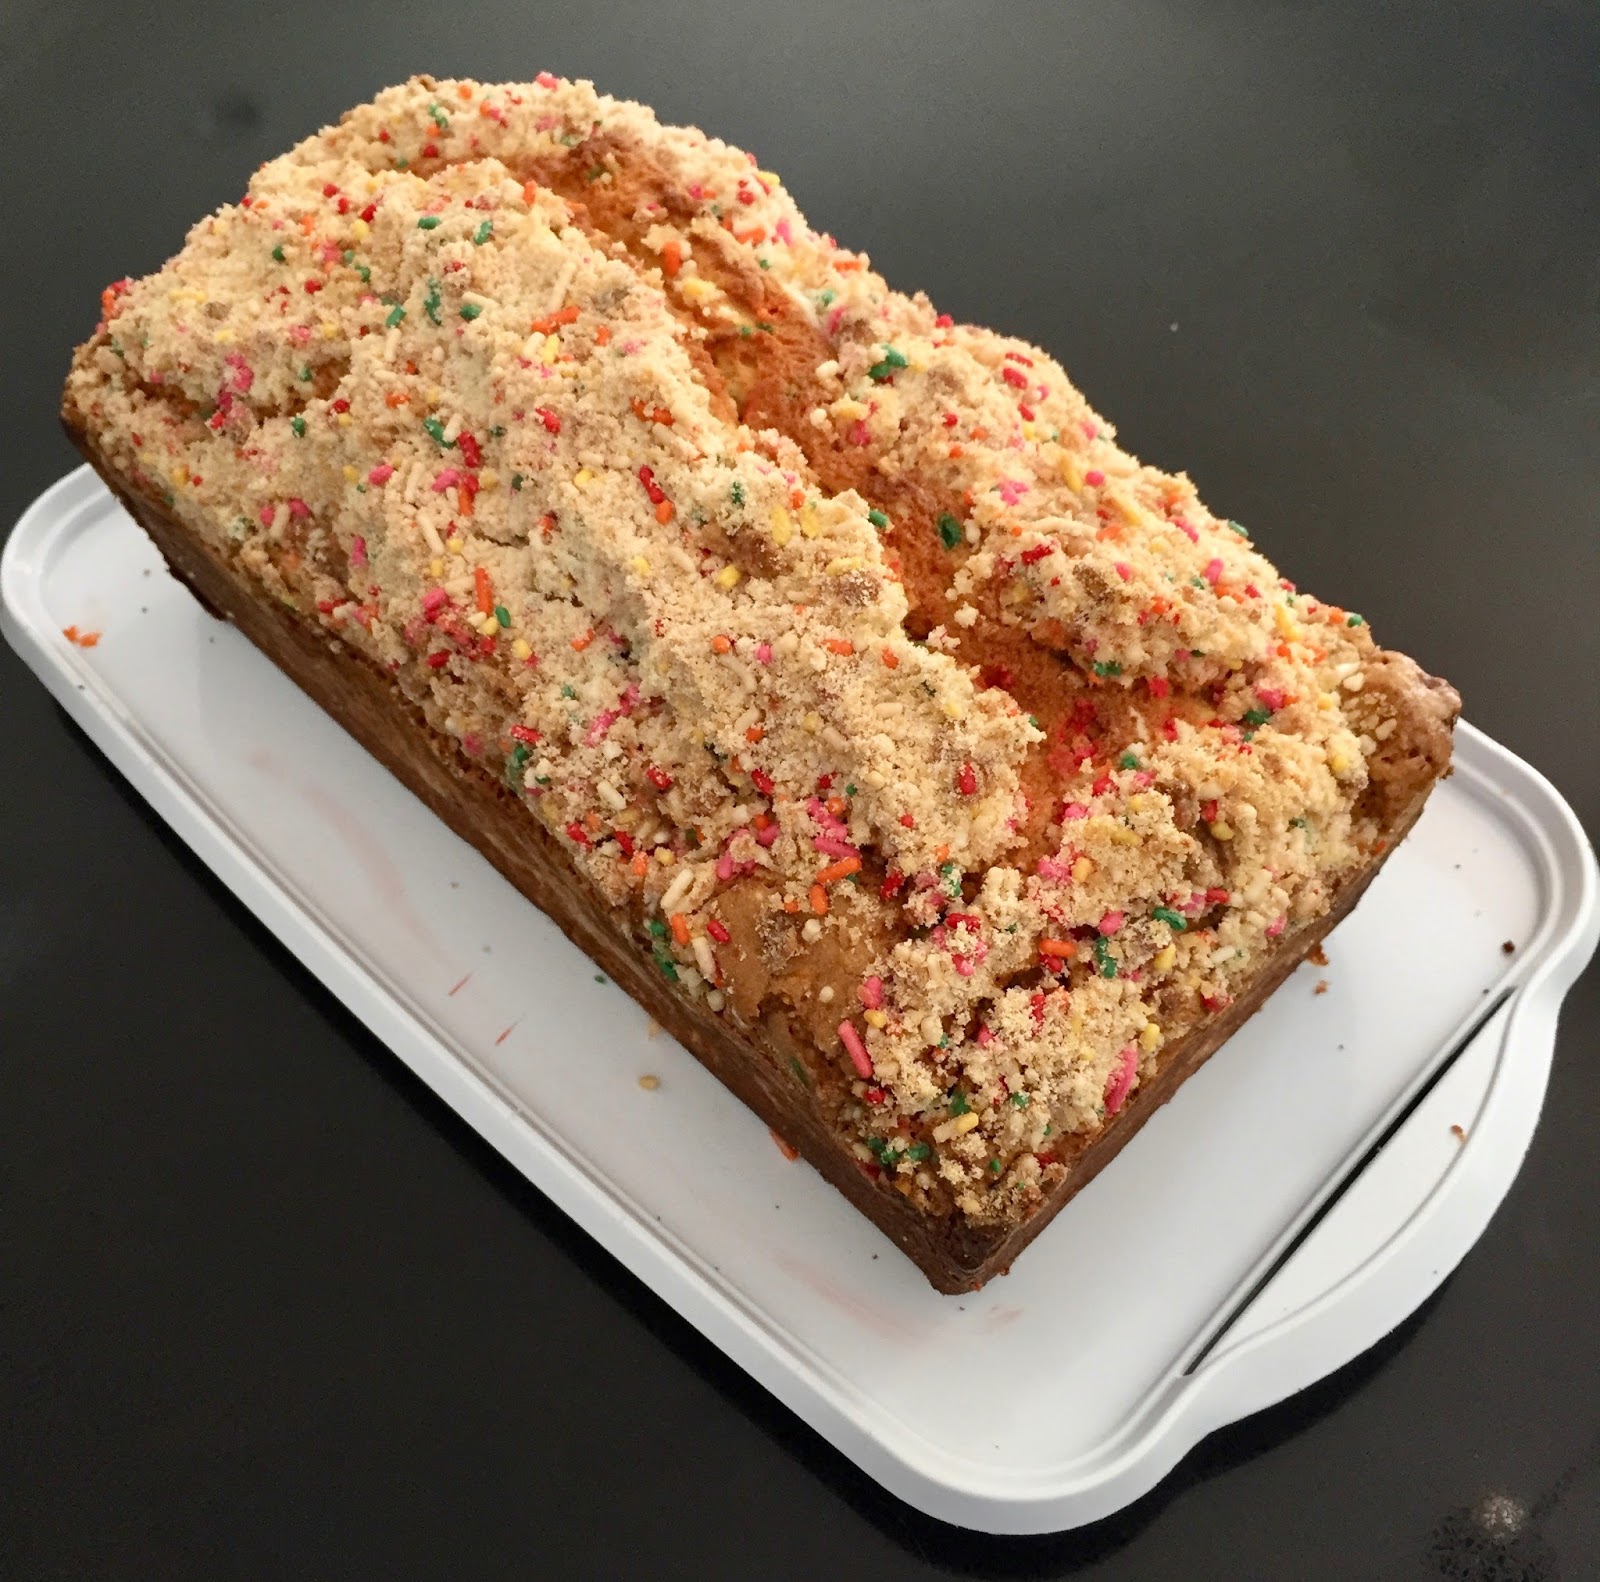
A torte is a multi-layer cake that is filled with whipped cream, buttercream, mousse, pastry cream, jam or fruit.  This cake incorporates pastry cream and berries; raspberries, strawberries, blueberries or blackberries.  Although a torte is usually baked in a springform pan, two 8-inch cakes pans created the unusual layers with this light, airy meringue/almond topping.

Berry Blitz Torte (courtesy of King Arthur Flour)

Pastry Cream*
2 1/2 cups whole milk
1/2 cup sugar
1/4 tsp. salt
1/3 cup cornstarch
3 large egg yolks
1 large egg
2 tsp. vanilla

1/2 cup heavy whipping cream, whipped

1 1/2 to 2 cups fresh berries (raspberries, sliced strawberries, blueberries or blackberries

In a medium saucepan, stir together 2 cups of the milk, the sugar and the salt.  Bring to a simmer over medium heat, stirring to dissolve the sugar.  Whisk the cornstarch, egg yolks and whole egg with the remaining 1/2 cup of milk.  Whisk some of the hot milk mixture into the egg yolks/cornstarch mixture to temper the egg yolks.  This keeps them from becoming "scrambled" eggs.  Pour the egg/cornstarch mixture back into the saucepan.  Bring to a boil over medium heat, stirring constantly with a whisk.  Cook for 2 minutes, stirring constantly; the mixture will thicken significantly.   Remove from the heat and add the vanilla extract.  Transfer the filling to a heatproof glass bowl and top with a piece of buttered plastic wrap--making sure it touches the top of the filling.
Refrigerate until cool, or up to several days.  Before adding the pastry cream to the torte, lighten it up with the whipped cream just before you are going to fill the torte.

*For a quick pastry cream:
1 small box Instant Vanilla pudding
2 tsp. vanilla extract
1 3/4 cup heavy or light cream
Whisk all the ingredients together in a medium bowl.  Place plastic wrap on top and refrigerate until ready to use.  Add the 1/2 cup of whipped heavy cream to the quick version also.


Cake
1/2 cup (1 stick) unsalted butter at room temperature
1/2 cup granulated sugar
1/4 tsp. salt
4 large egg yolks (you'll use the egg whites for the topping!)
1 tsp. vanilla extract
3 T milk
1 tsp. baking powder
1 cup King Arthur all-purpose flour (plain flour)

Preheat oven to 350F-degrees.  Spray two 8-inch cake pans with baking spray, line the bottoms with parchment paper, and spray again.  Set aside.

In a stand mixer, cream the butter completely.  While the mixer is running on low, add the sugar gradually.  Scrape down the sides of the bowl with a rubber spatula and cream until fluffy.  Add the salt.

Add the egg yolks, one at a time, incorporating them completely into the batter.  Add the vanilla extract.  Whisk the flour and baking powder together and add half, all of the milk, and then the remaining flour mixture to the batter.  Beat just until combine.  Divide this batter between the two round pans and smooth the top.

Topping
4 large egg whites
3/4 cup Baker's Special Sugar or granulated sugar
1/2 cup sliced almonds
1 T granulated sugar + 1tsp. cinnamon

Using an electric mixer or stand mixer with a whisk attachment, beat the egg whites until foamy.  Gradually add the 3/4 cup of sugar and continue to beat until the meringue is smooth, glossy, and somewhat stiff (but not stiff enough to form rigid stand-up points).
Spread the meringue on the cake batter.  Sprinkle with almonds over the meringue, then sprinkle with the sugar/cinnamon mixture.

Bake in the preheated oven for 30 minutes, until almonds are lightly browned.  The cakes will puff up significantly; don't worry, they'll settle as they cool.  Remove cakes from the oven and cool for 15 minutes.  Carefully and thoroughly loosen the edge of each cake and gently turn it onto a rack lined with wax paper or parchment paper.  Then flip it over with the meringue right side up onto another and one onto a serving tray.

If some of the almonds fall off, just sprinkle them back on top.  When the cake is cooled, fill the bottom layer with the pastry cream/whipped cream mixture.  Add the fresh berries.  top with the second cake layer, meringue-side up.

Serve immediately or refrigerate until serving.
This cake was heavenly!  I think I could literally have eaten the whole thing! Enjoy!

On a sad note...my heart goes out to the people in Manchester, mostly young adults who were enjoying a concert when their lives were taken by terrorists.  I leave for London on Saturday and it is frightening that this is the world we live in now.  
May God comfort the families and hold the victims in his loving arms.


Friday, May 19, 2017

Chocolate~Chocolate Almond Biscotti

Nothing is better than a biscuit and a cup of tea to de-stress...and if it's chocolate, even better!  I love making biscotti (twice-baked) cookie that is easy to make and so good for when at the end of the day you just need to put your feet up and relax.

This chocolate~chocolate version came to mind when I was thinking about my mom the other day; she loved chocolate, but she also loved coffee.  In fact, she and my dad would brew a 40-cup urn of coffee daily and drink it, with every meal and in between!  I think my dad got her hooked while he was in the Navy, he drank coffee to stay alert and it just rubbed off:-D

It's a fact that coffee enhances the chocolate flavor, but I've NEVER drank coffee nor do I have a desire to, however, it doesn't stop me from adding a bit of espresso powder when I'm making something with chocolate.  Years ago a movie called "Beverly Hills Cop" with Eddie Murphy came out, and the character Serge asks Axel, "would you like a little lemon twist in your espresso?" Apparently, the "twist" of lemon takes the bitterness from the strong espresso.  So, you will notice in my recipe, I've added the zest of one lemon to do just that.

Chocolate~Chocolate Almond Biscotti

3/4 cup (1 1/2 sticks) unsalted butter, at room temperature
1 1/2 cups granulated sugar
4 large eggs
Zest of 1 medium lemon
1/2 cup Dutch-processed cocoa
2 tsp. Espresso powder
2 1/2 tsp. baking powder
1/4 tsp. salt
3 cups + 2 T King Arthur all-purpose flour
1 cup sliced almonds, lightly toasted
1 cup bittersweet chocolate bits

Preheat oven to 325F-degrees.  Line a large baking sheet with parchment paper and set aside.

In a stand mixer, using the paddle attachment, cream the butter thoroughly.  While mixer is on low, slowly add the granulated sugar.  Beat 2-3 minutes until fluffy.  Scrape down the sides of the bowl with a rubber spatula.

Start mixer on medium and add eggs, one at a time until combined.  Continue until all eggs are mixed and again, scrape down the sides of the bowl.   Add the dry ingredients and mix on low just until combined (don't over beat!)  Stir in the almonds and chocolate bits.

On a separate sheet of parchment paper, sprinkle additional granulated sugar on the surface.  Scoop out half the dough and form a log, rolling it in the sugar to coat the sides.  Place it on the prepared baking sheet and repeat with second half of the dough.  Space them 3-inches apart.


Bake in the preheat oven for 30 minutes or until the tops are set and firm.  Remove from the oven and cool 15 minutes.
Place the baked log on a cutting board and using a serrated knife, make diagonal 1/2" slices.  Lower the oven temperature to 300F-degrees and bake the slices (twice-baked!) again for 12 minutes.

Repeat with all the slices.  Allow the cookies to cool before storing them.  The best thing about Biscotti is that they have a long "shelf" life, they pack well to send to family and friends, and they are good dunkers! Enjoy!

Wednesday, May 10, 2017

Healthy Vanilla~Almond Granola with Dried Fruit

Last November, after years of pain and finally having to give up playing tennis, my hubby had a Total Hip Replacement.  Now, he's like a new man; a bionic man that is!  He has started playing tennis again and on a health kick to get back to his "old" self (excuse the pun!)

On top of his new found wellness, he also retired the end of April, so now I have an at-home-hubby who needs things to do.  Well, there is tennis and I had him clean out the garage, but when I said I was going to Publix to grocery shop, he said, "I want to go."  Oh ladies, I'm not use to this, but gave in and let him tag along.  As we went down the cereal aisle, he said he wanted to get some granola to eat for breakfast and eat healthy.  However, after showing him the packaging info, I said, "I'll make you some!"  So I did!

Vanilla~Almond Granola with Dried Fruit
1/2 cup vegetable oil
1/3 cup Maple syrup
1/2 cup firmly packed light brown sugar
1/4 tsp.  Kosher salt
4 tsp. Vanilla extract

5 cups Old Fashioned Oats
2 cups sliced almonds

Preheat oven to 325F-degrees.
In a large bowl, whisk the "wet" ingredients (the first 5) together.  Add the oats and almonds and stir until everything is evenly coated.  Spread the mixture into a rimmed baking sheet and place in the preheated oven.  Bake for 40 to 45 minutes, until golden brown, stirring every 10-15 minutes to ensure even browning.
In the same large bowl, add 2 cups of dried fruit (I used 1 cup of raisins and 1 cup dried blueberries, but you can use your favorite.)
When the granola comes out of the oven, spoon it over the dried fruit and mix together.  Return the granola to the baking sheet to cool completely before storing in an air tight container.  This granola is not only great for morning cereal, but try it on yogurt or ice cream.  Enjoy!

Saturday, May 6, 2017

Rainbow Sprinkle Bread with Birthday Cake Crumb Topping

Sprinkles or "jimmies" which we know today, but nonpareils, the beginning of these forms, have been around since the 18th century.  Kids love sprinkles.  I know because it's the topping of choice when my grands are here visiting.  My own love for sprinkles did start with my obsession to nonpareils that my mom would buy at the candy store.  I love letting the chocolate melt in my mouth and still have a confection to crunch!

A few weeks ago I made my own sprinkles, but this time the recipe from bake FROM SCRATCH magazine called for using Betty Crocker's Rainbow Sprinkles because they don't bleed when stirred into batter.  Since I love sprinkles, it was a must try and I have to say it did not disappoint.

Rainbow Sprinkles Bread with Birthday Cake Crumb Topping

1 cup (2 sticks) (227g) unsalted butter, softened to room temperature
1 1/2 cups (300g) granulated sugar
4 large eggs + 1 egg yolk
1 T (13g) Vanilla extract
2 cups (250g) all-purpose flour
1/2 tsp. (1.5g) Kosher salt
1/3 cup (60g) Rainbow Sprinkles

Birthday Cake Crumb Topping:

1/4 cup (31g) all-purpose flour
1/4 cup (50g) granulated sugar
1/4 tsp. Kosher salt
2 T (28g) cold, unsalted butter, cubed
1/3 cup (60g) Rainbow Sprinkles
1/2 tsp. (2g) Vanilla extract

Stir the flour, sugar and salt together.  Use a pastry blender to cut in the cubed butter.  Add the sprinkles and vanilla extract and stir to combine.


Preheat oven to 325F-degrees (170C-degrees).  Spray a 9" x 5" loaf pan with baking spray with flour. Line with parchment paper, letting excess extend over the sides of the pan.  Spray again.

In a bowl of a stand mixer, using the paddle attachment, cream the butter and sugar together on medium speed until fluffy, about 3 to 4 minutes.  Scrape down the sides of the bowl with a rubber spatula.  With the mixer running, add the eggs, one at a time, beating well after each addition.  Beat in the vanilla.


On low speed, gradually add the flour/salt to this mixture, beating just until combined.  Stir in the rainbow sprinkles.  Pour batter into the prepared loaf pan.  Sprinkle the crumb topping over the surface.  Bake until golden brown and a wooden toothpick inserted in the center comes out cleanly--1hour/10 minutes (mine actually took 1 hour/25 minutes), but start it on the shorter time and check yours.  Let cool in the loaf pan for 10 minutes before removing.
The excess parchment paper helps to lift the bread and transfer to a serving plate.  Store in an airtight container for 3 days...if it lasts that long! Enjoy!

I posted a card this past week, on my paper blog, in memory of our daughter Kelly.  It will be 7 years ago she passed away from invasive breast cancer.


The stamps I used, with my hydrangea die, are by Ellen Hutson, LLC.  If you're interested in this set, they're available with half the cost going to Breast Cancer Research; a project dear to my heart to find a cure.
Too many women, in fact, 1 in 12 will be diagnosed with this disease in their lifetime.  We need to keep fighting, especially if women maybe losing their health care if Trumpcare passes!

Monday, May 1, 2017

No-Knead Dinner Rolls & May's Give-Away Apron

I know, from experience, that making yeast bread (rolls) can be daunting and challenging.  So, when I come across a recipe that's easy to make with successful results, I thinks it's my duty to pass it on.  These dinner rolls are no-knead and except for a lengthy rise of 1 1/2 hours, are easy and fool-proof.  Perfect accompaniment with dinner and my friends that know me, know that I've been on a mission for years to show how easy baking can be and eliminating preservatives from our daily lives since our daughter passed away from breast cancer. Here's a link to read on the dangers of preservatives and additives: http://www.healthguidance.org/entry/9987/1/Dangers-of-Food-Additives-and-Preservatives.html

No-Knead Dinner Rolls

4 1/2 cups (600g) Bread Flour
1 T dry yeast
1/2 cup (125g) warm water
1 1/2 tsp. Kosher salt
1/4 cup (50g) granulated sugar
2 large eggs
3 1/2 T (50g) unsalted butter, melted
1 cup (250g) milk

Additional unsalted butter, melted, for baking dish and brushing the tops of the rolls.

First, in a 1 cup glass measuring cup, whisk the yeast into the warm water, adding about 1 tsp of granulated sugar (from the 1/4 cup called for in the recipe.)   Allow to rest 5 to 7 minutes until it becomes foamy.

In a large bowl (I used my large stainless steel bowl) mix together the flour, salt and remaining sugar together.
In a 2-cup glass measuring cup, melt the butter, then add 1 cup of milk and the two large eggs. Whisk together and add to the dry ingredients.


I stirred the dough with a rubber spatula, but you could also use a wooden spoon.  Don't worry, it will look shaggy--remember, no-kneading!
Cover the bowl with a cotton towel you've dampened with very warm water, then set the bowl in a warm place to rise for 1 1/2 hours.  My screen-in porch on an 85-degree day was perfect!
When the dough has doubled, turn out onto a floured board.  This is where you can lightly knead it into a semi-smooth log.
Divide the dough into quarters, then each quarter into thirds for 12 rolls.
Shape the rolls into a round ball, pinching the bottom of the roll to come together.


Place the shaped rolls into a 9" x 13" baking dish which has been brushed with melted butter. Brush the tops of the rolls with melted butter and cover with plastic wrap.  Allow to rise another 30 to 40 minutes.  Preheat oven to 375F-degrees (190c).


Place risen rolls into the preheated oven and bake 16 to 18 minutes, until golden brown.


Easy, right?  Serve these and your family will be very happy...enjoy!

Now, hold on to your hats...I actually have May's Apron sewn!  The pattern caught my eye at my local quilt store~Wish Upon A Quilt and the pattern is "Save the Bees."  As a gardener, I not only love flowers, but I too am concern with the bee population being diminished by pesticides and pollution.  This is our planet and we need to leave it in good shape for future generations.
When you comment on a post, you will be eligible to win this month's apron.  Good Luck!