Wednesday, November 23, 2016

Grandma Pizza

Not actually my Grandma, but rather created in the 1970s by Umberto Corteo at Umberto's Pizzeria on Long Island in honor of his mother's version, but it's become our family's favorite for a delicious alternative to the usual pizza.  The number one thing I like about this pizza is that it goes together so quickly and with just a tossed salad, dinner is complete.

I know tonight, homes all over the country will be ordering pizza, but I didn't feel like being around crowds or in traffic.  If you're the same way, try this recipe...I know you'll love it.

Grandma Pizza
Dough:
3 T olive oil
3/4 cup warm water
1 1/2 cups bread flour
2 1/4 tsp. instand or rapid rise yeast
1 tsp. sugar
3/4 tsp salt

For the dough, coat a rimmed baking sheet with 2 T olive oil and set aside.  Combine water and remaining 1 T olive oil in a 1 cup measuring cup.  Using a stand mixer with a dough hook, mix flour, yeast, sugar and salt and mix on low until combined.  With the mixer running, add the water mixture and mix until dough comes together, about 1 minute.  Increase speed to medium low and mix until dough is smooth and comes away from the sides of the bowl, about 10 minutes.

Transfer dough to the oiled baking sheet and turn to coat.  Use your hands to stretch the dough to a 10" x 6" rectangle.

Cover with plastic wrap and allow to rise in a warm place until doubled in size, about 1 to 1 1/2 hours.  Once it's risen, it will be very easy to stretch the dough to the full length and width of the baking sheet.

Once stretched, allow to rise once more, about 45 minutes.

For the Topping:
1 28 oz. can diced tomatoes
1 T olive oil
2 cloves of garlic, minced
1 tsp. dried oregano
1/4 tsp. salt
8 ounces of mozzarella, shredded, about 2 cups
1/4 cup grated Parmesan cheese
2 tsp. chopped fresh basil (in season) or 1 tsp. dried

Drain the tomatoes in a colander.  In a bowl, add the tomatoes and the remaining ingredients, except for the fresh Basil (if using dried, you can add now).
Preheat oven to 500F-degrees.  Sprinkle shredded mozzarella and grated Parmesan cheese over the dough, leaving about 1/2-inch margin around.  Top with the tomato mixture and bake until well-browned and bubbling, about 15 minutes. Slide pizza to a wood board and cool 5 minutes.  Serve with a tossed salad or use this as an accompany to your favorite pasta dish.  Enjoy!

Tomorrow is Thanksgiving and once more, I take an account of all my blessings.  I think this will always be one of my favorite holidays because I was in the kitchen with my mom.  Happy Thanksgiving, y'all!

Sunday, November 20, 2016

Almond Pastry Pillows

I love working with cream cheese dough; I make Rugelach, Pecan Tassies, and now these little Pillows!  The dough comes out flaky and the surprise inside is a nice treat with a cup of tea (or coffee) on these cold days.  We've gone from 76F-degrees to only in the 50s today--I know that's not freezing compared to the snow that Minnesota or Michigan got yesterday, but it is chilly here:-)

I'm in the early stages of planning my cookie boxes for Christmas.  I loved baking cookies with my Mom, who made dozens of cookies to set out for her Christmas Eve buffet, but also to give to friends.  You can freeze a lot of doughs and even some cookies and get a head start--I do.

Almond Pastry Pillows
Dough:
1 cup unsalted butter, softened
1 8-oz. pkg. Cream Cheese, cut up and softened
2 cups King Arthur all-purpose flour
1/4 tsp. salt

In a stand mixer, using the paddle attachment, cream the butter and cream cheese together thoroughly until well combined.  Scrape down the sides of the bowl, as needed, with a rubber spatula.  Add the flour and salt and mix on low just until combined.  Divide the dough in half and wrap in plastic wrap. Refrigerate for 1 hour or until easy to handle.

Filling:
1 7-oz pkg. Almond Paste
1/4 cup granulated sugar
1 large egg white
Break up the Almond Paste into a bowl and add the sugar.  Beat with a hand mixer until combined, then add the egg white and beat until smooth.
Preheat oven to 375F-degrees (360F-degrees Convection) and line two baking sheets with parchment paper.
Take out one of the doughs.  Lightly flour your surface with flour and roll the dough to a 8" x 14" rectangle.
Use a 2-inch square cookie cutter to cut the dough.  Place them on the parchment-lined baking sheet.
Brush with 1 large egg + 1T water.  Add about 1/2 tsp. of filling in the center and place another square on top.  Lightly press the edges with the tines of a fork.


Brush the tops, lightly with more of the egg wash and sprinkle a few sliced almonds and Sparkling Sugar on top.  Bake in the preheated oven 15 to 20 minutes until golden brown.  Remove from the oven and allow to cool completely before packaging them. Makes about 30 cookies. Enjoy!

Tuesday, November 15, 2016

Hokkaido~Japanese Sandwich Bread

Also known as Japanese Milk Bread, has a soft buttery texture like Brioche, but with a crunchy crust. If you love a really good sandwich bread...this is the one is for you.  There are several recipes for this bread, but I've chosen to use a Tangzhong, which is similar to a roux and added to the dough.  The key though, for a beautiful rise, is doing three (3) rises instead of two (2).  The bread comes up over the pan and you have the most beautiful dome.

HOKKAIDO (Japanese Sandwich Bread)
*Makes 1 loaf of bread--I actually tripled this recipe to make three loaves of bread.
Tangzhong:
3 T whole milk
3 T water
2 T King Arthur all-purpose flour

In a small sauce pan, over low heat, measure the wet ingredients and add to the pan.  Whisk in the flour and continue to whisk and cook over low heat until it thickens, about 3-5 minutes.  Allow to cool completely.

Dough:
3 1/2 cups King Arthur Bread Flour (*it's important to use bread flour and not all-purpose because of the higher content of protein)
1 1/2 tsp. Kosher Salt
1 cup warm milk
1 large egg
4 T unsalted butter, at room temperature
Tangzhong

Proof:
1 T Sugar
1 1/2 tsp. yeast
1/4 cup warm water (no more than 110F-degrees)

In a stand mixer, using a dough hook, measure the flour and salt and mix to combine.  Add the proofed yeast mixture, Tangzhong, egg and milk and start on low speed until the flour is incorporated.  If the dough seems too touch, add a bit more water, one tablespoon at a time.  Finally, while the mixer is running, add the softened butter, 1 tablespoon at a time.

Turn dough out onto a lightly floured bread board and knead until smooth.  Place in a buttered bowl and cover with plastic wrap for Rise #1.


Place covered bowl in a warm area--I have a warming drawer, but when I've made bread in someone else's kitchen, we placed it by the heater!  The first rise will take 45 minutes to 1 hour.

Punch down the dough and turn it over.  Wrap with plastic wrap and about to rise once again, about 30-40 minutes--Rise #2.

When the dough has doubled once more, turn it out onto a lightly floured surface and roll into a 9" x 9" square.  Start rolling the dough from the side closer to you, sealing the roll by pressing your fingertips on it to the dough.  This helps with eliminating air pockets.  When you rolled it completely, pinch the seam closed and tuck under the ends to fit a 9" x 5" loaf pan.
Cover with plastic wrap and allow to rise for the last time (Rise #3).  The dough should come up over the pan about 2 inches before baking.  This rise will take about 30-40 minutes.

Preheat oven to 425F-degrees.  Place loaf (loaves) into the oven, spray the surface of the bread and the oven with water.  Set the timer for 15 minutes, then lower the oven temperature to 375F-degrees and bake another 25 minutes.
The crust is brown and if you check the internal temperature with a thermometer, it should read 190F-degrees.  Allow to cool a few minutes, then turn out onto a bread board to cool completely before slicing.
Kitchen smelled wonderful and hubby was drooling waiting for dinner.  This is a recipe worth trying and your family will certainly thank you.  Enjoy!


Saturday, November 12, 2016

Creme Brûlée Cheesecake & November's Give-Away Apron

This past week, I got to meet in person one of my blogging buddies--Ellen Haertle from "Baking with Booze" who came to stay with us for a few days.  We've talked on the phone, so it was as if we'd known each other all our lives...do you have those kind of friends too?

I wanted to create a special dessert in her honor, so I came up with this cheesecake--Creme Brûlée.  It takes two of my favorite desserts and combines it into one.  Creme Brûlée is a rich custard topped with a hard caramel.  The earliest known date of this dessert is actually 1691 in a French cookbook, "Cuisine royal et bourgeois" and was called "burnt cream."  It disappeared from cookbooks until the 1980s.  This cheesecake is rich with egg yolks and a burnt sugar topping.

Creme Brûlée Cheesecake
Crust:
2 cups firmly packed Digestive cookies, vanilla wafer, or shortbread crumbs
1/3 cup granulated sugar
6 T unsalted butter, melted
1 large egg white

Preheat oven to 300F-degrees.  In a small bowl, stir together the crumbs, sugar, melted butter and egg white.

Press crumb mixture into the bottom and up the sides of a 9 1/2-inch springform pan.  Bake for 8 minutes.

Filling:
4 (8-ounce) packages cream cheese, softened
1 1/4 cups granulated sugar
2 vanilla beans, scraped or 1 T vanilla extract

6 large egg yolks
2 T King Arthur all-purpose flour
1 cup sour cream

For the filling, place the cream cheese in the bowl of a stand mixer and use either the whisk or paddle attachment to cream.  Slowly add the sugar and vanilla beans and beat at medium speed until creamy.  Scrape down the sides of bowl with a rubber spatula.  With the mixer running, add the yolks, one at a time.  Add the flour, beating just until combined.  Stir in the sour cream.  Spoon bater into prepared crust.

Bake for 1 hour and 15 minutes.  Turn oven off and leave cheesecake in oven with door closed for 4 hours.  Remove cheesecake from oven and run a knife around edges of the cheesecake to release the sides.  Let cool completely, then cover and refrigerator for 8 hours.

To serve--sprinkle 1/4 cup of granulated or Turbinado sugar on top of cheesecake.  Using a handheld kitchen torch, carefully caramelize sugar until melted.  Remove sides of pan.  Garnish with raspberries, if desired.  Enjoy!

This month's apron represents the colors of Autumn and is warm and inviting.  When you comment on a post this month, your name will be entered to possibly win this beautiful apron.  Good Luck!


Wednesday, November 2, 2016

Cranberry Nut Bread~Pumpkin Nut Bread Swirl & October's Apron Winner

...or as I like to call it, "My Split Personality Bread!"  November brings back memories of preparing for the holiday season and one of my favorite times is Thanksgiving.  I believe it's a holiday that we have passed by too quickly over the years because of the influence of the retailers to focus on Christmas.

I have so many memories of Thanksgiving with my mother that I hold dear; baking pies the day before, getting up at 5 a.m. to make the stuffing and start the turkey, making the yeast rolls, and preparing the side dishes...which were my favorites.  It was a Family holiday that has so many blessing attached to it and with my Dad, grandfathers, great grandfather, uncles, brothers and nephews having served in the military, always made us feel lucky we lived in such a Great Country!

Cranberries have shown up in the grocery store--this is the first sign for me that Thanksgiving is nearing!  My mom always made cranberry bread that we could have in the morning for a light breakfast in order to save room for the afternoon feast.  However, my family also likes pumpkin and besides pie, I love to make pumpkin bread for breakfast.  It occurred to me that why not entwine these flavors and make a symbolic bread...like the pilgrims and Native Americans coming together in peace to share a meal.  It certainly will surprise your family and guests.

Cranberry Nut Bread~Pumpkin Nut Bread Swirl

Cranberry Nut Bread:
1 cup granulated sugar
1 egg
4 T shortening
Orange zest, from one naval orange
1 1/2 cups Fresh or frozen cranberries, wash & coarsely chopped
1 tsp. vanilla extract
2 cups King Arthur all-purpose flour
1 1/2 tsp. baking powder
1/2 tsp. baking soda
1 tsp. salt
3/4 cup orange juice
1/2 cup pecans, chopped

Preheat oven to 350F-degrees.  In a stand mixer, using the paddle attachment, cream the sugar, shortening and orange zest together.  Scrape down the sides of the bowl with a rubber spatula and add the egg and vanilla.  Beat to combine on medium speed.  Scrape down the sides once more.

Chop the cranberries.  I use a Moulinex chopper I found at Sur La Table.

Add the dry ingredients and orange juice to the bowl and mix on low just until the flour is incorporated.  Remove the bowl and with the rubber spatula, add the chopped cranberries and pecans.  Stir to incorporate.  Set aside while you make the pumpkin bread.


Pumpkin Nut Bread
1 1/3 cups granulated sugar
2/3 cup vegetable oil
1 cup canned pumpkin (not pumpkin pie filling)
1/3 cup water
2 large eggs
1 tsp. vanilla extract
2 tsp. pumpkin pie spice
1/2 tsp. ground cardamon
1 3/4 cup King Arthur all-purpose flour
1/4 tsp. baking powder
1 tsp. baking soda
3/4 tsp. salt
1/2 cup pecans or walnuts, chopped

In a large bowl, whisk together the oil, sugar, water, and pumpkin.  Add the eggs, one at a time and whisk to incorporate.  Add the vanilla and pumpkin pie spice and cardamon.  Mix well.

Switch to a rubber spatula and add the dry ingredients and nuts.  Stir to combine.


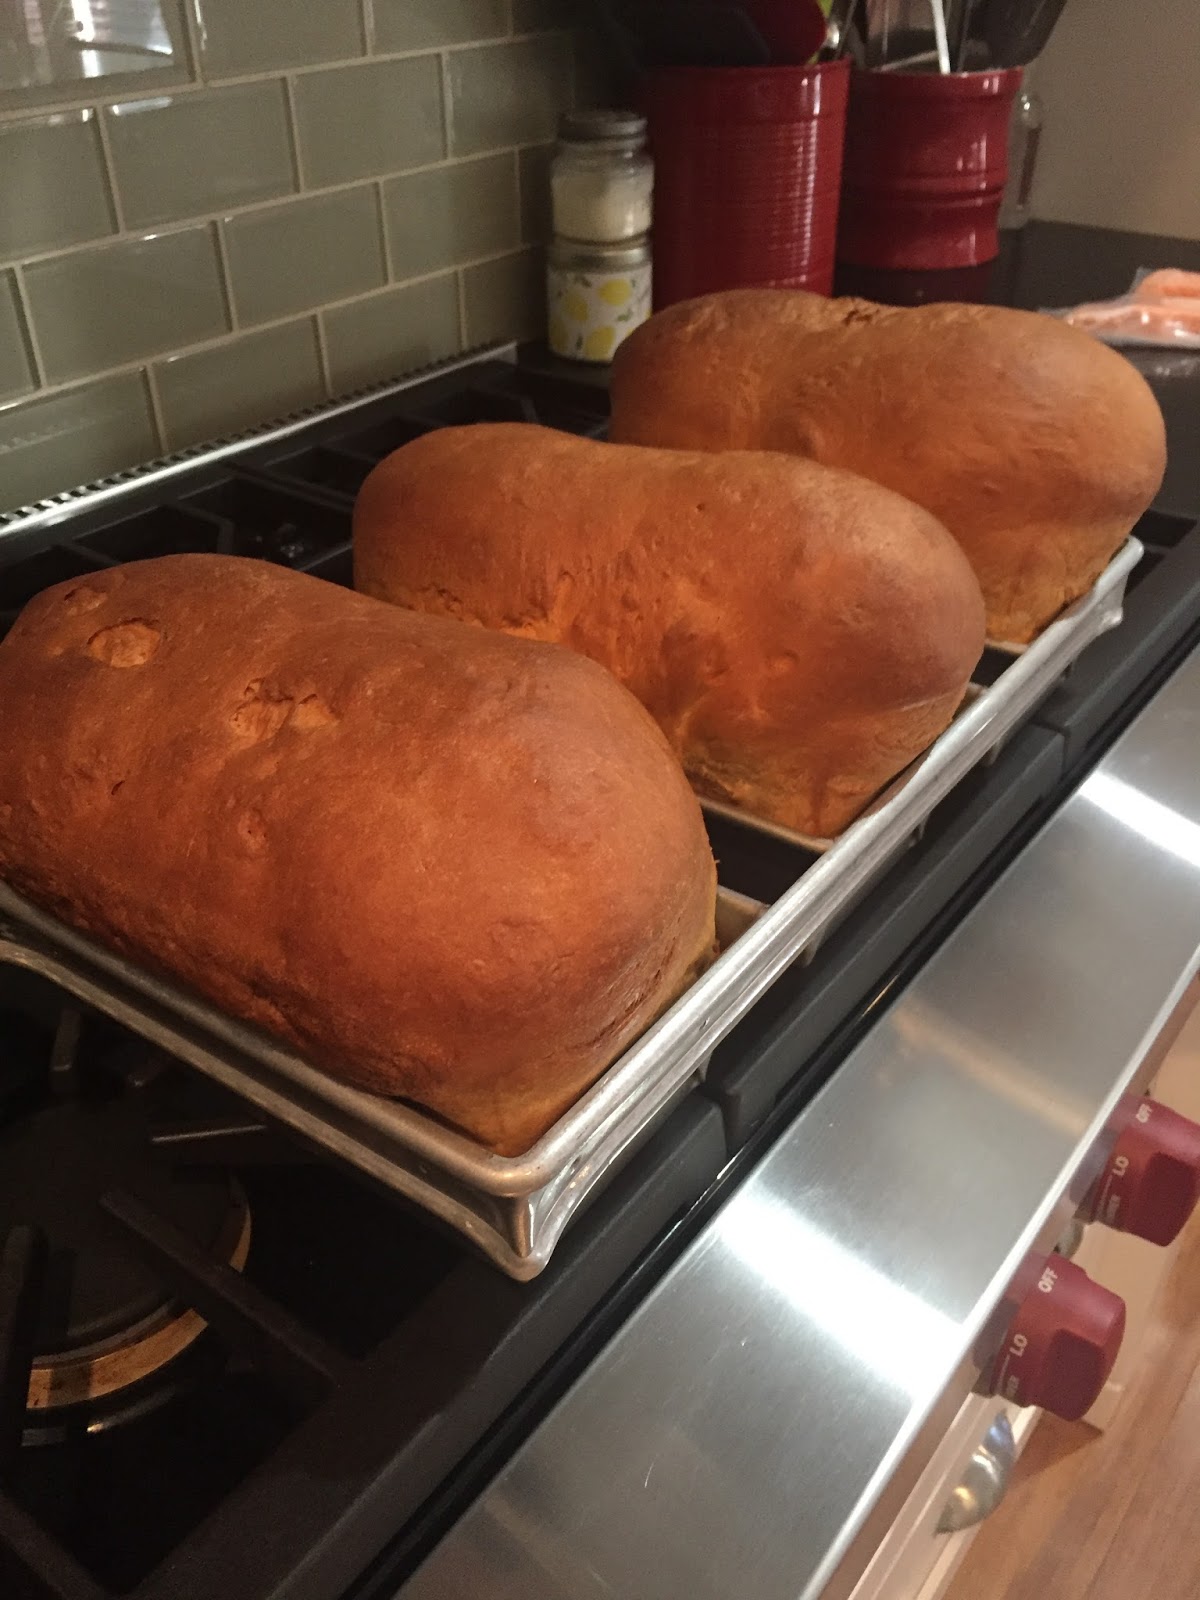
I used a 1/4-cup scoop to divide the bread among the pans, which were sprayed with a baking spray.  I used my decorative pans (the one in the front is from one my sister for my birthday last year.)

Alternating scooping the batter into the prepared pans.

When all the batter has been distributed, I used a kitchen knife to swirl the batters together.
Bake in the preheated oven for 50 to 60 minutes.  Test with a wooden skewer in the center when done.  Remove from the oven and cool about 10 minutes in the pan before turning it out on a parchment lined rack.
I dusted the tops with confectioners' sugar to show off the design.  One of the breads we ate and one I gave to a friend.
...isn't that what Thanksgiving is about.  Enjoy!

The October Apron Give-Away goes to minibea12.  Nicole, please send me your address and I will send this apron off to you.  Happy Baking!

I will have November's Apron up tomorrow with more ideas for Thanksgiving:-D