Monday, February 28, 2011

Double Delight Bars

When I came up with this recipe, I decided to combine two of the most beloved desserts that mothers bake for their kids--brownies and chocolate chip cookies.  I thought, "why can't we have them together!"  Both of these recipes have long been in the United States; in fact, both were created here.

Chocolate Chips cookies, or as we've come to refer to them as Toll House Cookies, were a creation of Ruth Wakefield in Massachusetts in the early twentieth century.  However, brownies date back to the 19th century when a chef at the Palmer House Hotel developed a recipe at the request of Bertha Palmer for the 1893 Colombian Exposition, held in Chicago.  From there, recipes for brownies started to show up in such cookbooks as Home Cookery in 1904, The Boston Cooking School Cook Book (by Fannie Merritt Farmer) in 1906, and Lowney's Cook Book in 1907.

I like a fudgy brownie, although my mother usually baked a more cake-like brownie.  Either way, it's chocolate and the requirement that Bertha Palmer asked of the chef is stilled fulfilled--"smaller than a piece of cake and easily packed in boxed lunches."

Double Delight Bars
Chocolate Chip Cookie Base:
1 cup (2 sticks) unsalted butter, at room temperature
3/4 cup granulated sugar
3/4 cup light brown sugar, packed
1 large egg
1 tsp. vanilla extract
2 cups all-purpose flour
1/2 tsp. salt
3/4 cup Mini Chocolate Chips


Preheat oven to 350F-degrees.  Spray a 9" x 13" pan with baking spray.  Set aside.
In the KitchenAid, using the paddle attachment, beat the butter and sugars together until combined.  Add the vanilla extract and the egg and mix together well.  Add the flour and salt and beat until combined.  Stir in the chocolate chips.  
Place the dough into the prepared pan.


  Use your finger to pat the dough to cover the bottom of the pan completely.
Bake in the preheated oven for 12 to 14 minutes--until lightly golden brown.
Set aside to cool a bit while you mix up the brownie layer.


Brownie:
4 large eggs
1 cup (2 sticks) unsalted butter
2 1/2 cups bittersweet chips (or use semi-sweet)
1 cup granulated sugar
1 tsp. vanilla extract
1/2 cup all-purpose flour
1 tsp. baking powder
1/4 tsp. salt

In the KitchenAid, using the paddle attachment, beat the eggs well.  In the top of a double boiler, melt butter and chocolate chips together.  Cool a few minutes.  Add the sugar to the eggs and mix thoroughly.  Add the melted chocolate/butter mixture and beat again.  Stir in the flour, baking powder, and salt.  Pour mixture over the chocolate chip base.
Bake an additional 25 minutes--top should be shiny.
 Allow the bars to cool for approximately 1 hour before cutting.
You get 24-2" squares

Wouldn't this be a wonderful surprise for the children after school?  I know I always looked forward to special treats my mother had baked when I walked down the path towards our home from school.  They're the perfect size for some one-on-one time with Mom.  Enjoy!
Yum!


Saturday, February 26, 2011

Last Day with Maddie...

Tomorrow I fly home to Seattle and my husband says it's lightly snowing : ( !  Today, here in New Jersey, we spent the afternoon at the mall and then went out for Mexican food.   Maddie was a little fashion trend-setter with her bunny ears and sun glasses readying herself for Spring.
At the restaurant, we squeezed together for our last photo--(Erin) Mommy, Mimi, and Maddie.  Maddie loved the  mariachi band and did a few la la la's watching the guitar players.  As we left our seats and headed for the door, Maddie (or as we call her, the Greeter) said, "Goodbye everyone, good night music, I have to go see my ladybug."

On a lighter note...we did find yellow sprinkles at Williams-Sonoma for Maddie and Mommy to bake cookies another day.  Next week, I'm planning some interesting treats--stay tuned!

Thursday, February 24, 2011

Helen's Lemon Meringue Pie


There's nothing difficult about making a lemon meringue pie, but there is a whole lot of learning that comes from baking one.  I decided to share with Maddie her Great Grandma Helen's (my Mom) recipe and get her started on a love for baking like it did for me.  Now, understandably the techniques were over her head, but the point of sharing a long time tradition is what I wanted her to have today.

I remember watching my mother bake this pie and couldn't wait until she started turning over "duties" to me.  First it was making the pie crust and learning to blind bake.  Blind baking a pie crust is not difficult, but if you're going to make any cream pies, getting it right is a must.
 Adding a piece of heavy duty aluminum foil for the first 8 minutes was crucial in making sure the crust didn't "bubble" up.  You can also use pie weights or the economical, dried beans.
You should have a nicely browned crust ready for your filling once it cools.

When I was tall enough, I got to make the filling...that luscious, tart lemony pudding that the pillows of meringue set upon.  Stirring the sugar, cornstarch and water and watching how the mixture thickened readying for the next step of tempering the eggs.  This step is a little tricky, but getting it right is important or you'll end up with scrambled eggs!
Remove the hot mixture from the burner and start adding it to beaten egg yolks, whisking it into the eggs quickly.  You end up adding about 1/2 cup (or a little more) to the eggs to bring them to the same temperature before adding it back into the sugar mixture.  Heat on the stove top for an addition 2 minutes, then, add the butter and lemon zest.  Finally, gently stir in the freshly squeezed lemon juice, which Maddie helped squeeze for me.
The last step is making the meringue.  Getting this part right, to me is crucial because I wanted to please my mother with making a meringue that didn't "weep."  Weeping happens when you don't take the time to beat the sugar long enough into the meringue.  I learned to count up to 60 (1 minute) between the tablespoons of sugar I would add just to make sure.

Today, I let Maddie help roll out the pie dough and beat the meringue.  She's not tall enough to be at the stove yet to make the filling, but one day, she will and I'll be there to guide her, just like Mom did with me.  However, Maddie got two things right today...
...licking the spatula that stirred the lemon filling and the beaters that whipped the meringue!

Helen's Lemon Meringue Pie
Perfect Pie Dough
Heat oven to 450F-degrees.  Roll the pie dough and place in a 9-inch pie plate; flute the edges.  Take a fork and prick the surface and around the sides.  Add a piece of aluminum foil to the center as a weight (or you can use put a piece of parchment over the surface and fill with dried beans or pie weights.) Place pie plate on a baking sheet. Bake 8 minutes, then remove the foil and bake another 5 to 6 minutes until golden brown.
 
Lemon Filling:

1 1/2 cup granulated sugar
1/3 cup cornstarch
1 1/2 cups water
Zest of 1 lemon (about 2 T)
2 T unsalted butter
1/3 cup freshly squeezed lemon juice
4 large egg yolks (save the whites for the meringue)
2-3 T pie filling enhancer (optional, but helps the filling set)

In a medium saucepan, whisk the sugar, flour and cornstarch together.  Slowly add the water, stirring constantly place over medium heat.  When mixture thickens and starts to bubble, remove from the heat and add about a tablespoon at a time to the lightly beaten egg yolks.  Whisk the hot mixture into the eggs, adding a tablespoon at a time until the eggs have adapted to the hot mixture.  Pour mixture into the saucepan and return to the heat for another two minutes.  Remove from the heat and immediately add the butter and zest.  Stir the mixture until the butter melts.  Slowly add the lemon juice to the mixture.  Pour mixture into the cool pie crust and start the meringue.

Meringue:

4 large egg whites at room temperature
1/4 tsp. cream of tartar
1 tsp. vanilla
6 T granulated sugar

My mother chose to make a 4-egg white meringue--she didn't like to skimp!  In a large metal or glass bowl, place the 4 egg whites and the cream of tartar.  Beat to soft peaks.  Add the sugar, one tablespoon at a time, beating well (and I mean well) after each addition.  If I was at home, I would have used Baker's Sugar, a super fine sugar, but Erin had granulated sugar, which in reality is what my mother used.  Lastly, add the vanilla.

Preheat the oven to 400F-degrees, making sure the oven rack is on the second notch from the bottom. Mound the meringue over top, making sure you cover the filling completely.  Take your spatula and add some peaks to the meringue.  Place the pie plate on the baking sheet again. Place the pie in the oven for 8-10 minutes.  Remove from the oven and let cool to room temperature before serving.  Placing the pie in the refrigerator 2 to 4 hours before serving will set the filling.

Maddie told her Mommy (on the phone when she called from work) that she made a pie with Mimi, but quickly added, "I not sharing!"  She did share and the memories came back. Enjoy!

Tuesday, February 22, 2011

Banana Cream Pie Shortbread...kind of

Maddie and I decided to make cookies today.  She had told me a few days ago that she wanted yellow ones, but we were unsuccessful in finding yellow sprinkles, but she eyed the rainbow ones and said, "these ones, Mimi."

Now, rainbow sprinkles don't really go with the recipe, but who am I to tell a toddler no...especially this cutie.  That's why, they may have the flavor of banana cream pie, but definitely not the look.  This isn't the first time I've let the influence of a toddler take over, and like my mother, I love to bake for others, no matter what their taste is.  I knew I wanted to make a "refrigerator" cookie because Maddie and I could make them up in the morning and bake them off in the afternoon, after her nap.  In fact, even if you can't bake them for a few days, this dough will last and even freeze for later use.

I might add that here in the Northeast, they had another 4 inches of snow yesterday, so Maddie was probably thinking rainbow (sprinkles) would be a happy thing with this weather!

Banana Cream Pie Shortbread
1 cup (2 sticks) unsalted butter, softened
3/4 granulated sugar
1 ripe banana, smashed
2 tsp. vanilla
1 large egg
2 3/4 cups all-purpose flour
1/2 tsp. salt
In the KitchenAid, using the paddle attachment, beat the butter and sugar.  Add the mashed banana and the egg.
 Beat well.  The batter may look a little "curdled" but don't worry that will disappear once the flour is added.  Add the flour and the salt and mix to combine.  I scraped the dough together and divided the batter.  I laid down some wax paper and gave the sprinkles to Maddie to pour out onto it...she definitely like pouring out the sprinkles :D
 I rolled the dough into a log and let Maddie roll it back and forth in the sprinkles.  We rolled up the wax paper, tucked under the ends, and refrigerated them for several hours.
Preheat oven to 350F-degrees and line baking sheets with parchment or use a Silpat.  Remove dough from the refrigerator and slice into 1/4-inch cookies, using a serrated knife. Bake cookies 8-10 minutes until golden brown on the edges.  Let cool completely.   Make up the creamy frosting while the cookies are cooling.

Cream Frosting: 
1/2 cup (1 stick) unsalted butter, softened 
3 cups confectioners' sugar
2 tsp. vanilla
2-3 T heavy cream

Cream butter in the KitchenAid, using the paddle attachment.  Add the sugar and vanilla and beat well.  Add the heavy cream, one tablespoon at a time, beating well after each addition until creamy.  Frost the one side of the cookie and add a top cookie.  
  The subtle taste of the banana could have been boosted with banana flavoring, which I have at home, but not here.  And, when I make these again, I probably will eliminate the rainbow sprinkles and roll the cookies in crushed Nilla wafers.  However, these tasted great and well, Maddie was pleased to tell her Mommy and Daddy..."she made them!"  Enjoy!
 

Saturday, February 19, 2011

Mint Stracciatella Pound Cake

Today I decided to bake a pound cake capturing the flavor of one of my favorite cold confections--gelato.  Stracciatella is an Italian term with gelato describing the process of slowly pouring melted chcolate into the ice cream maker while it's spinning, creating striations of chocolate through it.  These ribbons of bittersweet chocolate enhance the subtle mint flavor of the pound cake, much like they do in the gelato I make.

My Mom made great pound cakes, especially in the summer when sweet strawberries were in season.  What I learned from her was that a pound cake was the perfect basic cake and allows your imagination to change it into whatever the occasion presents.

I guess I was imagining strolling through Faneuil Hall Marketplace, in the summer heat, savoring a gelato from one of the vendors.  We lived in Massachusetts in the early 90s and along with our daughters, we loved to go into Boston for the day on the train.  Memories inspire me; memories and a good lesson from my mother.

Mint Stracciatella Pound Cake
1 1/2 cups (3 Sticks) unsalted butter, softened
1-8oz. pkg. cream cheese
3 cups granulated sugar
6 large eggs
1/4 tsp. peppermint oil
1 vanilla bean, split and scraped (or 2 tsp. vanilla extract)
3 1/2 cups + 2 T all-purpose flour
1 1/2 tsp. baking powder
1/3 cup whole or 2% milk
5 oz. bittersweet chocolate


Preheat oven to 350F-degree.  Melt the bittersweet chocolate in a heat-proof bowl in the microwave (30 seconds at a time for 1 minute).  Pour the melted chocolate onto a parchment lined baking sheet and use a spatula to spread.
Place the chocolate into the freezer for 10-15 minutes. Meanwhile start the pound cake batter.  In the KitchenAid, using the paddle attachment, cream the butter, cream cheese and sugar until fluffy.  Add the eggs, one at a time until fully incorporated.  Beat in the peppermint oil and vanilla.  Add the dry ingredients and the milk and beat until fully mixed.  


Remove chocolate from the freeze and lifting the parchment, break into pieces.
Add these broken "shards" of chocolate to the batter and then spoon into a 12-cup bundt pan that has been sprayed with a baking spray.


 Bake pound cake for 55 minutes, then, lower temperature to 325F-degrees for another 15-20 minutes (until top is firm to the touch).  Let cool for 15 minutes before inverting cake onto a serving plate.

The stria's of bittersweet chocolate make this pound cake very classy.  Serve it with just a sprinkle of confectioners' sugar or maybe a scoop of gelato.  Enjoy!

Thursday, February 17, 2011

Chocolate Explosion Cookies


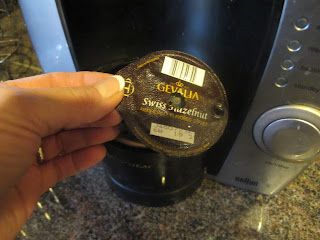
I have one of those minds that is always in "create" mode; whether it's figuring out a new flower in paper, designing a quilt, or coming up with a new recipe, whatever...it's hard to shut it down sometimes.  This morning, as I was cleaning counter tops in the kitchen, I picked up the canister with the Tassimo coffee discs in it and thought I'd organize them again.  After sorting out the different ones, I noticed I had just one of the Swiss Hazelnut and as they say, "Light bulb!!"  I decided to throw together some other  ingredients and see what developed :-D

Of course, since I just bought a new cocoa, I collected that from the pantry, as well as the bittersweet chocolate chips, a half of a bag of white chocolate chips, and a box of dried cranberries.  The cranberries just seemed to go with hazelnut because they're both grown in Oregon.  See the picture.  I have this file cabinet of items in my head and I've learned...just go with it.

I know it seems obscure that I just happen to have all these ingredients on hand, but that's my other fault.  Although, I've never had anyone complain when they wanted a certain dish made!  Kelly would tell me, "Mom, I'm coming to your house if there's a disaster, because you have an unending supply of ingredients!"  It does make it easier, but I've also been the 1-800-Ask Mom with our daughters when they call and say, "I have ...(list 3-4 ingredients) what can I make with them?"

Today, these cookies turned out great and I'm happy to share the recipe.  However, if you don't have Swiss Hazelnut, try regular or even espresso (if you like an intense coffee flavor), switch out the chips to mint, milk chocolate, or even peanut butter, and the dried fruit could be dates, raisins, or dried cherries.  Turn on your inner imagination and have a go at it.

Chocolate Explosion Cookies
1 cup (2 sticks) unsalted butter, softened
1 cup light brown sugar, packed
3/4 cup granulated sugar
2 large eggs
1/2 cup cocoa rouge (or a good quality cocoa)
2 tsp. vanilla
2 1/3 cups all-purpose flour
1 tsp. baking powder
1/2 tsp. baking soda
3/4 cup dried cranberries
1 cup bittersweet chocolate chips
1 cup white chocolate chips
1/4 cup hot Swiss Hazelnut coffee-Tassimo (or your favorite coffee/espresso)


Preheat oven to 350F-degrees.  Line a baking sheet with parchment or use a silpat.
In the KitchenAid, using the paddle attachment, cream the butter and sugars.  Add the eggs, one at a time, beating well after each addition.  Next, add the vanilla and cocoa and mix well.  Add the dry ingredients, in two batches, alternating them with the hot coffee.  Finally, add the chips and cranberries and fold in.


Scoop the dough, using a 1/4-cup measuring scoop onto the prepare sheet.  Bake 12 minutes, turning the pan half way through for even baking.
Remove to a rack and cool completely.  Recipe makes 2 1/2 dozen 3-inch cookies.  Store in an airtight container.

Once the baking is done, I turned to my knitting to finish up a project.  One thing I've certainly learned this past year...time waits for no one.  Enjoy!
 

Wednesday, February 16, 2011

Hope SPRINGS Eternal Cupcakes

Today, my post turns towards honoring a very dear friend who sent me an incredible gift at Christmas of these darling Beatrix Potter characters that she hand-knitted to share with our grandchildren. I have read Peter Cottontail to Ari, via Skype, and he thoroughly enjoyed it, although I can't wait until I'm reading to him and Maddie in person so they can see these characters up close and feel the love they were made with.  What is so amazing about Suzanne's work is that she did not have a pattern--letting her hands control the needles to create the characters!

I'm also inspired by the signs and sounds of Spring happening here in the Pacific Northwest.  I took a walk around my yard yesterday, noticing the budding of the daffodils, peonies sprouting, and the heather in bloom, but moreover, the sounds like the geese honking on the lake and chirping birds gathering materials for their nests.
Hal Borland, who wrote "outside editorials" for the Sunday New York Post, said, "No Winter Lasts Forever, No Spring Misses It's Turn."  I have this framed in my studio and keep it in mind when the rain, snow, or cold, gray days seem endless.  Spring is one of my most favorite seasons with it's promise of renewal and I decided I'd bake a cupcake to pay tribute to this season and my dear friend, Suzanne, who honors Beatrix Potter with her needlework.

My mother didn't much care for cooked carrots, but loved carrot cake.  Our daughter, Erin follows in her footsteps, often requesting carrot cake for her birthday and special occasions.  I added a few more flavors, incorporating orange zest, crushed pineapple, and coconut in the batter, then, topped them off with a White Chocolate/Cream Cheese Buttercream icing.  A little toasted coconut and a couple of Cadbury Mini Eggs give these cupcakes the look and taste of spring.

Extraordinary Carrot Cupcakes 
with White Chocolate/Cream Cheese Buttercream

1/2 cup (1 stick) unsalted butter
1/2 cup vegetable oil
1 1/2 cups granulated sugar
3 large eggs
2 T honey or agave syrup
1 cup finely grated carrots (about 3 medium)
1-8oz can crushed pineapple in juice, drained
1 cup sweetened coconut
2 cups all-purpose flour
1 1/2 tsp. baking powder
1/2 tsp. baking soda
1 tsp. ground cinnamon
1/2 tsp. freshly grated nutmeg
1/2 tsp. ground cardamon
1/2 tsp. salt
1 T orange zest
1/4 cup hot water


Preheat oven to 350F-degrees.  Line muffin pan with cupcake papers.


In the KitchenAid, using the paddle attachment.  Cream the butter and sugar until fluffy.  Gradually add the oil while the mixer is running.  Add the eggs, one at a time, incorporating completely after each addition.  Add the orange zest.
Finely grate the carrots, either using the food processor or a box grater.  Since you only bake cupcakes 18 to 20 minutes, grating the carrots finely will ensure you won't have any "crunchy" pieces of carrot in the finished cupcake. Alternatively, you could also par-boil them a bit, if you don't have a fine grater, to softened them.
Add the carrots, drained pineapple, and coconut and mix to combine.  Sift the dry ingredients, including the spices, then, add to the batter with the hot water.  Mix on low speed just until combined.  
Scoop batter into the papers, filling about 3/4 full.  Bake in preheated oven 18-20 minutes.  Check cupcakes after 18 minutes.


 Let cool for about 10 minutes in the pans (makes 18 cupcakes) then, remove to a rack to cool completely.

White Chocolate/Cream Cheese Buttercream
1/2 cup (1 stick) unsalted butter, softened
1 -8 oz. pkg. cream cheese
4 oz. white chocolate, melted
6 cups confectioners' sugar
2 tsp. vanilla extract

Melt the white chocolate in the top of a double boiler.  Set aside while you beat the butter and cream cheese together until fluffy.  Add the white chocolate and mix to combine.  Add the confectioners' sugar, one cup at a time, and beat thoroughly.  Finally add the vanilla extract and beat until fluffy.

Pineapple/Mango/Strawberry Jam (PMS) or your favorite

To assemble:
Remove a "plug" of cake, using an apple corer and fill with the jam. (I used a #7 tip and piping bag).
 Fill a large pastry bag, with a #808 tip, and pipe the buttercream on top in a swirl, starting from the center and moving outward and up.

Sprinkle tops with toasted coconut.
Finally, add 2 to 3 mini eggs on top of the "nest" for that Spring-time look!

Warmer temperatures seem to be prevailing throughout the United States today and surely, Spring can't be far away...if you believe the groundhog :D!  Take time to look and listen to this beautiful season and be HAPPY!  Enjoy!