Thursday, January 20, 2011

Homemade Gnocchi

Gnocchi are wonderful "little pillows" of pasta served as a main dish with marinara sauce or as a side dish with a browned butter/sage sauce.  Since I was on the browned butter kick today, I made it as a side dish.  The rich, nutty flavor of browned butter, that enhanced the brownies, made these gnocchi melt-in-your-mouth delicious.  All that was needed was a sprinkling of fresh Parmesan cheese.
The word gnocchi may have derived its name from the Italian word "nocchio" meaning knot in wood or "nocca" meaning knuckle.   I actually think they more resemble a knuckle rather than a knot in wood.
Typically, gnocchi is made with semolina, wheat flour or potato, which was introduced to Europe in the 16th century.  I have always made my version with potato; must be the Irish in me!  These are true Italian comfort food and so satisfying.  If you've shied away from making gnocchi because you thought it was too hard, I know you won't anymore when you see how easy they really are.

Homemade Gnocchi
3 large baking potatoes
1 large egg
2 T heavy cream
1 1/2 tsp. salt
1/4 tsp. freshly grated nutmeg
1 1/2 cups all-purpose flour


Preheat oven 425F-degrees.  Wash and scrub the baking potatoes.  Use a fork to pierce the skin in several places. I use a baking stone, but you can also wrap the potatoes in aluminum foil.  On the baking stone, it took 1 hour 15 minutes.  Pierce the skin with a tip of a paring knife to check for doneness.   Remove from oven and let rest.
Use a paring knife to remove the skin.  Cut potato in half and place it in a ricer (alternatively you can use a masher).  Rice all the potatoes into a large bowl.
Add the egg, heavy cream, salt and nutmeg.  Stir to combine.  Add the flour--it's easier to use your hands to knead the dough, adding a tablespoon of flour at a time, if needed to get to a smooth ball.
I divided the dough into quarters, then eighths for ease of rolling it into a rope.
Use a dough blade or knife to cut the rope into approximately 1-inch pieces.  To achieve the "ridged" look of gnocchi, you can use a fork to roll the 1-inch piece off or if you're lucky enough to find a gnocchi maker, roll your dough off that.


Either technique provides the necessary ridges to hold on to the sauce!  Place the gnocchi on a lightly floured (with all-purpose flour or semolina) pan until you've completely finished making all of them.
Meanwhile, bring a 6 quart sauce pan with two-thirds full of water to a boil, adding 1 tablespoon of Kosher salt to the water.  Drop about 15 gnocchi into the boiling water at a time.
As the gnocchi cooks it will rise to the surface when they're done.  Use a slotted spoon to remove them.
The gnocchi can go into your favorite marinara sauce or into the Browned Butter/Sage sauce at this point.


Browned Butter/Sage Sauce:
1/2 cup (1 stick) unsalted butter, cut into 1-inch pieces
1/2 tsp. dried sage

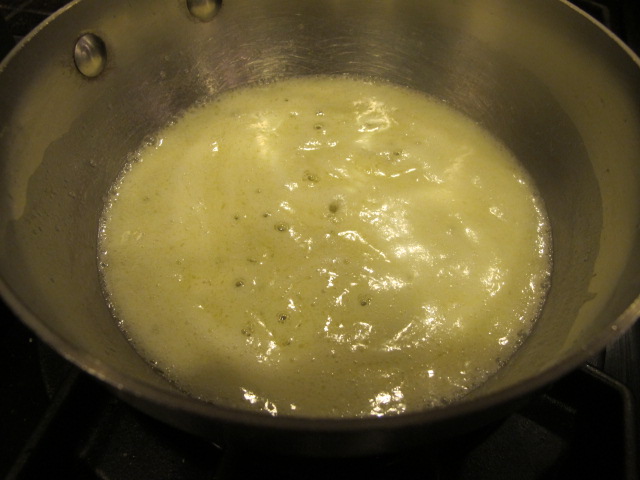
In a sauce pan, heat the butter over medium heat, stirring occasionally.  When the butter stops foaming and browned bits appear, add the dried sage.  Stir to combine.
Add the freshly grated Parmesan cheese on top and put into a 350F-degree oven for 15 minutes to toast the cheese.  
Homemade gnocchi will surely impress your family and friends, not to mention it's a wonderful addition to any meal as a main entree or side dish.  Enjoy!

Valentine Brownies


February 14th is just around the corner.  How do I know this?  Well, cards and candy have been in the stores since after Christmas and once again, we seem to be steered towards holidays early by the retail sector.  I'm not complaining because Valentine's Day is one of those special days I looked forward to because my grandparents made us our special heart-shaped iced sugar cookies and it didn't get much better than that!

This year I thought I'd add chocolate to my treats.  My mother was a chocoholic and I've proudly inherited those genes.  However, some of her combinations (i.e., Cheese doodles and chocolate) I have not : )  but I can certainly see why something salty and chocolaty was an obsession for her.   Erin is my big chocoholic; edging Kelly out slightly, but nonetheless, they both loved to make and eat brownies.  We're "nutty" brownie lovers, but certainly you can leave them out and we seem to love the fudgier brownies instead of cake-like.

This recipe, from Bon Appetit's current February issue, inspired me this morning.  Under the "Cocoa Power" section are these brownies--Cocoa Brownies with Browned Butter and Walnuts.  I love melting butter to a "browned" consistency for recipes; it adds a rich, nutty flavor.   I first used browned butter in sugar cookies I made for Christmas one year and I love to make a browned butter sage sauce to go with my homemade gnocchi.  The flavor is so enhanced by this extra process and it's what attracted me to try this recipe.

Cocoa Brownies with Browned Butter and Walnuts

10 T (1 1/4 sticks) unsalted butter, but into 1-inch cubes
1 1/2 cups granulated sugar
3/4 cups natural unsweetened cocoa powder, (spooned into the cup to measure, then leveled)
2 tsp. water
1 tsp. vanilla
2 large eggs, chilled
1/3 cup plus 1T unbleached all-purpose flour
1 cup walnut pieces
I toasted the walnuts, slightly, for 5 minutes and then, just broke them with my hands.


Position rack in the bottom third of oven: Preheat oven 325F-degrees.  Line a 8x8x2-inch metal baking pan with foil, pressing foil firmly against pan sides and leaving 2-inch overhang.  Coat foil with nonstick spray.  *Since I have a a springform square pan, I did not use the foil.  Also, I brushed my pan with melted butter, which I'd rather use than spray.

Melt butter in a medium saucepan over medium heat.  Continue cooking until butter stops foaming and browned bits form at the bottom of the pan, stirring often--about 5 minutes.


Remove from heat; immediately add sugar, cocoa, water, vanilla, and a generous 1/4 tsp. salt.  Stir to blend.  Let cool 5 minutes (mixture will still be hot).

Add eggs, one at a time, beating vigorously to blend after each addition.  When the mixture looks thick and shiny, add flour and stir until blended.  

Beat again, vigorously 60 strokes.  Stir in nuts.  Transfer to prepared pan.


Bake brownies until toothpick inserted into center comes out almost clean (with a few moist crumbs attached).  About 25 minutes.  (I checked them after 20 minutes) Cool in a pan on a rack.  Divide into 16 brownies.   

Do Ahead Can be made 2 days ahead.  Store airtight at room temperature.

These brownies are actually getting packed up and sent to Erin, Maddie and Michael.  They've had a rough week with weather and colds and I thought brownies would be the perfect pick-me-up!  There are more cocoa recipes to try in this issue, but this is a good start.  And, I thought I'd give you a new technique to try and maybe you'll add browned butter to one of your favorite recipes to change up the flavor.  Enjoy!

Sunday, January 16, 2011

Jumbo Buttermilk Blueberry Pancake...Muffins


As Gru would say from "Despicable Me"...LIGHT BULB!  The idea for this recipe came about from Ari's love of blueberry pancakes, but with the ease of eating a muffin, which is what Maddie (and Ari) really love. 
Maddie eating Mimi's Pumpkin Muffins that her Mommy made yesterday!

Less messy (toddler-wise) with the maple syrup incorporated into and on top of the muffin.  The texture is light, like a pancake and the maple flavor, combined with the blueberries makes this muffin hard to resist.  I also had a jar of Pure Maple Cream by Stonewall Kitchen to slather on the muffin, but you could make your own by mixing soften butter with maple syrup. 

I used Jumbo Silicone Muffin Cups (a Christmas gift from a dear friend) but I also baked them in regular muffin papers to test the baking time.

The inspiration of the maple syrup, also a gift, reminded me of our trip to Vermont before moving to Seattle.  Watching how the trees are tapped, sap collected, and the extensive process of making syrup, gave us a real appreciation for this wonderful product. 
Buttermilk Blueberry Pancake Muffins
 4 cups King Arthur All-purpose Flour
1/2 cup Queen Guinevere Cake Flour
3/4 cup granulated sugar
2 1/4 tsp. (1 pkg.) Instant Yeast
2 1/2 tsp. baking powder
1 tsp. baking soda
1/3 cup Pure Maple Syrup
1 cup (2 sticks) unsalted butter, melted
1 1/2 cups buttermilk
3 large eggs
1 cup fresh or frozen blueberries
1/2 cup dried blueberries
1/2 cup Maple Fav-R bites
1 tsp. vanilla extract


Addition Maple Syrup for drizzling


Preheat oven 400F-degrees.  Line muffin pan with papers or use Silcone muffin cups.
In a large bowl, add all the dry ingredients and whisk to incorporate.  In a large glass measuring cup, measure the buttermilk, then, add the eggs.  Use a fork to whisk together.  To that mixture, add the Pure Maple Syrup and vanilla.  Make a well in the dry ingredients and add the liquid ingredients (including the melted butter), all at once.
Stir to combine.  Fold in the blueberries (frozen and dried) and the Maple Flav-R bites (if using).  Scoop into the muffin cups.  If you're using the Silicone Muffin Cups, make sure you place them on a baking sheet--never directly on the rack of the oven!
Drizzle an addition tablespoon of Pure Maple Syrup on top of the batter.  Bake for 5 minutes, then, lower oven temperature to 350F-degrees and continue to bake another 20 minutes or until golden brown.

Let muffins cool about 5-10 minutes before removing from the cups.  The regular sized muffins baked an additional 15-20 minutes after lowering the temperature, as well.


Remembering pancake breakfasts that my mother would fix on the weekend came back with the first bite.
And I know Ari and Maddie will just love these the next time Mimi comes to visit.  Enjoy!

Friday, January 14, 2011

Breakfast Cookies!

What would your kids say if you told them they could have a cookie for breakfast?  I know when I was a kid, that would have been my choice : )  I'm not a typical breakfast person--a doughnut, a scone, or even a "Pop Tart" is my first choice to have in the morning.  That's why when I got an email from King Arthur Flour with this recipe, my interest was peaked and I thought, "what a great idea!"

These "cookies" are packed with protein and fiber, so as a mother, I would have gladly have made them for my girls.  Also, when paired with fruit and yogurt and you now have a well rounded meal to start the day...with a smile.  What's really fun about these cookies is that you can customize them with your (and your children's) taste.  Furthermore, you can make them gluten-free by substituting  the mere 1 1/4 cups of flour with a combination of a specialty flour blend (rice flour, tapioca starch, potato starch, brown rice flour, for example).

Breakfast Cookies
1/2 cup (1 stick) unsalted butter, softened
1 1/4 cups light brown sugar, packed
1 cup peanut butter
2 tsp. vanilla
2 large eggs
1/3 cup milk
1 1/4 cups King Arthur All-purpose flour
1/3 cup Hi Maize Natural Fiber 
1/3 cup dried milk, whole or non-fat
1 tsp. cinnamon
1 tsp. salt
4 1/2 cups of Add Ins (dried fruit, old-fashioned oatmeal, granola, nuts, coconut, chocolate bits, etc.)

First, I want to give the changes I made in the "Basic" ingredients.  I also added:
2 T molasses
1/2 tsp. cardamon
3/4 cup bittersweet chocolate chips
Raspberry Jammy Bits
2 T Malted powder

1 vanilla bean, split and scraped
I also used chunky peanut butter and toasted 3/4 cup of walnuts (as one of my add-ins)
I also lowered the oven temperature to 325F-degrees (the original recipe calls for 350F-degrees) because I used a one-third scoop to measure my cookie dough.
In the KitchenAid, using the paddle attachment, cream the butter, peanut butter, and brown sugar.  Add in the molasses and vanilla extract (and bean, if using) and blend well.  Add eggs, one at a time, beating well between.  Add the milk and blend.  Sift the flour, Hi Maize Natural Fiber, dried milk, salt and spices.  Add to the dough and combine well.
The dough will resemble more a "cake" batter, but remember you're adding in 4 1/2 cups of additional ingredients, so don't be concerned.
Scoop out the dough onto parchment-lined sheets.
I pressed down slightly on the cookie dough.  Bake 15-18 minutes.  My cookies were done at 16 minutes.  Let cool on the pan for 5 minutes before transferring them to a rack to cool completely.


Breakfast is definitely one of the important meals of the day and these healthy cookies will give you and your children a great start to the day, especially these wintry days.  Maddie and Ari, bundled up, would have loved these before going out into the cold.

I know my mother would have approved; this is a person who loved chocolate and cheese curls! Enjoy!
 

Thursday, January 13, 2011

Ginger Spice & Everything Nice Cookies

When I returned home (sadly) on Monday from my week with my grandson, Ari, I had The Baking Sheet from King Arthur Flour awaiting me.  The first thing that caught my eye was these Ginger Spice Cookies and I thought I would share them...because you just can't have enough ginger cookie recipes : )

Kelly's favorite (and mine) are the Giant Gingerbread Cookies I made in May, but these are a very close second in flavor and comfort for those snowy, cold days hitting much of the United States.  Even I came home to snow Monday evening, but nothing like New England faced with two feet or more, and ours has melted with temperatures in the 50s.  However, this is a great recipe to add to your cookie file and would be even better made with your kids.

Ginger Spice Cookies
3/4 cup (1 1/2 sticks) unsalted butter, at room temperature
1 cup light brown sugar, packed
1 large egg
1/4 cup molasses
1/2 cup crystallized ginger 
 2 1/4 cups King Arthur All-Purpose Flour
1 1/2 tsp. baking soda
1/2 tsp. salt
1 tsp. ground cinnamon
2 tsp. ground ginger
1/2 tsp. ground cloves
1/4 tsp. ground allspice
1/2 tsp. ground cardamon (I added this, it wasn't in the original)
1/2 cup Sparkling Sugar Crystals 

Preheat oven to 375F-degrees.  Line baking sheet with parchment paper or use a Silpat.
In the KitchenAid, using the paddle attachment, cream together the butter and brown sugar until light and fluffy.  Add the egg and molasses, blending well.  Add the dry ingredients; scrape the sides and bottom of the bowl, then mix in the crystallized ginger.  Chill dough for 10 -15 minutes or even overnight.

Scoop the dough into 1-inch balls with tablespoon scoop and roll in Sparkling Sugar Crystals.
Place the balls 2 to 3 inches apart on the prepared baking sheet.
Bake for 10 to 15 minutes, until golden and set.  Mine baked for exactly 11 minutes, so I suggest you set your oven timer for 10 minutes to check for doneness, adding more time if needed.
Let cool about 5 minutes, then transfer to a rack to cool completely.   The recipe yields about 3 dozen cookies.  


One of the games I played with Ari was "Dinosaur" because he received a very precious gift from Heidi Witte (humbleluna@gmail.com) of a dinosaur tail.  


It was cold and snowy outside, but feeding my little dinosaur became such a wonderful game and I know he would have loved these cookies.  Make Believe and Baking just seem to go together when you're snowed in with your kids!  Enjoy!

Saturday, January 8, 2011

Ari's Cookie Jar Chocolate Chip


Baking cookies has always been one of my favorite things to do with my grands.  Both Ari and Maddie patiently await my cue to add ingredients and in between stick their little fingers and ask, "I taste?"
This morning, Ari said to me, "Mimi, my cookie jar is empty."  A few months ago, when I sent cookies to him, I put them in a plastic jar to protect them in shipping, but now it sat on the counter empty just like he said.  We made Pumpkin Spice Snickerdoodles in October and filled the jar, so on this snowy, cold day, we chose chocolate chip, another comfort food.

I know baking is a great way to build self-esteem; completing the steps in a recipe with gratifying results.  I loved baking cookies with my mother and baking with my girls.  Now, there's a new generation to pass along this tradition and I'm loving it even more.

Ari's Cookie Jar Chocolate Chip

1 1/4 cups (2 1/2 sticks) unsalted butter, softened
2 cups light brown sugar, packed
2 large eggs
1 egg white
1 T vanilla extract
2 1/2 cups all-purpose flour
1/4 cup cake flour
1 tsp. baking powder
1 tsp. baking soda
1/2 tsp. salt
1 cup chocolate chips
Preheat oven 350F-degrees.  Line a baking sheet with parchment or use a Silpat (silicon mat)

In a stand mixer, cream the butter until fluffy.  Add the brown sugar and beat for 2-3 minutes to completely combine.  Add the eggs, egg white and vanilla and mix well.  In a medium bowl, mix all the dry ingredients and add to the batter.  Mix just until combined.  Stir in the chocolate chips.
The batter is soft and Ari had no problem giving it a stir.  Use a cookie scoop or a large tablespoon to drop the cookies on the prepared sheet.  Ari likes BIG cookies (just like his mama did) so we did big scoops.  Eight mounds of dough per baking sheet, spacing about 2-inches apart.
Bake the cookies for 12 minutes.  Let them cool on the sheet for at least 5 minutes, then, remove to a rack to cool completely.  These cookies, as Ari said, "Soft and yummy," but if you prefer a crispier cookie, change out the light brown sugar to dark brown.  You can also add nuts or dried fruit (cranberries, tart cherries, raisins).  All I know is that these cookies made my grandson very happy to have his cookie jar filled once more.  Enjoy!

Thursday, January 6, 2011

Mac & Cheese Soup...a toddler's delight


Mac & Cheese is the ultimate comfort food.  Both Ari and Maddie find this to be true and love to have it at least a couple of times a week.  When I came across this recipe in the January/February food network magazine, I brought it with me to make for Ari while I was here in Kentucky.  The first word out of his mouth when he saw the soup at his place, was "Yum."

The recipe actually calls for roasting some Roma tomatoes and baguettes in the oven to top the soup with, but for a toddler, I just accompanied some cherry tomatoes for him to add and he did with each spoonful.  It has just a few ingredients and takes less than 35 minutes to make which was easily accomplished while Ari played with Thomas the Train.  I set it up his set on his mama's desk and he had such a fun time pretending with all his new friends.
Mac & Cheese Soup
Kosher salt
4 oz (1 cup) elbow macaroni (I used whole wheat)
cooking spray
2 plum tomatoes, sliced 1/2-inch thick
4 1/2-inch thick slices baguette
Freshly ground pepper
3 shallots
1 carrot, diced
1 stalk of celery, diced
1/2 cup all-purpose flour
3 3/4 cups fat-free low-sodium chicken broth (I used vegetable stock)
1 1/4 cups 2% milk
6 oz. shredded cheddar cheese ( about 1 1/2 cups)
1/4 cup grated parmesan cheese

1. Position a rack in the upper third of the oven and preheat to 450F-degrees.  Bring a medium saucepan of salted water to a boil.  Add the macaroni and cook as the label directs; drain.
2.  Mist a baking sheet with cooking spray and arrange the tomato and baguette slices on it in a single layer; season with salt and pepper.  Bake until the bread is golden brown, about 7 minutes.
3.  Mince the shallots, carrot and celery in a food processor.  Add 2 tablespoons of olive oil in a saucepan and add the vegetables and cook over medium-high heat until softened, 4 to 5 minutes.  Add the flour and cook, stirring 2 minutes.  Gradually stir in the broth and bring to a boil; cook, stirring 2 minutes.  Remove from the heat.
4.  Add the milk, cheeses and macaroni and stir until the cheeses melt.  Season with pepper.  Top the toasts with tomatoes; serve ontop.

I loved this soup! And, I can't wait to make it for Pop Pop when I return home.  Cold, winter days and soup is so satisfying...just ask this toddler.  Enjoy!

Saturday, January 1, 2011

RECIPE FOUND...Kelly's Jam Bars

Through the past year, I've made a few different jam bars, each time mentioning I wish I could find the recipe that Kelly made.  On Christmas, I unwrapped the most wonderful gift from my daughter Erin.  She had "My Mother's Apron Strings" bound into a book for me.  As I was looking back to the beginning of the blog, I came across a post I did on August 18, 2009, about Raspberry Bars from Tate's Bakery and Kelly had made a comment that she had always made "this" recipe.  I couldn't believe my eyes; there it was, the recipe she made, when I visited in June and helped her with a bake sale for God's Pantry.

You may not believe in miracles or twists of fate, but this recipe has been on my mind this past year, wondering where she could have kept it, and with Erin's surprise gift, I now have it.  She got the recipe from Real Simple magazine and with just a few ingredients, she easily made these up whenever she wanted to give something special to people.  The only change I made was that I used my homemade raspberry jam, but a good quality jam works too.

Kelly's Jam Bars

1 3/4 cup All-purpose flour
1 cup light brown sugar, firmly packed
1/4 tsp. salt
1/2 tsp. baking soda
3/4 cup (1 1 /2 sticks) unsalted cold butter
1 1/2 oats (the recipe called for Quick, but both Kelly and I use Old-Fashioned)
2 T lemon zest (since I put lemon zest in my raspberry jam, I omitted this)
1 1/2 cups raspberry jam


Preheat oven 350F-degrees.  Lightly butter a 9" x 13" baking pan and set aside.
In a large bowl, mix the flour, brown sugar, salt and baking soda and whisk to combine.  Cut the butter into 1/2-inch cubes and use a pastry cutter to incorporate into the dry ingredients.  (I used the food processor to mix the butter and dry ingredients, then put them back into the large bowl to continue.
Add the oatmeal to the bowl and stir to combine.
Measure the jam.  I didn't add the lemon zest since I use some lemon in my jam when I preserve it.
Spoon about two-thirds of the crumble mixture into the prepared pan.  Press down lightly.  Add the jam and use an off-set spatula to spread over the surface.  If you're using the lemon zest, sprinkle it on top of the jam.
Sprinkle the remaining one-third of the mixture on top of the jam layer.  Place in the preheated oven and bake 20-25 minutes or until golden brown.
Let the bars cool in the pan about 30 minutes.  For ease in removing the bars, I run a straight spatula around the rim when I first take them out of the oven.
My 9" x 13" pan is a spring form, so after 30 minutes, I can remove the sides for easy cutting.
This recipe is a wonderful way to start off the New Year and I've made some resolutions. One of them is to get the "Give-Away" up on the 1st day of the month.  The fabric I chose is white poinsettias with a snowflake companion fabric and I thought it fit, not only the season, but the weather : )  Just leave a comment on the posts for the month of January and this apron could be yours.  Enjoy!