Tuesday, November 15, 2011

National Bundt Day! ~ Apple/Cranberry Fritter Bundt Cake


The Honorable Governor Tim Pawlenty of Minnesota, home of Nordic Ware, has proclaimed Wednesday, November 15th as National Bundt Day.  It commemorates their 60th Anniversary of a pan that literally has changed baking cakes--in fact, there are over 60 million bundt pans across the continent!  So, how could I not celebrate the day when this cake pan has been around "almost" as long as I have. LOL!!

I learned to love the Bundt pan watching and helping my mother whip up this most beloved cake.  It was her choice in pans to use when baking the pound cakes she made over the years and certainly, when she was taking a cake to a friend or church function because of how stable it is when transporting it.   One of my favorites was the "Tunnel of Fudge" cake created by Ella Helfrich in 1966 for The Pillsbury National Bake-Off contest.  She took 2nd place, but most importantly, Pillsbury got over 200,000 inquiries as to where to find the pan she baked it in.

My choice for a unique Bundt cake to honor the day is derived from a memory I have of my mother's fritters.  Okay, you're probably saying, "fritters and bundt cake just don't seem to go together," but remember it's the pan that creates the dessert and I have found through the years, that almost anything comes out great in a Bundt pan.  Fritters are known world-wide and simply consist of an ingredient, coated in batter and deep fried, i.e., British fish (and chips),  corn, zucchini,  clams, etc. to name just a few.  For me, apple fritters are so satisfying--rings of tart, fall apples, dipped in a batter and fried, then, dusted with confectioners' sugar--and my mom made the best :D!  I'm changing this around and instead of making a batter, typical for fritters...or even a cake, I've decided to go with a yeast dough and bake it in a Bundt pan.  A drizzling of a glaze over the warm cake it finishes the dessert that maybe will make you think twice how you can use your bundt pan.

Apple~Cranberry Fritter Bundt Cake
Yeast dough:
1/4 cup milk
2 T unsalted butter
Place in the microwave and heat for 35-40 seconds, until the butter has melted.  Remove and add warm water up to the 3/4 cup mark.

In a stand mixer, using the paddle attachment, add:
1/4 cup granulated sugar
1 large egg
1 tsp. salt
Mix until ingredients have blended together.  While the mixer is running, slowly add the milk/butter/water mixture and mix thoroughly.  
Add:
2 T (or 2 pkgs) yeast
Mix again to incorporate the yeast.  Let set 5 to 7 minutes until the yeast mixture becomes frothy. (This ensures you that your yeast is good and proofed.)
Add:
2 T. shortening
1/4 tsp. mace
3 - 3 1/2 cups King Arthur Bread flour

After about 2 cups of flour, change to the dough hook to finish the dough.  The dough should cling to the hook, but still be somewhat tacky.  Turn dough out onto a bread board and knead until smooth.  Use a rolling pin to roll dough out to a rectangle 8" x 10".  Place on a half-sheet pan, lightly sprayed with baking spray and cover with a towel.
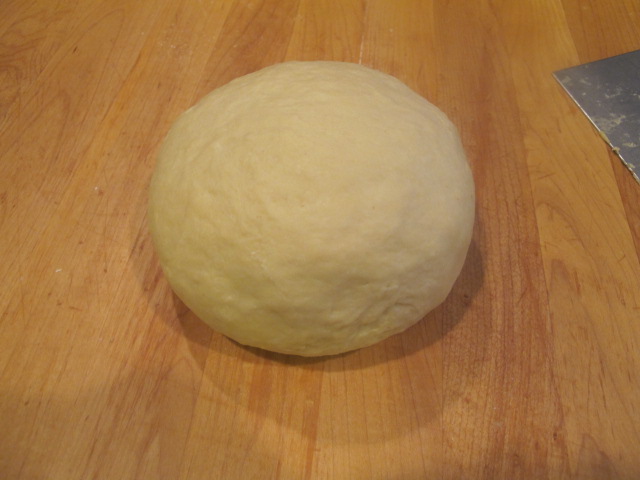


To help the dough rise easier, I made a "make-shift" proofing oven.  Place the pan with the dough on the middle rack and on a lower rack add another baking pan.  Fill that pan with boiling water, then, close the door to your oven.  On these chilly mornings a little help from this method produces the right atmosphere for a good rise.  Let rise about 1 hour.


Meanwhile, make the Apple~Cranberry Filling:
2 cooking apples, peeled, cored and cut into small chunks
1 cup fresh cranberries
1/4 cup granulated sugar
2 T Boiled Apple Cider
pinch of salt


In a medium saute pan, mix all the ingredients.  Cook over med/low heat until all the liquid has evaporated and the apples have softened--about 7-9 minutes.  Transfer mixture to a shallow bowl and cool completely.


To create the "Fritter":
Remove the dough from the proofing oven and roll out, on a lightly floured board, to roughly a 12-inch square, about 1/2" thick.  Spoon the apple/cranberry mixture on half of the dough. Sprinkle mixture with 1 tablespoon of bread flour and 1/2 teaspoon of Apple Pie Spice.  Fold over the "empty" half of the dough over the mixture.  


Using a metal bench scrapper, start cutting the dough vertically, in 1-inch sections, then repeat this method going horizontally and diagonally.  

Dust the board again with flour and the cut-up dough.  With your hands, form the dough into a "roll", adding more flour as necessary to hold it together.  

Cut the roll in half and place it into a buttered 12-cup Bundt pan.  

Repeat with the remaining half of dough.  Brush the surface with butter and cover with a piece of plastic wrap. 


Place in the oven once more, and proof by pouring boiling water into a pan beneath it like you did for the dough in the first rising.  Let rise again, 1 hour or until doubled in size.  

Remove from the oven and preheat oven to 375F-degrees.  Bake for 15 minutes, then lower oven to 350F-degrees and continue baking another 15 to 20 minutes.
Remove from oven and allow to cool about 7-8 minutes, then, invert on a rack.  Place rack on a baking sheet to glaze.


Glaze:
2 cups confectioners' sugar
3 T light Karo syrup
1 tsp. Vanilla extract
1/2 tsp. Apple flavoring (optional, but well worth it!)
3-4 T boiling hot water


Whisk together all the ingredients, starting with 3 tablespoons of the boiling hot water, adding more if needed.  Pour the glaze over the warm cake.  Use a spatula to scoop up overage of glaze and add in places not covered.  Using a giant spatula, lift cake to a serving plate and allow to cool.


Yum, warm memories of my mother's fritters in this celebratory pan made my morning.  Happy Birthday Bundt and a big thank you to Nordicware.  Enjoy!


Friday, November 11, 2011

Emerald City Brownies

As many of you know, my other persona is that of a paper artist and I've written two books on creating 3-dimensional flowers, using craft punches, that can be used to adorn cards, boxes, frames, etc.  Definitely the best thing about this "job" is the wonderful, creative people in the craft world that I meet and collaborate with on projects.  One of those special people is Eileen Hull, whom I met at the 2011 Winter CHA (Craft & Hobby Association) trade show.  She is a designer and artist and is licensed by Ellison/Sizzix with her own line of die cuts.  In September, she sent me one of her newest die cuts--a suitcase and I was immediately inspired to create a project that exemplifies the last year and a half of my life after Kelly's passing and the friends who have helped me through it.
I've entitled this project "The Journey" and just like Dorothy in the Wizard of Oz, it epitomizes the friends we meet along the way in life to help us through the good, but also the bad times we may encounter.  I know, without doubt, my friends have shown me courage to look forward again,  knowledge that memories of our loved ones will sustain us, and most of all, love that has truly warmed my heart where the void of loss once was.

In addition to Eileen's unique suitcase, I used a paper collection called The Magic of Oz by Graphic 45--their perfect gingham paper for Dorothy's suitcase and the colorful character cards that surround the sides of the box adds to the story.  However, I bet, like me, your eye is drawn to the most perfect ruby slipper at the very top that acts as a vessel to hold my paper poppies.  Another dear friend I've met in this business and who happens to also live here in the Pacific Northwest is Ellen Hutson.  She has an online craft store, but is also a designer and when I showed her my drawing of what I wanted to do, she painstakingly came up with a ruby slipper done in a canvas self-adhesive paper and glitz up with an ultra fine red glitter.  I wish you could see this in person because after viewing The Wizard of Oz last Saturday evening on TBS, I can tell you this miniature version is very accurate...but then, Ellen wouldn't have done anything less!

The brownies, I've come up with to accompany this project, have a bright green center to symbolize The Emerald City, where Dorothy and her friends go to seek the help of The Wizard and happens to be the nickname of Seattle, where I live.  I've added a little bit of peppermint oil that makes you think you're eating either a Thin Mint Girl Scout cookie or an Andes Mint, then, topped it off with a bittersweet glaze to seal this scrumptious dessert that makes any rainy day bearable!

Emerald City Brownies
Cake Brownies:
3/4 cup (12T) unsalted butter, melted
1 1/2 cups granulated sugar (divided)
6 large eggs, separate the yolks and whites
6 oz. bittersweet chocolate
1 T Vanilla extract
1/2 cup + 1T Queen Guinevere cake flour
1/2 cup +1T Dutch-processed 
1 1/2 tsp. baking powder
1/2 tsp. Kosher salt
Preheat oven to 325F-degrees.  13" x 9" baking pan--line with aluminum foil, brushed with melted butter.  If you happen to have a springform 13" x 9" baking pan, like me, I brushed it with melted butter, lined the bottom with parchment paper, then, buttered again.
In a medium sauce pan, on med/low heat, melt the unsalted butter.  Remove from the heat and add the 6 oz of bittersweet chocolate. Stir until the chocolate is completely melted.  Separate the eggs--place whites in a bowl of a stand mixer and use a whisk attachment to beat.  Lightly whisk the yolks, then add to the chocolate/butter mixture.  Add 3/4 cup sugar and the vanilla extract, beat to combine.
In a medium bowl, measure the flour, cocoa, baking powder and salt.  Stir to combine.  Add the wet ingredients to the dry and stir until completely combined.

Beat the egg whites until soft peaks forms.  Gradually add the remaining 3/4 cup of sugar.  Continue to beat until stiff and glossy.
Stir in one-third of the egg whites into the chocolate mixture to "lighten" it.  Scrape the lightened chocolate mixture into the remaining egg whites and fold to completely combine.  Try not to stir and deflate the egg whites.


I know this seems strange to separate the eggs, but here's my reasoning.  I prefer fudgy brownies, but sometimes, when I want a brownie that I'm going to top with other layers, I need a good foundation that a cake brownie provides.  However, I still want a moist, light brownie, and this step gives me that!
Pour batter into the prepared pan.
Bake in preheated oven for 30 to 35 minutes...mine took 30 minutes.  Remove from the oven and allow to cool while you make the peppermint white chocolate ganache.

Peppermint White Chocolate Ganache
2 (8.82 oz) bars Valrhona Blanc, chopped
1 1/4 cups heavy cream
1/2 tsp. peppermint oil
2 drops of blue and yellow food color
3 drops of green
3 T unsalted butter, soften to room temperature

In a "make-shift" double boiler, mix the white chocolate and heavy cream.  Heat over med/low heat, whisking to combine completely.  Remove from the heat and add the peppermint oil.  Stir to combine.
Using the whisk, add the unsalted butter, one-tablespoon at a time. 


Pour the ganache over the brownies and refrigerate one hour or overnight.

Bittersweet Chocolate Glaze:
2 cups of bittersweet chocolate chips
2 T Light Karo syrup

In a double boiler, mix the chocolate chips and Karo syrup.  Once the chocolate melts completely, remove brownies from the refrigerator and pour the glaze on top.  Use an off-set spatula to spread over the ganache.  Return to the refrigerator for 30 minutes before cutting.

The brownies are scrumptious and are the perfect finish to my project.

Count your life by smiles,
not tears.
Count your age by friends,
not years.

Tomorrow is my birthday and This Journey has made me realize how blessed I am to have friends.  Love to all.  Enjoy!

Wednesday, November 9, 2011

Cranberry~Hazelnut Scones


I feel, baking should always coincide with the season and this morning, exemplifying Fall so vividly, I turned to fresh cranberries to add flavor to these scones.

Cranberries are one of only three fruits indigenous to America (the other two are huckleberries and Concord grapes) and I can't wait until the bogs have been flooded and these wonderful, ruby-colored berries appear in the market.  In the Pacific Northwest, we're lucky enough to be able to get them locally (Oregon) and along with hazelnuts, which are also a product grown here, these scones are filled with the goodness of the season.

One of my favorite "anniversary" trips with my husband was to Nantucket when we lived in Massachusetts.  Because of our schedules, we couldn't get away in September, but chose the end of October to take the ferry across to the island.  It was the perfect time to take part in the Cranberry Festival and sample all the products--cakes, breads, relishes, chutneys, syrup, wine etc.  The list is really too numerous, but pretty much anything can be made from these fruits including soaps and body creams!

The name cranberry comes from early settlers who thought the flower, stem and calyx resembled the neck, head and bill of a crane.  It's a low growing shrub, usually in marshy areas, and can be found in most parts of the northern hemisphere.  It's been deemed a "super fruit" because of its nutrient value: high in dietary fiber and minerals, Vitamin C and manganese.  Also, it ranks near the top of fruits for its high measure of anti-oxidant properties.

Take heed and notice what ingredients are present in your area to use in your cooking and baking during the season.  Buying local not only supports our farm families, it's the smart thing to do for a healthy lifestyle.

Cranberry~Hazelnut Scones
2 cups Queen Guinevere Cake flour
1 1/2 cups King Arthur all-purpose flour
1/3 cup + 1 T granulated sugar
1 T + 1tsp. baking powder
3/4 tsp. Kosher salt
1/4 cup hazelnut flour (if you can't find hazelnut, you can also finely grind almond or pecan)
1/2 cup (1 stick) unsalted butter, cold and cut into small cubes
1 1/3 cups heavy cream
1 large egg + 1 large egg yolk
1/2 tsp. Orange oil

1 1/2 cups cranberries, washed and sliced in half

Egg wash:
1 large + 1 tsp. cold water
Sparkling Sugar
Preheat oven to 375F-degrees.  Line a baking sheet with parchment.
In a stand mixer, using the paddle attachment, measure and mix all dry ingredients.  Add the cubed, cold butter and mix on medium speed until the butter has broken down and is incorporated in the dry ingredients.  

In a 2-cup measuring cup, measure the heavy cream, then, add the orange oil, egg and egg yolk.  Whisk to combine.
 Add to the dry ingredients, while the mixer is on low speed.  Mix only until the dough comes together.  Turn dough out on a lightly floured board and knead carefully to a smooth disk.  
Flour a rolling pin and roll dough to about 3/4-1 inch thick.  Use a 4-inch scallop cutter to cut out scones.
 Repeat, kneading the scrapes of dough, until you've cut out all scones.  I was able to get 8 out of this recipe.
Brush tops with the egg wash and sprinkle with the Sparkling Sugar.

Bake in the preheated oven 18-20 minutes or until golden brown.  Remove from the oven and allow to cool slightly before serving. 

I made these for my breakfast this morning, slathered in Irish Butter and a heaping spoon of my Spiced Apple Butter, along with a cup of yogurt (sprinkled with some of my leftover Krispie Crunch) it was a perfect start to the day.
...I only wish I had some Fayette Cream for my scone that I got hooked on while in Kentucky with Kelly.  If anyone has a recipe...will you share??  Enjoy!


Sunday, November 6, 2011

Fall Fruit Galette

One thing (among many) that amazed me about my mother was her ability to whip up desserts at a moments notice.  As a child, I watched pertinaciously as she scooped up flour and sugar from the bins, measured out leavening agents in the palm of her hand, and stirred her magic into mouth-watering pies and cakes that would keep us all anticipating the after-dinner dessert.

I realize for most of us, spur of the moment desserts come in the form of a box mix or frozen and  prepackaged.   However, I've tried to develop quick techniques and recipes that keep me true to my roots and make sure not to have a "thunder bolt" coming my way from Mom. LOL!  Pie crust that is made in bulk and can be frozen, up to six months, and cakes that can be baked ahead of time, wrapped well in plastic wrap and sealed, then frozen until you need them.

Tonight, I made a galette filled with fall fruits--apple, pear and cranberry.  A galette is a French term for a round, flat, free-formed cake or tart; in this case, mine were tarts.  Having pie crust in the freezer made it all possible and in less than 20 minutes, these cute little galettes were in the oven baking and a wonderful aroma filled our home.

Fall Fruit Galette
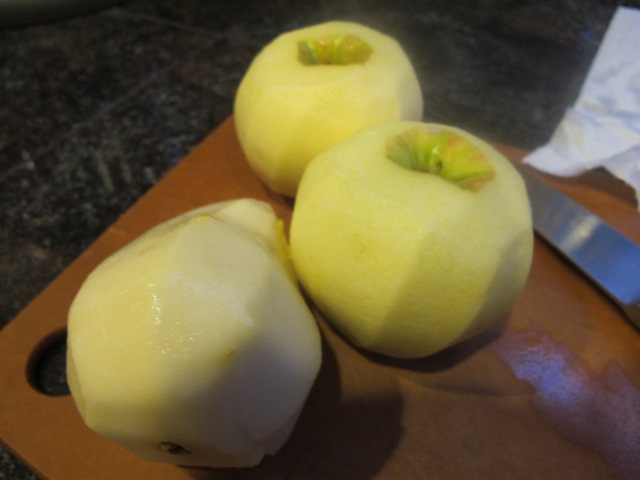
2 medium apples, peeled, cored and cut into chunks about 1 1/2-inches
1 Bosc or Anjou Pear, cored and cut into chunks the same size
1/3 cup dried or fresh cranberries
2 T unsalted butter
2 T Boiled Apple Cider*
1/3 cup light brown sugar, packed

*You could make your own boiled apple cider by simmering a cup of apple cider for 20-30 minutes until the mixture is thickened and syrupy.

In a medium sauce pan, melt butter and blend in brown sugar and Boiled Apple Cider.  Spoon fruit into the mixture and cooked about 10 minutes on medium.  The fruit will release more liquid, but it will be absorbed at the end of cooking.  Remove and let cool while you roll out the pie crust.


One disk of Perfect Pie Dough 
Preheat oven to 400F-degrees and line a baking sheet with parchment paper.
Roll out pie dough and use a 6-inch saucer as a pattern to cut a round.
For a little extra flavor, I spooned 1-teaspoon of Cranberry~Vanilla Pear Jam I had preserved in September. You could use a teaspoon of Apple Butter, Raspberry Jam, or even Lemon or Orange Marmalade instead.
Spoon some of the apple/pear/cranberry mixture on top, then, bring up the sides and pinch around the filling.

Brush the outside of the dough with a beaten egg.  Finally, add a sprinkling of Sugar Crystals over the top.

Bake for 20 minutes or until the pie dough is golden brown and the filling is bubbly.  


I have a friend, who would love a scoop of French Vanilla Ice Cream on top, but since I didn't have any ice cream, I whisked up some Cardamon Whipped Cream.  


Cardamon Whipped Cream:
1 cup heavy cream
1/4 tsp. ground cardamon
1 T confectioners' sugar


In a medium bowl, using a hand mixer, or a copper bowl with a whisk, beat the heavy cream until soft peaks form.  Add the ground cardamon and confectioners' sugar and continue to whisk until cream holds its shape.
The galette was a perfect finish to our dinner and even though it's dark and chilly outside, my kitchen is warm and inviting...just like Mom's. Enjoy!


Thursday, November 3, 2011

Snap~Crackle~Pop Cookies and November's Give-Away


No, that's not the sound of snow laden branches falling on power lines in the Northeast, but one of America's most recognized cereal, that I have incorporated in my baking today, with a new purpose!  Rice Krispies, created by Clayton Rindisbacher for Kellog's in 1927 and released to the public in 1928, is a rice and sugar paste mixed to form "berries," then cooked, dried, and toasted to become a thin, hallowed shape that is crispy and crunchy.

I chose this ingredient today to bake in honor of my mother, who passed away on November 4, 1987--24 years ago tomorrow, from a brain tumor and like Kelly, way too early.  Helen Margaret was born on February 6, 1920 to Frank and Gladys Huekels in Washington, D.C.  My grandfather was in the Marines and with each of his deployments my mother got to experience other parts of the country while growing up.  One of her favorite places she lived in, was Honolulu, Hawaii, when her father was stationed at Pearl Harbor in 1927--see the connection to Rice Krispies :).  Before her passing in 1987, I had my first trip to Hawaii and she wanted to know if the Royal Hawaiian Hotel was still there.  She said she would always remember the beautiful pink building, nestled among the palm trees and as a child--to her it looked magical.

She also loved German's Chocolate Cake for her birthday and so with this in mind I have created a cookie that includes a bar of Baker's German's Sweet Chocolate along with a coconut milk Krispie Crunch to simulate that dessert.  Cereal crunch is not my creation, but that of Christina Tosi of Momofuku Milk Bar in New York City.  She makes a Cornflake Crunch in her cookbook Milk and it gave me the idea to change my favorite cereal into a unique form to add to my cookies.  I put my twist on it by using Coconut Milk Powder instead of non-fat milk powder, which is what her cornflake crunch calls for.  German's Chocolate Cake is so good because of its rich coconut, sweetened condensed milk topping and I wanted to make sure the taste of coconut came through loud and clear.  You will have some Krispie Crunch leftover from what is called for in my recipe, but like Christina's Cornflake Crunch, use it as a topping on ice cream, parfaits, or yogurt...to name a few.


Snap~Crackle~Pop Cookies
Krispie Crunch:
7 cups (about 1/2 of a 12-oz. box) of Rice Krispies
1/2 cup Coconut Milk Powder
2 T granulated sugar
1 tsp. salt
3/4 cup (12 T) unsalted butter, melted
Preheat oven to 275F-degrees and line a baking sheet with parchment paper.
In a large bowl, add the Rice Krispies and with your fists, press down to break them up some.  (If you use a large Pyrex 8-quart measuring bowl, like I did, I noticed the 7 cups became 5 cups with my compressions.)  Add the sugar, coconut milk and salt and mix together.  Pour the melted butter over and mix well--make sure the ingredients are fully saturated.  Spread mixture on the baking sheet and bake for 20 minutes, stirring the mixture half way through the baking time to make sure you have even toasting.  Remove from the oven and let cool completely before adding to the cookie dough.

Cookies:
1 cup (2 sticks) unsalted butter, at room temperature
1 1/3 cups granulated sugar
1/2 cup light brown sugar, packed
1 large egg
2 tsp. Vanilla extract (or 1 tsp. Vanilla Paste, which is what I used)
1/2 tsp. Coconut flavoring
1 1/2 cups King Arthur all-purpose flour
1/2 tsp. baking powder
1/4 tsp. baking soda
1/2 tsp. salt
3 cups Krispie Crunch
1 cup sweetened coconut
1 4-oz. bar German's Sweet Chocolate Bar, chopped


In a stand mixer, using the paddle attachment, cream the butter and sugars for 2-3 minutes, until the sugars are fully incorporated.  Add the egg and Vanilla and coconut flavoring and beat on low to incorporate, then turn the mixer to med/high and beat for 6-8 minutes until the batter is light and fluffy.
Scrape down the sides.

Add the dry ingredients and mix on low just until incorporated.  Don't over mix!  Finally, add the Krispie Crunch, coconut and chopped chocolate and mix or stir to incorporate.  Scrape the sides and make sure all ingredients are mixed in.
Prepare a baking sheet with parchment paper and using a 2-tablespoon scoop, measure out the cookie dough on it.  Place the scoops side-by-side (this is also a technique of Christina's) to chill the dough.  Cover with plastic wrap, flattening the tops slightly and refrigerate the "scoops" for 2-3 hours or even overnight.

Preheat oven to 375F-degrees.  Line two cookie sheets with parchment.  Remove cookies from the refrigerator and place on prepared sheets, 2-inches apart (for spreading).  

Bake cookies for 6 minutes, then, rotate pan to bake another 6 minutes or until the edges of the cookies are browned and the centers are cooked.  Allow to cool about 5 minutes on the baking sheet before transferring to a rack to cool completely.  
These cookies are crispy and crunchy just like the cereal, although even with dipping into a glass of milk, you won't hear the familiar--Snap, Crackle & Pop, but you can use your imagination. Enjoy!

The Give-Away apron celebrates Thanksgiving--the harvest and families coming together.  I fell in love with the main fabric; pumpkins, cornucopias and colorful fall leaves.  I hope it puts a smile on your face and all you have to do is visit and leave a comment.  I will be drawing the name early because I have to be away after Thanksgiving.  Good Luck.