Saturday, June 27, 2015

Coconut (flour) Pizzelles

When I was growing up (in the 50s & 60s) I had never heard of Celiac Disease and of course eating gluten-free. Moreover, my mother never baked with anything other than wheat flour.  A few years ago, I was surprised to learned that one of my dearest friend's husband wasn't diagnosed until he was in his 40s that he had this celiac disease and had suffered through the symptoms not knowing what was caused them. Over the last 10-15 years it's definitely become part of our lives to be diligent in distinguishing those affected by the inability to consume products made with wheat.

We see a lot of products that are gluten-free on the shelves and even restaurants are denoting some entrees (especially pizza) that are made without wheat.  I've experimented with many alternatives and want to share with you an incredible produce I use in my baking gluten-free--Coconut Flour.

Coconut flour (which I purchase at Nuts.com) is produced from dried coconut meat; a natural byproduct of coconut milk production.  This soft flour is popular for baking for those following a grain-restrictive diet such as paleo diets or the GAPS or SCD diet.  It offers a gluten-free and protein-rich alternative flour, but that's not all.  Did you know that it's rich in fiber, a good source of lauric acid (a saturated fat thought to support the immune system, thyroid function, and good skin health), and exceptionally good source of Maganese.

This extraordinary absorbent flour means that your ratio exchange IS NOT 1:1 with wheat flour.  In baked goods, you generally want to substitute about 1/4 to 1/3 cup of coconut flour to 1 cup of wheat flour.  This took me a little time to comprehend until I started experimenting with it.  The first recipe was a vanilla cupcake where I used only 1/2 cup of coconut flour instead of the 2 cups of wheat flour called for in the recipe and they turned out perfect!  You can also use coconut flour with wheat flour, substituting 20% of the wheat with it.  Today, I wanted to make one of my favorite cookies--Pizzelles, which is one of my family's favorite cookies!
Coconut (flour) Pizzelles
6 large eggs
1 1/2 cups granulated sugar
1 cup (2 sticks) unsalted butter, melted & slightly cooled
1/4 tsp. Coconut flavoring (or you can do 2 tsp. Vanilla extract)
3/4 cup + 3 T Coconut flour
2 tsp. baking powder

In a stand mixer, using the whisk attachment, beat eggs until a golden yellow, about 5 minutes.  Turn mixer on low and gradually add the granulated sugar and coconut flavoring.   Add the warm butter while the mixer is on low and beat until combined.  In a separate bowl, mix the coconut flour with the baking powder, using a hand whisk.
Remove the bowl from the stand mixer and slowly add the flour/baking powder mixer, whisking to combine.  This is very important because the coconut flour has a tendency to clump .  When all the flour mixture has been added, let the mixture set about 20-30 minutes to thicken slightly.  Meanwhile, preheat the Pizzelle iron.
I used a small scoop to place the batter on the iron, close the lid and allow to cook until the iron clicks "ready".
The pizzelle iron makes two at a time.  Continue making the pizzelles until you've used all the mixture.  Pizzelles are a wonderful cookie and because they come out slightly soft, you can "mold" them to any shape.  Rolled up or placed in a small ramekin (or over a muffin tin) and make a bowl to serve your favorite ice cream in!

I love making healthy alternatives for my family.  My granddaughters have been visiting all week and we baked a lot. I'm just as concerned that my grands learn healthy alternatives as I was with my daughters and my mother with our family.  In addition, we've also begun a "treehouse" project this past week so they will have a place (free of television & computers) to play and create.
My hubby and I laugh and say this treehouse is nicer than our first apartment!  There will be a pulley on the side to send up healthy treats (like these cookies), as well as swings, and a slide pole.  More photos to follow. Enjoy!

Thursday, June 18, 2015

Peanut Butter~Banana~Marshmallow Muffins

...Or, simply, the Elvis Muffin!   My sister was actually a big fan of Elvis, I'm more a Beatles fanatic, but when I came across this peanut butter powder at Costco yesterday, I thought of Elvis, go figure.  I knew he was a peanut butter & banana & Fluff fan, so creating this muffin had to be in honor of him.
This PB2 is a powdered peanut butter that can be used in various recipes; especially smoothies or mousse, and can, of course be reconstituted into the spreadable version.  Since I had, once again, leftover bananas (hubby was traveling) I decided to make up a muffin and see if the flavor was actually true.

Peanut Butter~Banana~Marshmallow Muffins
1/2 cup (1 stick) unsalted butter, melted and cooled slightly
1 1/4 cups granulated sugar
3 large eggs
1/2 cup + 3T PB2 (powdered peanut butter)
1 tsp. Vanilla extract
4 medium bananas, peeled and smashed with a fork
1/2 cup sour cream
2 1/2 cups KAF All-purpose flour
1 tsp. baking soda
1/2 tsp. baking powder
1/2 tsp. salt

30 miniature marshmallows or 16 regular size

Preheat oven to 375F-degrees and line a muffin pan with liners or use aluminum cups that are lightly sprayed with a baking spray.


In a bowl of a stand mixer, mix the melted butter and sugar together.  Add the next four ingredients and mix well. Remove the bowl from the stand. In a separate bowl, whisk the dry ingredients and add to the batter, stirring until incorporated with a rubber spatula.  Finally, add the sour cream and stir to combine.


Use a #20 scoop and add one scoop to each cup or muffin wells.  Add two miniature marshmallows or a quarter piece from a regular size marshmallow.
Cover with one more scoop of batter.  Bake in preheated oven for 5 minutes, then, lower the temperature to 325F-degrees and bake 17-20 minutes more.  Press on top of the muffin to feel if it's done.  Let cool slightly, then dust with a little confectioners' sugar and serve.

Well, "I'm all Shook Up" how good these were--Enjoy!
 

Monday, June 15, 2015

Refrigerator Spice Cookies with Almonds

Refrigerator cookies have been around somewhere after the ice box was conceived in 1802, by an inventor, surveyor, engineer and entrepreneur named Thomas Moore from Brooksville, Maryland and was granted a patent for it.   My Grandfather Will, after he retired from the Navy, worked on changing over old ice boxes to electrical refrigerators for a living.

This type of cookie is indispensable for us busy bakers and I know that's why my Grandmother Gladys liked baking them.  She had gone to work during WWII and figured out making up this dough and keeping it in the refrigerator (or freezer) made for instant gratification with a limited amount of time used.  My mother adapted her recipe and I've been baking them for years; they're one of my "cookies of choice" for mailing because of their shelf life!

Like my pie dough I make up in bulk, it's nice to have several rolls of refrigerator cookies in the freezer when the urge hits.  The dough is pretty standard and I still make up her original recipe (with a few flavor changes) using Crisco and not butter--an ingredient that was in short supply during the war.   Grandma Gladys always made a nut version, but I'll give you some substitutes that also work.

Refrigerator Spice Cookies with Almonds
1 cup shortening (I use Butter-flavored Crisco)
1/2 cup granulated sugar
1/2 cup firmly packed light brown sugar
2 large eggs
2 tsp. Pumpkin Pie spice
1/4 tsp. ground Cardamon
1/2 tsp. baking soda
1/2 tsp. salt
1 cup chopped nuts (I used sliced almonds)
2 3/4 cups King Arthur Flour all-purpose flour

In a stand mixer, using the paddle attachment, cream the shortening and sugars together, scrapping down the sides of the bowl with a rubber spatula as needed.  While the mixer is running on medium, add the eggs, one at a time (don't expect the mixture to cream together as if you're using butter.)

Add the spices with the dry ingredients and nuts and mix on low until the dough is thoroughly combines.  Divide in half and create two rolls of dough.  Grandma always wrapped the dough in wax paper, but plastic wrap is my choice.
I also shaped the "roll" into a rectangle, but round is good also:-D  Refrigerator several hours or overnight.  (You can also place the rolls in a freezer bag and freeze the dough for later; it will keep 3-6 months.)

Preheat oven to 400F-degrees and line a baking sheet with parchment paper.  Remove the rolls from the refrigerator, one at a time, and slice just about a 1/4"-thick.  Place on the parchment, spacing them about 1 1/2-2 inches apart.
Bake in the preheated oven about 6-7 minutes.  Fast, huh!  Allow to cool slightly, then, remove to a rack to cool completely before putting them in your Cookie Jar or sending them to family.

Variations
Substitute 1/2 cup cocoa, decrease flour to 2 1/4 cups & add chopped pecans.  Use 1 tsp. vanilla extract instead of spices

Add 1/2 tsp. Coconut flavor and 1/2 cup sweetened flaked coconut

Add 1 T red food coloring, 2 T cocoa, 1 tsp. vanilla extract and chopped pecans for Red Velvet refrigerator cookies

Add zest of 1 lemon (orange or lime), 1 tsp. juice to dough

So many recipes can be made, but you get the picture. Enjoy!

Tuesday, June 9, 2015

HoJo's Coconut Cake, May's Apron-Giveaway Winner, and June's Giveaway Apron

If you're not afraid to date yourself...who remembers Howard Johnson's?  I do and was happy to see a story about this iconic restaurant on King Arthur's blog "Flourish" this past Sunday--http://www.kingarthurflour.com/blog/2015/06/02/american-baking-decades-1950-1959/.  From the early 50s to the 70s, travelers knew this restaurant well.  I remember the grilled hot dogs in butter, fried clams, and of course, the ice cream and cakes.  This Coconut Cake is one of my favorites and like the author, PJ Hamil of KAF, I've had a love affair with coconut since I was a kid.  I was anxious to make their version with the only difference is that I topped the lovely frosting with toasted coconut instead of the flaked.   
You can click on the link and read the entire story and get the recipe.  The cake is similar to a pound cake, but moister and the hints of extra coconut flavor in the batter and coconut milk powder in the frosting made this my new favorite cake. Enjoy!

It was another crazy month, but let's get to the Give-Away for May...Congratulations to Mary at The Last Act blog!
To claim your apron, please send me your email address and I will be happy to send it to you.

Next, yes, I've done an apron for June. A month that honors my brother Joe, who passed away in 1969 at the age of 14 and my Grandma Gladys, who taught me so much about gardening.  This apron has the cheerful colors of summer and actually leans towards the tropical feeling. 
If you would like to win this bright apron (perfect for preparing picnics!), all you need to do is post a comment. Good luck!

Wednesday, May 27, 2015

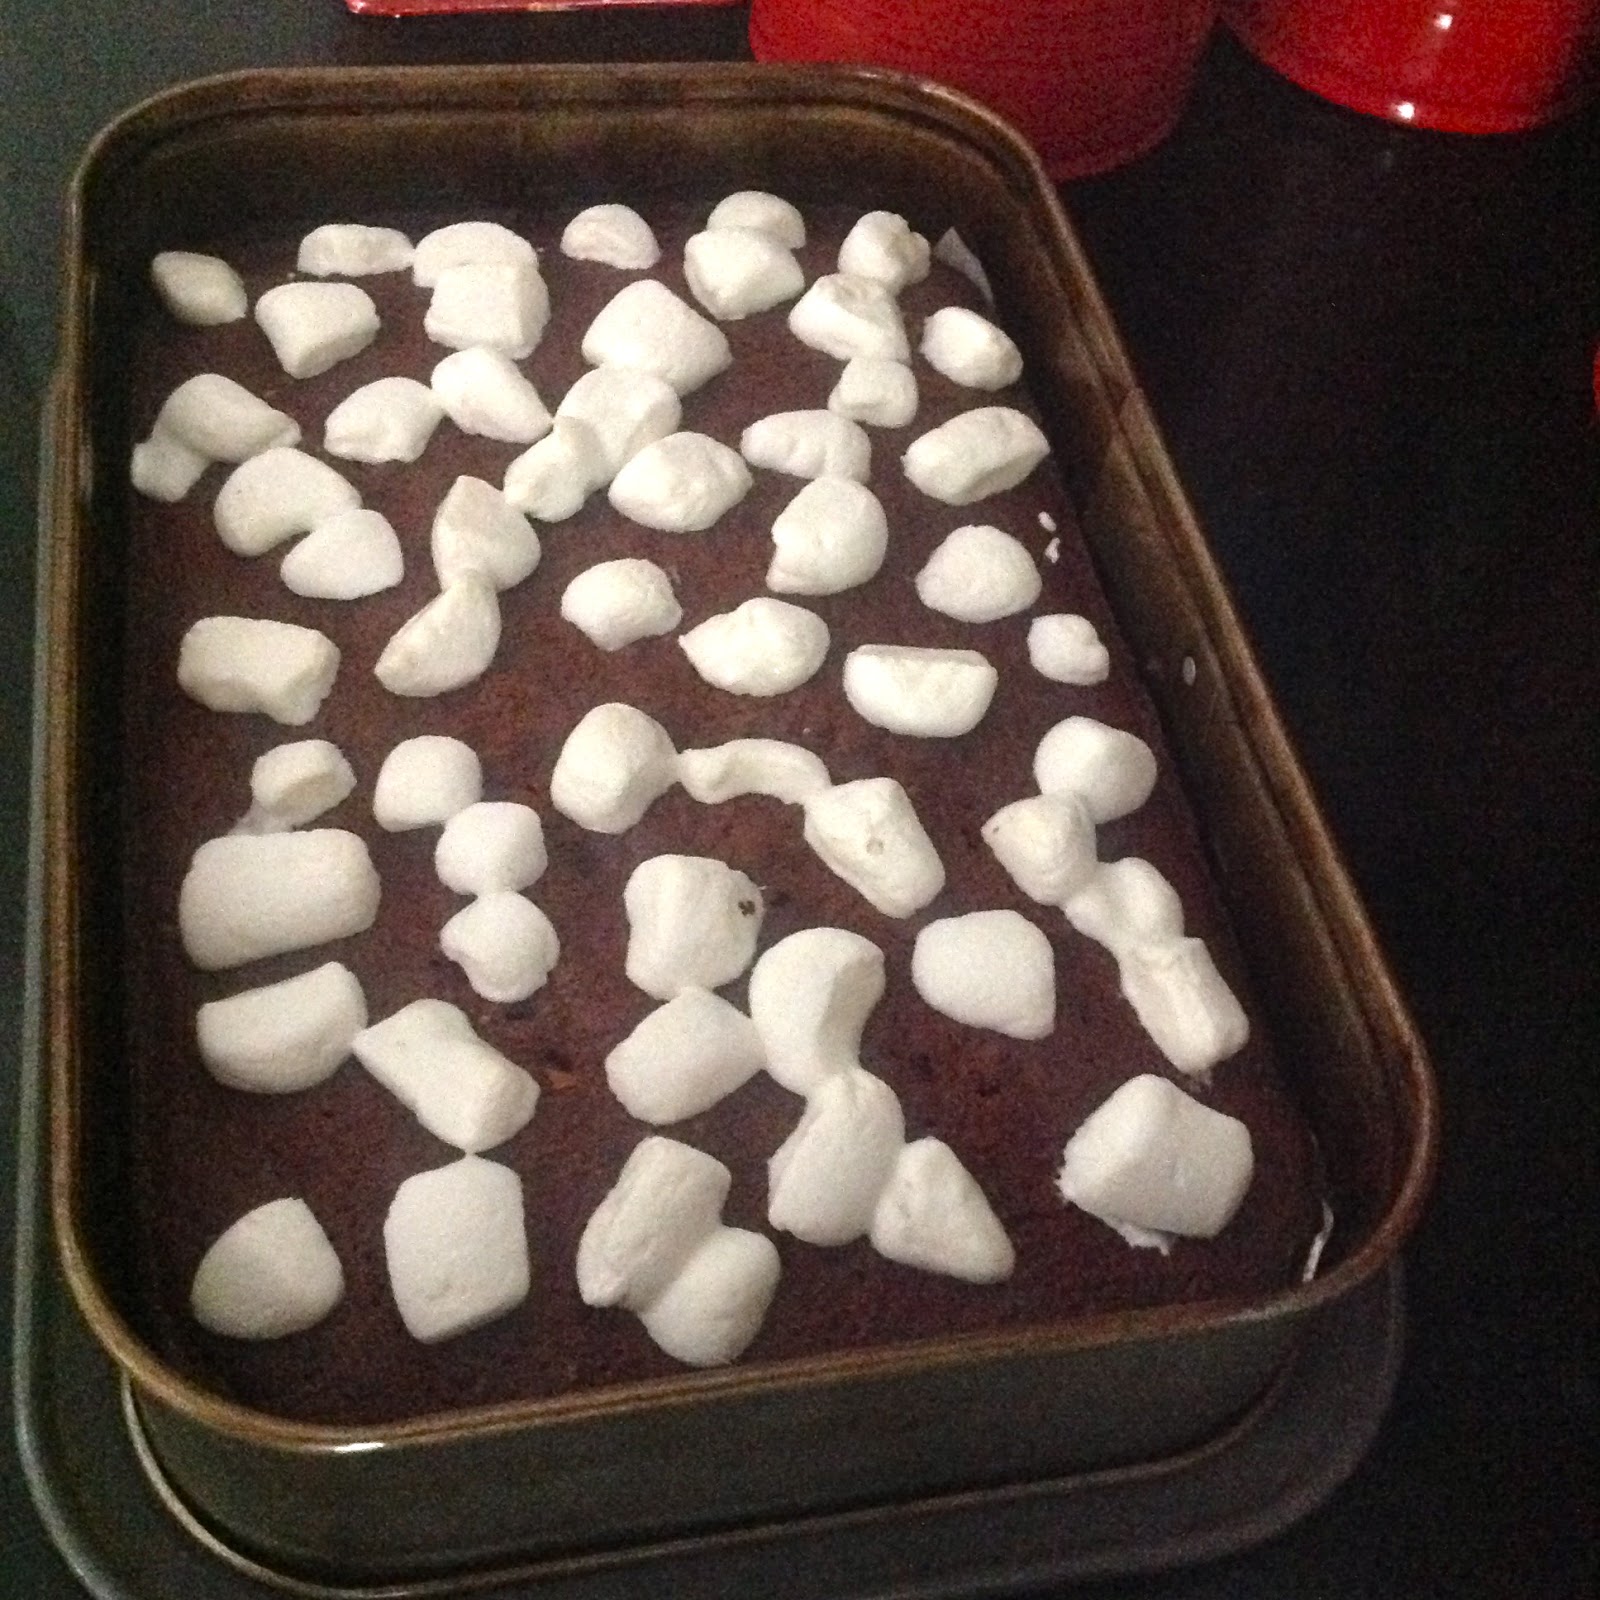
Cheerwine Soda Sheet Cake

Just in case you've never heard of this soda...it happens to be produced by the Carolina Beverage Company right in Salisbury, North Carolina.  It is the oldest soft drink company (since 1917) and still run by the same family.  This soda is cherry-flavored, burgundy colored, and has the highest carbonation ratio of any soft drink.  All I know is that it's a winner and I'm proud it comes from our state.

So, I decided to make a cake, based loosely on a coca cola cake that was made popular in 1997 by Cracker Barrel restaurants.  This version with Cheerwine is so moist, however, in spite of the ingredients, does not come off overly sweet, which is a good thing.  Even the icing, or topping, is quick and is better to go on the cake while still warm.  With all the picnics we do during the summer, this is sure to be a hit.

Cheerwine Soda Sheet Cake
1 cup (2 sticks) unsalted butter, softened to room temperature
1 3/4 cups granulated sugar
2 large eggs
1 cup Cheerwine (not diet!)
1/2 cup buttermilk
1 tsp. vanilla
2 cups KAF all-purpose flour
1 tsp. baking soda
1/2 cup Dutch-processed cocoa

1 1/2 cups miniature marshmallows

Icing:
1/2 cups (1 stick) unsalted butter, melted
1/3 cup Cheerwine soda
1 tsp. vanilla
2 cups confectioners' sugar (16 oz-1 box)

1 cup rough chopped pecans

Preheat oven to 350F-degrees.  Spray a 9" x 13" sheet pan with baking spray and line with parchment paper.  I used my spring-form pan, but a regular sheet pan works great.

In the bowl of a stand mixer, using the paddle attachment, cream the butter and sugar together for 4-5 minutes.  Scrape down the sides of the bowl with a rubber spatula as needed.  Add the eggs, one at a time, incorporating well.  In a 2-cup glass measure, mix the Cheerwine, buttermilk and vanilla together.  Also, mix the dry ingredients together in a separate bowl.  Add the dry ingredients to the egg/sugar mixture while the mixer is on low speed alternately with the wet ingredients; starting and ending with the flour mixer. Mix on medium for 1 minute.

Use the rubber spatula to scrape down sides and make sure all ingredients are incorporated.  Spread the batter into the prepared pan.
Bake for 30-35 minutes (mine passed the wooden skewer test after 30 minutes).  Remove pan and add the marshmallows on top.  Return to the oven and cook 2 minutes more.  (*I actually cut regular marshmallow into quarters because I didn't have miniature...get miniature!)
Melt the butter in a small saucepan on low heat.  Add the Cheerwine and vanilla and whisk to combine.  Place the confectioners' sugar in a medium bowl and pour the warm mixture over it.  Whisk to combine, then, pour over the cake and use a rubber spatula to spread on top of the softened marshmallows.  Finally, top with the broken pecans.
Yes, it's that easy and delicious.  Fancy enough to serve at dinner or picnic.  I know it's one my mother would have done for our July 4th picnics if she knew about Cheerwine; you can of course, substitute coca cola, but  here in North Carolina we wouldn't think of it.  Enjoy!


Saturday, May 23, 2015

Brown Butter Fruit & Nut Banana Bread

This morning, it looked like banana bread would be on my baking list with four very ripe bananas left on their hanger by my hubby.  Along with some new ingredients I bought through King Arthur Flour catalogue; Strawberry & Apricot Jammie Bits and I would create a bread full of flavor, but very healthy too.
This is a two-loaf recipe, however for ease of freezing, I baked eight mini loaves and one regular loaf.  Also, I boost the flavor by browning the butter and roasting the nuts, pecans, but you could use walnuts or even macadamia.

A few facts about Banana Bread (since I've made about a thousand loaves and found interesting):

~First appeared in American cookbooks in the 1930s.  Pillsbury entered it in their cookbooks in 1933 and Chiquita Banana's Recipe Book in 1950.

~National Banana Day is February 23rd.

~Some people believe that banana bread was the by product of The Great Depression--resourceful homemakers didn't want to throw away overly ripened bananas.  Others believe it was to promote the discovery of baking soda and powder for leavening.

Whatever!  Banana bread sure has become a never ending delight in our home...how about yours?

Brown Butter Fruit & Nut Banana Bread
1/2 cup (1 stick) unsalted butter, melted to a golden brown
1 cup granulated sugar
1/4 cup firmly packed light brown sugar
4 bananas, peeled and mashed
1/4 cup vegetable oil
4 large eggs
1 T vanilla extract
1/2 cup sour cream
4 cups KAF all-purpose flour
1 tsp. baking soda
1/2 tsp. baking powder
1/2 tsp. Kosher salt
1 cup Strawberry & Apricot Jammie Bits (or you can use dried fruit, finely chopped)
1 cup pecans, walnuts or macadamia (rough chopped or in the case of pecans, I broke them with my hands.

Preheat oven to 325F-degrees.  Lightly spray two loaf pans, mini loaf pan, or muffin pan with baking spray.

In a stand mixer, using the paddle attachment, mix together sugars and bananas.  Add the oil and vanilla extract to the melted browned butter, then with mixer on low, add to the sugar/banana mixer.
Allow the mixture to set for 10 minutes.  In the meantime, lightly toast pecans in the oven.  Remove from the oven and cool a few minutes.

 Add two cups of flour, the nuts and fruit and mix on low just until combined.  Add the sour cream and the remaining 3 cups of flour and mix on low again.
Use a rubber spatula to turn the batter over a few times to make sure all the flour has been incorporated, being careful not to over mix.  Scoop into prepared  muffin, mini or loaf pans.

Bake:  Muffins--20-22 minutes; Mini Loaves--25 minutes; Loaf pans--55-60 minutes. 

Memorial Day is very special to me.  We always had a picnic at my grandparents and remembered all our family members who served in the military; both grandfathers, father, brothers, nephews and uncles. I hope your day is filled with wonderful memories too. Enjoy!


Wednesday, May 20, 2015

Biscoff Biscotti & May's Give-Away-Apron

This beautiful dish was a gift from my dear friend in Japan and her staff!
I love flying on Delta Airlines; the personal service from reservation to gate staff to flight attendants (& pilot) and of course, Biscoff cookies. My experience with Delta started when I was flying back and forth between Seattle and Lexington, Kentucky as Kelly was under going surgery and later, chemo.  When the cart service came around, I always asked for an extra package of Biscoff to take to my grandson and Kelly and they happily obliged.  Now, seven years later, I still prefer to fly Delta...and Biscoff cookies!

In addition to the cookies, I've discovered a Biscoff spread that I usually have on my toast in the morning or add it to my favorite recipes.

Today, I thought I'd give it a go in one of my favorites--Biscotti; another morning treat I love to eat on the go while I start my day.  I definitely credit my mother for giving me the gift of making up recipes and I know she'd love this one with her morning coffee.

Biscoff Biscotti
8T (1 stick) unsalted butter, softened to room temperature
1/2 cup firmly packed light brown sugar
1/4 cup granulated sugar
1/2 cup Biscoff European Spread
1 1/2 tsp. vanilla extract
3 large eggs
3 1/4 cups King Arthur All-purpose Flour
1 tsp. baking powder
1/4 tsp. Kosher salt
2/3 cup chopped sliced almonds
 Preheat oven to 375F-degrees.  Line baking sheet with parchment paper.

In a stand mixer, using the paddle attachment, beat butter, sugars, Biscoff spread and vanilla extract together until fluffy.  While the mixer is running, add the eggs, one at a time.  Use a rubber spatula to scrape the sides of the bowl as needed.  
Add the dry ingredients and mix on low just until combined.  Remove the bowl from the stand and use the rubber spatula to make sure the dough is fully incorporated--DON'T OVER MIX!

Drop dough, making two lines approximately 3-inches x 15-inches--smooth to make two long logs, then gently pat the tops to flatten slightly.

Bake in the preheated oven for 20-25 minutes, lowering the temperature to 350F-degrees after 10 minutes.  The tops will be slightly cracked, dry and firm to the touch.
Cool about 10 minutes, then, transfer the logs, one at a time to a cutting board and use a serrated to slice in 3/4-inch wide biscotti. Lower the oven temperature to 325F-degrees to give the biscotti a second bake (Biscotti actually translates to twice-baked!)
You will need to line a second tray for the second log of cookies.  Place both trays in the oven and bake 7 minutes.  Remove and turn the biscotti over.  Return to the oven, changing the tray that was on the bottom to the top and the top tray to the bottom.  Bake another 7 minutes.  Remove from the oven and allow to cool completely before storage.  These cookies are great with coffee, tea, diet Coke and of course, a glass of wine--your choice.  Enjoy!

Now, for May's apron.  This fabric, of course, has a story like most of my aprons, but even more special.  As many of you know, our Kelly passed away five years ago on May 14, 2010.  While she was undergoing treatment for metastatic breast cancer, friends (and family) sent her lots of gifts reflecting the familiar pink ribbon.  She said to me one day, "Mom, I love the sentiment, but I really hate pink!"  So, each May, I have done an apron featuring her favorite color, orange.  This fabric also reflects her love of vintage-looking fabrics from the 40s.  I made her a quilt when she went off to Colorado State University for her masters with 40s fabrics and her son, Ari has on his bed now.  

If you would like to win this apron, please comment on any of my posts and you will have a chance.  Double-winners are accepted!


Sunday, May 17, 2015

Good Morning Crumb Coffee Cake & April's Apron Winner

Yes, I'm back...April flew by just like me.  My work schedule has become very busy and I was in Massachusetts for an event, then home a week before heading to Tokyo, Japan for their Hobby & Craft Show.  I've been there previously for the show, but it had been over 6 years ago and I can honestly say, it's gotten twice as busy; if that's possible!
7 year old Gwen is creating a tulip from my Garden Notes!
Just missed Cherry Blossoms in full bloom
Aren't the Kimonos beautiful!
Once back, and very jet lagged, I made a trip to see our grandson and be a part of "Grandparent's Day at the Montessori school he attends.  Home now for a few weeks before heading to our granddaughter's dance recital, so I thought I better get this post in before everyone thinks I've disappeared off the face of the Earth!

Crumb Coffee Cake is one of my favorites for breakfast.  Crumb topping differs from  streusel mainly because the ratio of flour to sugar...crumb requires more flour and the result are pea-sized pieces that sit perfectly on top of a delicious golden cake.  This cake is not too sweet, but very satisfying.

Crumb Coffee Cake
Preheat oven to 325F-degrees.  Line a 9-inch square baking pan with 2 pieces of aluminum foil, joined and making sure you get the corners tight.  Fold extra foil over to use later to lift crumb cake out of the pan.
 
Crumb Topping:
8 T unsalted butter, melted and slightly cooled
1/2 cup granulated sugar
1/2 cup dark brown sugar
1/4 tsp. ground cinnamon
1/8 tsp. ground cardamon
1/8 tsp. Kosher salt
1 3/4 cup cake flour ( I use Queen Guinevere Cake Flour by King Arthur Flour)

In a small saucepan, melt the butter over low heat.  While the butter is cooling, in a medium bowl, mix together the all ingredients except the flour, use your fingers or rubber spatula to mix.  Pour the butter over the sugar and spices and stir together.  Finally, add the flour until mixture resembles a thick, cohesive dough.  

Set aside while making the cake.

Cake:
6T unsalted butter, softened 
I cut the butter into small cubes to soften quicker
1 1/4 cup cake flour
1/3 cup granulated sugar
1/4 tsp. baking powder
1/4 tsp. Kosher salt
1/3 cup buttermilk
1 large egg + 1 egg yolk
1 tsp. Vanilla extract

 Using a stand mixer, with a paddle attachment, mix the dry ingredients. Add the softened butter, 1 cube at a time on low speed.  Continue mixing until mixture resembles moist crumbs--1-2 minutes.   Add the butter, egg, egg yolk and vanilla and beat on medium-high speed until light and fluffy, about 1 minute.  

Using a rubber spatula, spread the cake batter into the prepared pan.
Using both hands, roll pieces of topping dough (crumb) between your thumb and forefinger into large pea-sized pieces.  Top the batter with these crumbs, beginning around the edges and continuing towards the middle  Bake until crumbs are golden brown and a toothpick inserted in the center of the cake comes out clean, 35 to 40 minutes.

Remove from the oven and allow to cool in the pan for 30 minutes.  Lift the cake out onto a serving board, dust with confectioners' sugar and cut into squares.  Enjoy!

Now, the winner of April's Apron is Miss Jane of http://missjaneblog.blogspot.com/ .  Please email me your address and the apron will be sent to you with love.

I will have May's apron up tomorrow; it's a special one in honor of our daughter, Kelly.  The anniversary of her passing was on May 14th (another reason for not blogging lately) and I really feel like the colors of the apron speak volumes of her life.