Saturday, December 11, 2010

English Toffee

In addition to the many cookies my mother would bake, she also made candy;  fudge and divinity were her favorites. I also make fudge, but English Toffee is my favorite and that's what I made this morning.  It was also Kelly's favorite--something else we shared.

The caramel flavor and color, so reminiscent of candies like toffee and brittles is not from the sugar caramelizing...because it doesn't.  It's from a complex series of reactions between proteins and sugars called the Maillard reaction or Maillard browning.  The Maillard reaction is not only responsible for the browning in confections, but in many of our favorite foods and beverages.  Toffee contains some important ingredients: sugar, water, corn syrup, a dairy product (which can be just butter, but in this case I used sweetened condensed milk), butter, and flavoring that will react together to produce the crunchy caramel.  Pouring this mixture over chopped roasted almonds and then, spreading bittersweet chocolate over it and finally a sprinkling of more almonds makes this a very special gift in your food boxes.

Before beginning any candy confection, make sure you have on hand a heavy 6-quart saucepan and a candy thermometer--the ingredients need to reach a temperature of 290F-degrees, which is a soft-crack stage, and a candy thermometer is a must.  Also, because this mixture needs to be stirred constantly, investing in a silicon spoon or spatula would be a great addition, but as my mother used, a wooden spoon will also do.

English Toffee
1 1/2 cups water
2 cups granulated sugar
1/4 cup light brown sugar, packed
1/2 cup Sweetened Condensed Milk
1/2 cup Light Karo Syrup
1/2 cup (1 stick) unsalted butter, at room temperature
1/2 tsp. Sea Salt
1 T Vanilla Extract
2 cups toasted and finely chopped slivered almonds
6 oz. Bittersweet Chocolate Bits

Preheat oven to 350F-degrees and toast almonds for 6-8 minutes.  When cooled, chopped finely. Spread half of the almonds on a buttered-prepared 12 x 17-inch baking sheet.  Set aside.

In a large saucepan, combine the water, sugars, condensed milk, Karo syrup, and butter.  Bring to a boil, stirring constantly, with a heat-proof rubber spatula or wooden spoon.
Attached candy thermometer to the side, making sure it doesn't touch the bottom of the pan.  Turn the heat to medium and continuing to stir constantly, check thermometer and when the mixture reaches 290F-degrees remove from heat.  Add the salt and the vanilla. 
Pour the mixture over the toasted almonds.  Smooth with an off-set spatula.  Then, sprinkle the bittersweet chocolate chips over the top.
The chips will melt from the heat of the toffee.  Spread with an off-set spatula and sprinkle with the remaining almonds.
Let cool completely, making sure the chocolate has set, then, break into pieces and package for your gift-giving.

Confections like candy, cookies, fruited breads, and jams are just some of my favorites to share with friends and family.  I'd love to hear about your traditions and what you're baking for the holiday. Enjoy!

Friday, December 10, 2010

Pretty, but Simple Spritz

Spritz was one of my favorite cookies my mother made for the holidays.  Like Russian Tea Cakes, it can be make a few weeks ahead then, stored in a cool place, for packing up in cookie boxes for later;  thus, my choice today to get a head start on my mad cookie baking marathon for my gift boxes to family and friends.

Spritz or Swedish Butter Cookies are a favorite, not only in Scandinavia but here in the United States.  I not only made them with my mother, but they have been part of my Christmas cookie baking for over 40 years.  They are formed using a cookie press and my choice today actually came from a suggestion from my sister, who requested the ridged wafer shape...dipped in chocolate!

Pistachio Spritz dipped in Bittersweet Chocolate
1 1/2 cups (3 sticks) unsalted butter, at room temperature
1 cup granulated sugar
1/4 cup Pistachio Paste
2 egg yolks
1 1/2 tsp. Vanilla Extract
1/2 tsp. baking powder
1/4 tsp. salt
4 cups flour
12 oz. Bittersweet chocolate
Pistachio nuts, finely chopped


Preheat oven to 350F-degrees and line a baking sheet with parchment.
In the KitchenAid, using the paddle attachment, beat the butter until fluffy.  Add the granulated sugar and beat well.  Add the pistachio paste (or you could use almond paste), the egg yolks, and the vanilla extract and beat 1-2 minutes until combined.  Add the dry ingredients and mix until the dough comes together.
Use a cookie press and fill as directed with the dough.
I pressed out the wafer cookie shape, but I had other shapes I could have used (and have before).  
Don't worry about the edges being "rough".  I've found by adding just 1/2 teaspoon of baking powder to my butter dough the edges smooth out nicely during baking.


Bake 8-10 minutes or until the edges are lightly browned.  Cool slightly on the sheet, then transfer to a rack to cool completely.
In a double boiler, melt the bittersweet chocolate.  Dip the edges of the cooled cookies into the chocolate and place the dipped cookies on a sheet of parchment paper to set.

Before the chocolate sets, however, sprinkle with the finely chopped pistachios.  (If you have used almond paste instead of pistachio, sprinkle with finely chopped almonds).
 Once the chocolate sets completely, you can store these cookies for a few weeks in a cool place. You could also freeze the cookies if you want to make them earlier.
This recipe made easily 8 dozen+ cookies.

I've been baking these cookies (including helping my Mom) for over 50 years and think this recipe, I've come up with, is really good.  Tender cookies with the distinctive buttery taste that are simple, but just like a little black dress, can be "accessorized" to be festive for the holidays.  Enjoy!

Tuesday, December 7, 2010

Easy Apple Cider Jelly...really!

Sometimes, ideas pop in my head and I just have to try it.  That was the case with the vision of Apple Cider jelly.  We're lucky to be living in Washington state where apples are abundant and since moving here I've fallen in love with a particular variety called Honey Crisp.  One of these apples usually makes up my lunch; not only is it a big apple, but biting into it makes you feel like you're drinking a cup of apple cider...no kidding!

I noticed before Thanksgiving, our local supermarket was carrying just that--Honey Crisp Apple Cider and the light bulb went on!
Last year I had made Pomegranate jelly with great success, so I thought, this would be a great way to capture that taste.  And, I was right.  The key to preparing jelly from juice (without all the peeling, coring, and straining) is to start with 100% juice, or in this case apple cider.  A lot of markets sell juice this way, especially Whole Foods, but I actually found the pomegranate juice at Costco!

This easy and yes, quick jelly will be part of my Christmas box, along with baked goods, to friends and family.  Homemade from the heart (and in this case, also the brain) is so appreciated by the recipients and brings me back to my mother's tradition of giving gifts from the kitchen at this time of year.

Apple Cider Jelly

5 cups of 100% apple cider
7 1/2 cups granulated sugar
2 pouches of CERTO liquid fruit pectin (not the powder!)
1/2 tsp. butter (this cuts down on foam forming)

In a large Dutch Oven (or a 6-8 quart saucepot), measure out the juice and sugar.  Bring mixture to a rolling boil; one that cannot be stirred down.  Add the liquid pectin and stir completely.  Bring mixture back to a boil, stirring constantly.  Set timer for 1 minute once a rolling boil comes.  Turn the heat off and ladle into prepared jars, leaving about 1/8-inch space to the top of the jar.  Use a damp cloth (or paper towel) to wipe around the rim, then, place the sterilized lid and ring on; tightening the ring.  Turn jar upside down while you finish the rest of the jars.  This recipe made 8 jars of jelly.  Let the jars remain upside down for 10 minutes, then, turn right-side-up and you should hear the "pop" of the lid sealing.  If this doesn't happen after 5 minutes or so, turn the jar upside down again for another 5 minutes.  If it still doesn't seal, you can do the water-bath method.*  Let the jars stand at room temperature for 24 hours.  Store unopened jelly in a cool, dry, dark place for up to 1 year.  Refrigerature opened jelly up to 3 weeks...if they last that long!
  
*Water Bath: Cover jars 1-2 inches with boiling water. Cover the pot with a lid and bring to a gentle boil.  Process for 10 minutes. 

Making jams and jellies can be done year 'round, especially with the help of prepared juice.  Enjoy!  

Monday, December 6, 2010

Chocolate Chip Shortbread Cookies


Anyone who knew Kelly, knows these cookies.  It was one of her favorites to bake and give as gifts--birthdays, Christmas, or just to cheer you up.  I came up with this recipe back in the 80s when we lived in California. My reason for making this recipe up was that I would bake them to ship back East to my family and I knew they'd still be delicious, weeks later.  In fact, a few years ago, this was the recipe I chose to make for a package going to Iraq for a dear friend's husband who was stationed there.

Today, I thought about these cookies after seeing our grandson Ari playing in his first snow of the season. Just a few inches, but  like Peter in Snow Day, Ari went through the motions of doing everything Peter does on that day.
The cookies are dusted (like the dusting of snow) with confectioners' sugar and would be the perfect snack with cocoa after a day of activities outside in the snow.

I made a few changes in the recipe, but I'll give you both ways and let you create a cookie, not only for baking ahead of time during the busy holiday, but for your little snowmen who need a comforting snack after a Snow Day!

Chocolate Chip Shortbread Cookies
2 cups (4 sticks) unsalted butter, at room temperature
2 cups Confectioners' Sugar, sifted
1/2 tsp. salt
2 tsp. Vanilla Extract
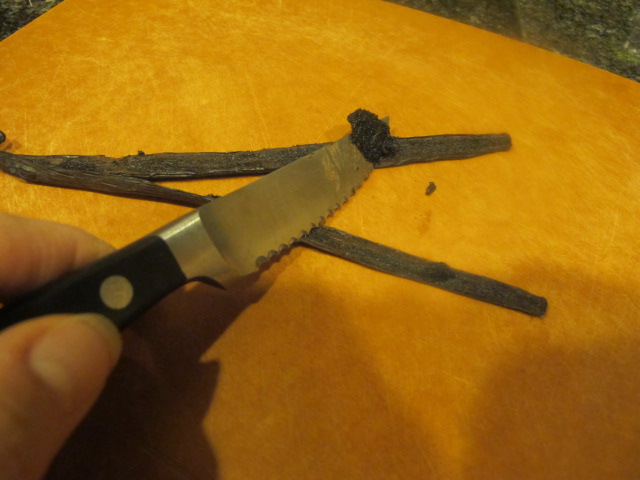
1 Vanilla bean, split and the seeds scraped out (optional)
4 1/2 cups King Arthur Unbleached All-Purpose Flour
12 oz. Mini Semi-sweet Chocolate Chips  (or 2 cups Bitter Sweet chips)


Preheat oven 350F-degrees.  Line a baking sheet with parchment paper or use a Silpat.

In the KitchenAid (preferrably the 6qt size) using the paddle attachment, beat the butter until fluffy.  Scrape down the sides.  Add the confectioners' sugar, one-half cup at a time, beating well after each addition, scraping down the sides again.  Add the vanilla extract and if using, the seeds of the vanilla bean. Beat to combine.


Add the salt and the flour, again one-half cup at a time and beat well.  Add the mini chocolate chips or the Bittersweet, which was my preference this morning. Mix until the chips are fully incorporated in the dough.


Scoop up "walnut-size" balls and place on the baking sheet.  When I use the mini chocolate chips I take a fork and do a criss-cross on the cookies to flatten slightly.  

Today, using the larger bittersweet chips, I merely used my fingers and pressed down slightly on the tops to flatten slightly.  Bake 12-14 minutes or until the edges are golden brown.  Cool slightly on the cookie sheet before transferring to a rack to cool completely.  


I think Kelly loved these cookies because they have a dusting of "snow" (confectioners' sugar) on top.  If you don't have a shaker, you can make one.  I used an empty jam jar, filled it with confectioners' sugar, then, covered the opening with a double layer of cheesecloth.  Place the ring over the opening and screw in place.  


Just tap on the bottom of the jar to dust your cookies.

I know Kelly's friends loved these cookies and were always happy to received them and so will your family and friends.  Enjoy!


Friday, December 3, 2010

Chocolate Cherry-Berry Fruitcake & a Holiday Give-Away

Trust me...I know what you're thinking.  Fruitcake!  Yes, fruitcake, but to ease you into the concept that fruitcakes can be good, I've chosen to bake a recipe from King Arthur Flour that includes chocolate as well as a variety of dried cherries,  Raspberry Jammy Bits and Pecans.

I first fell in love with fruitcake with my mother's recipe.  She started the day after Thanksgiving and I remember chopping all the fruit and nuts, then, adding it to the large wooden bowl filled with the batter (or as she called it, "the glue") to hold everything together.  I think that's how I developed great arm muscles--stirring everything together with a big wooden spoon!

The earliest recipe for fruited cakes dates back to Ancient Rome where they baked in pomegranate seeds, pine nuts, and raisins into the cake.  However, what we know as fruitcake comes from 18th century Europe where the cakes were made from the harvest of fruits and nuts for good luck the following year.  It's probably where soaking the cakes in brandy or rum started because they saved these cakes to be eaten before the harvest the next year!

In Canada, fruitcake is known as Christmas Cake and rarely shows up any other time of year.  Interestingly, in the Bahamas, the fruit is soaked ahead of time, for two weeks, in rum before making up the batter of the cake.  Then, there's versions of fruitcakes from Germany, called Stollen, which my mother made each year, and from Italy, Panatone, which I've added to my holiday baking.  I hope you try this recipe and fall in love with this holiday tradition that has come to be a big part of my memory of the season of baking with my mother.

Chocolate Cherry-Berry Fruitcake
2 cups dried cherries, chopped if very large ( I used a variety)
1/2 cup brandy or rum, or 1/3 cup water (I used rum that I had flavored with vanilla 2 weeks ago)
3/4 cup (1 1/2 sticks) unsalted butter, at room temperature
1 1/2 cups granulated sugar
1 1/2 tsp. baking powder
1 tsp. salt
1 tsp vanilla extract (1 also added the seeds of 1 vanilla bean)
1/4 tsp. almond extract, optional
2 T Cake Enhancer, optional
3 large eggs
2 1/2 cups King Arthur Unbleached All-Purpose Flour
3/4 cup milk, at room temperature
1 1/2 cups candied red cherries
1 1/3 cups Raspberry Jammy Bits or Blueberry Jammy Bits, or a combination
2 cups chocolate chips (I used bittersweet chips)
2 1/2 cups rough chopped pecans or walnuts, optional (I used pecans)

Glaze:
3/4 cup simple syrup, brandy, or rum

1. Combine the dried cherries with the brandy, rum or water.  Cover and microwave for 1 to 2 minutes, stir, then set aside to cool.
2. Measure out the candied cherries,  Jammy bits, chopped pecans, and chocolate chips and set aside.

3. Preheat oven to 325F-degrees and grease the pans of your choice.  Two- 8 1/2" x 4 1/4" loaf pans, Five- 7" wooden bakers, Six &" paper bake & give pans, or 12-cup bundt style pan, or two-6-cup bundt-style pans.  I used my muffin bundt pans and have to tell you that wasn't the best of choices.  The detail in the pans gave me such grief in releasing the cakes!  I lost one of the cakes from sticking, so next time I think I'll do a plain muffin pan or loaf pans as my mother did.
4. In a large bowl (I used my KitchenAid and the paddle attachment), beat the butter, sugar, baking powder, salt, flavors, and cake enhancer.
5. Beat in the eggs, one at a time.  Stir in the flour alternately with the milk.
6.  Combine the dried cherries and their liquid, candied cherries, Jammy Bits, chocolate chips, and nuts,  Stir into the cake batter (the glue!)
7. Spoon the batter into the lightly greased pans, filling them about three-quarters full.

Bake 50 to 100 minutes; the smaller the pan, the shorter the baking time.  These cakes actually took 36 minutes.  When done, the cakes will be a light golden brown all over, and a cake tester inserted into the center will come out clean.
8.  Remove the cakes from the oven.  If you're removing them from the pans, wait about 10 minutes, then turn out onto a rack.  If you've baked them in paper pans, they can stay in the pans.

9. If you using simple syrup: heat equal amounts of sugar and water over medium heat.  I placed the vanilla bean pod into my syrup to infuse more flavor.
Brush the warm cakes with the simple syrup, brandy or rum--your choice.

 When completely cooled, wrap well and let rest 24 hours (or up to a month, brushing with liquor or syrup weekly), before serving.  I placed mine in a waxed paper lined tin and will keep them cool in our garage since our temperatures are in the 30s at night, it's the perfect place.
 In a few weeks, when I'm wrapping these up for the gift boxes I will give, I'll show you the presentation...until then, patience is a virtue!  I remember waiting for my mother to slice the fruitcakes we had made on Christmas Eve.  Every year she did an open house for family and friends to come by and the baked goodies were the always well worth the wait!

Now, for my Holiday Give-Away...
 Again, when you post a comment between now and the 20th of December (so you can have this apron in time for the holidays) your name will be entered to win.  And, there maybe a surprise with it. Enjoy!

Thursday, December 2, 2010

Wish List--Veggie Chicken Pot Pie

Okay, I admit...I'm the Queen of Gadgets, Bakeware, and Unusual Ingredients!  My son-in-law, Matt, has even created a game he plays with dinner guests called "Guess What This Is?"  I'm used to being made fun of by my family, but tonight I have the last laugh with my latest appliance--Breville's "the Personal Pie."

Since I have a freezer full of pie dough, I decided to make my Veggie Chicken Pot Pie into individual portions with my latest purchase.  The Personal Pie maker caught my eye one evening while I was perusing the Williams-Sonoma catalogue and my imagination was inspired.  I think my grandchildren will just love, not only savory mini pies, but think about all the sweet ones I can create.

Veggie Chicken Pot Pie

3-4 pie dough disks
2-3 Yukon Gold Potatoes, washed and cut into 3/4-inch chunks
3 carrots, peeled and cut into 3/4-inch pieces
1 medium yellow onion, peeled and cut into chunks
3/4 cup frozen corn
3/4 cup frozen peas
1 pkg. Quorn Chicken Tenders (of course you can use real chicken, probably 2-3 breasts cut into pieces)
1/2 tsp Thyme
1- 1 1/2 tsp. Sea Salt and  3/4 tsp. Pepper  (or to taste)
1/2 tsp. garlic powder
3 cups vegetable broth
1 T. corn starch

Preheat oven 400F-degrees.  Line a baking sheet with parchment.  
Place potatoes, carrots, and onion are the baking sheet and drizzle with 2-3 T. Extra Virgin Olive Oil and toss with your hands.  Sprinkle with the thyme and garlic powder and toss again.  Roast vegetables in the oven 30 minutes.  Add the peas and corn and remove remove from the oven.  


Meanwhile in a 6 quart-saucepan, heat 2-3 T olive oil.  Add the Quorn Chicken Tenders and saute until golden brown.  Add the roasted vegetables and the vegetable stock.  Heat on med/high until it boils, then turn down the temperature.  Mix 1 tablespoon of cornstarch with 1/4 cup water and whisk together.  Slowly add to the chicken mixture and stir well.  When mixture thickens, turn off heat and remove from the stove.


Roll the pie dough out and using the cutter that comes with the appliance, cut out bottom disks.  Add the veggie chicken filling and cover with a dough top.  Close the lid and cook according to directions.  I set my timer for 8 minutes and they came out perfect.  I transferred the mini pies to a foil-lined baking sheet and kept warm in the oven (275F-degrees) while I baked the remaining pies.  This recipe will make12-15 individuals pies.


Pot pies are something my Mom made us.  She would bake them in the individual aluminum pans as a special treat.  I think she would have loved this appliance and I can't wait to try some of my favorite fruit pies next.  And, the point of this post, if you have a Wish List and love to bake, this should be on it!  Enjoy!

Monday, November 29, 2010

It's Beginning To Look A Lot Like Christmas...Cupcakes

Thanksgiving has come and gone; Black Friday has come and gone; now it's time for some serious baking!  This weekend I noticed the drastic changes that has beseech us--Christmas lights are shining brightly on homes, trees wrapped and tied on automobiles, and catalogues stuffed in my postal box.  All of this signifies that the holiday season is definitely upon us.

Our little Madison celebrates her 2nd birthday today, although her "party" isn't until Sunday, I decided to bake up some cupcakes in her honor and the start of the baking season for me.
 The "cake" in the cupcake is my Red Velvet recipe.  I was born in Tennessee and that southern specialty is one of my favorites and let's face it, makes the perfect color for the season.  However, instead of making the usual cream cheese frosting, I decided to make a "cheesecake" filling and the icing is a rich buttercream.

The holly and berries reminded me of our home in Massachusetts where we had two beautiful holly bushes by our front door.  I loved to watch the cardinals and wax wings come and pluck the berries from the branches.  Additionally, during heavy snow storms in New England, small birds would take refuge in the interior of the holly.  I piped the leaves, but found the berries at Williams-Sonoma.  They are called Deco Drops and come in a number of colors, but this red is perfect to resemble actual berries.

Cupcakes are always perfect and if you're doing a holiday dessert table, these could be your centerpiece.

Red Velvet Cupcakes with a Cheesecake filling

1 recipe of Red Velvet Cake

Fill cupcake papers with batter, three-quarters full.  Bake in a Preheated 350F-degree oven for 15-18 minutes.  Don't over bake and test after 15 minutes.  Let cool completely.  I like to leave the cupcakes in the pans to cool.
Meanwhile make up the Buttercream frosting and the Cheesecake filling.

Cheesecake Filling:
6 oz. cream cheese, softened
1/3 cup confectioners' sugar
2 tsp. Vanilla Extract
4 T. heavy cream
In a medium bowl, using a hand-held mixer, beat the cream cheese.  Add the confectioners' sugar and vanilla and blend completely.  Add the heavy cream, one tablespoon at a time, and beat well.  The mixture should resemble a "set" cheesecake state. Set aside.

Buttercream:
5 stick (2 1/2 cups) unsalted butter, softened to room temperature
7 cups sifted confectioners' sugar
2 T Vanilla Extract

6-7 drops of Green paste color
Deco drops

In the bowl of the KitchenAid, using the whisk attachment, beat the butter until fluffy.  Add half of the confectioners' sugar and vanilla and beat well to combine.  Add the remainder of the confectioners' sugar, one cup at a time until thoroughly combined and fluffy.
(If your bowl does not hold all the ingredients, you can make it in half batches)

When the cupcakes are cooled completely, use an apple corer to remove a center "plug" of cake for the filling.
Using a piping bag and a #7 round tip, pipe the cheesecake filling into the center hold.

Fill a large bag with the buttercream (before tinting it green) and a #808 tip and using a light pressure, swirl the top of the cupcake to coat.
Once all the cupcakes are iced, tint the remaining buttercream with the green paste color (to the color you like), I used about 7 drops.  With another piping bag and a #366 tip, create the holly leaves.

I created three leaves and then, added the Deco Drops in the center.

The cake was moist and the filling was delicious with a nice surprise in the middle, which is what I like to add with my cupcakes.
Happy Birthday, sweet little girl.  You've brought so much joy into all our lives and definitely will keep us on our toes. Love you, Mimi and PopPop

Saturday, November 27, 2010

Leftovers--Sweet Potato~Cranberry bread

Leftovers are inevitable at our house; I've always cooked like I'm still in a big family.  I remember the first time I made my mother's recipe for spaghetti for dinner.  We ate spaghetti for  almost a week!  But, like my mother, I can't seem to throw anything out and always find a new recipe to make from the abundance.  By the way, with the spaghetti, spaghetti pie was created.

Now, for Thanksgiving, I made a large casserole of sweet potatoes with dried cranberries and mini ginger chips.  It was delicious, but I had leftovers.
This morning I "remade" the sweet potatoes into Sweet Potato~Cranberry Bread.  The good thing is that it made two large loaves and I was able to share one with a dear friend.   I baked a similar recipe with my sister last Thanksgiving, but we made muffins with the batter.  Either way, using leftovers in a new way makes me think of my Mom and how economical she was.  I think she would be proud I listened and learned.

Sweet Potato~Cranberry Bread

1/2 cup butter (1 stick) unsalted butter, softened
1 cup packed, light brown sugar
1/2 cup granulated sugar
2 large eggs
2 cups mashed sweet potatoes
3 cups King Arthur All-purpose flour
1 1/2 tsp. baking soda
1 tsp. salt
1 tsp. ground cinnamon
1/2 tsp. ground cardamon
1/2 tsp. freshly ground nutmeg
1 tsp. vanilla extract
1 cup apple cider (or apple juice)
3/4 cup dried cranberries
1/3 cup Ginger mini chips (optional, but really good)

Preheat oven to 350F-degrees.  Spray two 5" x 9" loaf pans with a baking spray (or use can use muffin pans)
In the bowl of the KitchenAid, using the paddle attachment, beat the butter and sugars together until fluffy.  Add the eggs, one at a time and beat well between the additions.  Add the mashed sweet potatoes and beat to incorporate.  Sift together the dry ingredients and add to the batter, alternating with the apple cider (or juice).  Beat only to combine.  Add the vanilla extract and mix to combine.  Stir in the cranberries and Ginger mini chips, if using.
  Spoon into the prepared pans. and smooth the tops.
Bake in the preheated oven 45-55 minutes or until a toothpick stuck in the middle comes out clean.  If the tops are browning too fast, you can lower the temperature to 325F-degrees.  Let cool about 10 minutes before turning out.  I decided to add a simple glaze, but you could also just dust with confectioner's sugar.
Glaze:
1 cup confectioners' sugar
1 tsp. light Karo syrup
1 tsp. vanilla
1 tsp. hot water
Mix all the ingredients together.  Drizzle the smooth glaze over the loaves.
This bread had a wonderful spicy flavor and the richness of the sweet potatoes made it moist.  This would be great as a breakfast treat or with a tea break in the afternoon (after shoveling snow!)
 Creating new recipes with leftovers makes me smile and I hope this bread brings a smile to you and your family.  Enjoy!