Sunday, March 4, 2012

February's Give-Away Winner

There's really no excuse to be late in drawing the winner for February's apron, although a bout with bronchitis would have to be mine, I can't let another day go by...Time Flies!

The lucky winner is Martha Ellen!  Please email me your address and I will get this most happy butterfly apron off to you.

Thank you all for posting and as I'm starting to feel better, March's apron should be up...maybe later ;-D
The rules remain the same--the more you post a comment during the month, the more chances you have to win.  Good Luck (as us Irish would say!)

Friday, March 2, 2012

Orange-Orange glazed Genoise with Fresh Strawberries


One of the first cakes I made in cooking school was a Genoise--an Italian sponge cake named after the city of Genoa.  It's a very popular choice for wedding cakes when it's usually is soaked in flavored syrups or spread with fruit fillings before the buttercream is applied.

I thought this simple cake would be perfect with the beautiful strawberries I bought at the market as dessert.  See, we've had a day of rainy grey skies and a bit of Spring, even if it's in my baking would help me feel better.  I'm going on two weeks with this cold and the "dose" of citrus in this cake is just what my mother would have ordered!

There are different recipes for Genoise; some separate the eggs to add lightness and are the only fat, others add melted butter.  The key is that it's an easy cake to make and a wonderful base for fresh fruit or a special occasion...like a wedding.

Orange Genoise with Fresh Strawberries
4 oz. unsalted butter, melted and cooled (included is the amount you will use for buttering the pan)
2 large eggs
grated zest of 1 orange
1/2 cup granulated sugar (I use Baker's Sugar which is much finer, like Castor)
1 cup confectioners' sugar
1 cup flour
1 tsp. baking powder

Preheat oven to 325F-degrees.  Brush melted butter on an 8-inch x 2-inch high baking pan.  Line with a parchment round in the bottom and brush with more melted butter.  Set aside.

In a large bowl, using a hand held mixer or in a stand mixer, using the whisk attachment, beat the eggs, grated orange zest and both sugars until thick and lemony in color--about 5 minutes.  

Fold in the cooled melted butter and stir completely.
Sift the flour and baking powder over the batter and fold in.  

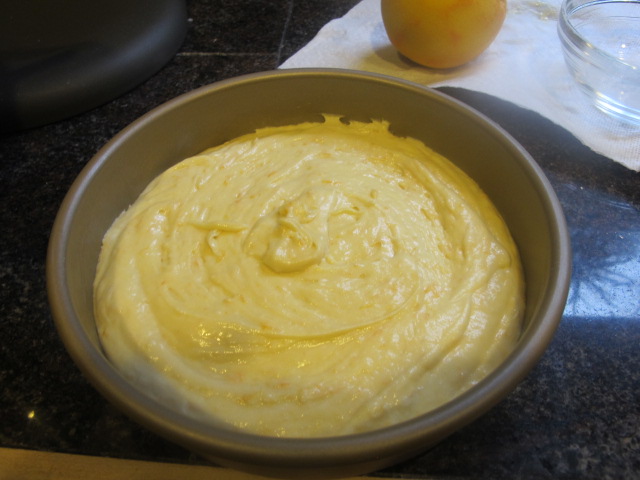
Pour batter into the prepared pan.

Bake 25 to 30 minutes.  The top will have a crust (like brownies do) so you shouldn't press down to test for doneness, but rather use a skewer--that should come out clean.

Cool 5 minutes than remove from pan onto serving platter.  Remove parchment round.  Let cool
completely before drizzling the orange glaze over the top.
Orange Glaze:
1 cup confectioners' sugar
2 to 3 T fresh orange juice (or enough to make a drizzle)
Drizzle glaze over cake.
   

A dreary evening to a rainy day, but somehow it seems a little brighter knowing I'll have a taste of sunshine for dessert.  Enjoy!


Thursday, March 1, 2012

Maple Sugar Bars

Maple Sugar Bars or as some would call them, Maple Brownies, is a recipe I came across in my recent issue "Early Spring 2012" of The Baking Sheet by King Arthur Flour Company.  It is published six times a year and is filled with just wonderfully, tested recipes that have inspired me for years.

It's been twelve years since my husband and I took a trip to Norwich, Vermont, mostly to visit the King Arthur Flour Company and see where I had been spending all my money! LOL!!  However, in the few days we were there, we also explored the surrounding areas and visited a maple farm (also called a Sugar bush or Sugar wood) and a dairy farm, where heavenly cheese was being made.  Our trip home was quite pleasant with our bounty of bread from King Arthur's Bakery, fresh cheddar cheese, and maple candy!

I admit, I was quite intrigued with the whole maple syrup process and want to share with you some interesting facts so you too can better appreciate this product.
  • The three types of trees tapped to collect the sap to make syrup are the Sugar Maple, Black Maple and Red Maple.
  • A syrup must be made entirely of maple sap to be labelled maple!
  • Vermont is the largest producer with 5.5% of the global supply.
  • Maple trees can begin being tapped between the ages of 30 to 40 years old and up to over 100 years old.
  • Usually the tapping begins in late winter to early spring and can can for 4 to 8 weeks depending on the weather (cooler is the best for the collection).
  • It takes 20 to 50 litres (depending on the concentration) to get 1 litre of syrup!
  • The syrup can be heated longer to create maple sugar, maple butter or cream, and maple candy.
  • Whereas, trees are tapped by boring holes in the trunk, modern Sugar Farms use a series of tubing to speed up the collection.
Beatrice Vaughan is the author of this recipe I am sharing with you today.  As she says, "it isn't a low budget treat" because of the price of the maple sugar, "but the maple wallop it packs, and the fact that the cookies stay moist and chewy for days makes it worth it."  I certainly agree and the cool weather we're having, in addition to the incredible aroma in my kitchen, brings me back to our trip and makes me long for a visit to this area again.

Maple Sugar Bars
I doubled the recipe to bake in a 13" x 9" pan.  However, you can easily divide the ingredients in half for a smaller version done in an 8" pan.
12 T unsalted butter ( 1 1/2 sticks) softened to room temperature
2 cups maple sugar 
2 large eggs
1/2 tsp. maple flavoring (I did not double this ingredient for the larger amount)
1/2 tsp. vanilla extract (I used Vanilla-Butternut flavoring)
2 cups King Arthur all-purpose flour
2 tsp. baking powder
1 tsp. salt
2 cups broken walnut meats, toasted in preheated oven for 6 minutes


Preheat oven to 350F-degrees.  Lightly spray a 13"x9" baking pan with a baking spray and set aside.

In a stand mixer, using the paddle attachment, cream the butter and maple sugar together.  Scrape down sides as needed.  Add eggs, one at a time, beating well between each addition, then, add the flavorings.  Whisk the dry ingredients and STIR into the batter to combine.  Stir in the broken walnut pieces. 
Spread the mixture into the greased pan.  I used an off-set spatula to assist the spreading.

 Bake in preheated oven for 25 minutes until the edges are a golden brown and just begin to pull away from the pan.  Remove from the oven and cool on a rack.
I discovered using my "pizza slicer" is a perfect tool for getting nice straight lines when cutting cookies into bars.
 I was able to get 24 (2" x 2") bars from this recipe.

These bars are moist and chewy and each bite I am reminded of watching the large vats of sap being heated to create such wonderful products.  Enjoy!

Tuesday, February 28, 2012

Light & Lemony Shortbread


I'm thinking Spring...even though the thermometer reads barely above 40-degrees today, my daffodils confirm my belief.  And, with St. Patrick's Day just a few weeks away, I thought I'd get started on baking some shortbread to give as gifts.

Shortbread is a soft crumb cookie that due to it's high fat content (butter) inhibits the long strands of gluten to form and create this texture. It is typically made from one part sugar, two parts butter, and three parts oat flour, which present day baking has substituted all-purpose flour for.  I like to create a mixture and add in rice flour for some of the all-purpose to give this "biscuit" it's rightful texture, however, if you own a food processor or Vita Mix, grinding old-fashioned oats into flour will work too.  The sugar should be superfine, which you can find in the baking aisle, but could also substitute confectioner's sugar if you can't.

The other nice quality about Shortbread is that it goes perfectly with a cup a tea--which I've been drinking a lot lately due to my cold--and did you know this is "National Hot Tea Month!"

Light & Lemony Shortbread
1 1/2 cups (3 sticks) unsalted butter, cubed and softened to room temperature
1/3 cup superfine sugar
2 T confectioners' sugar
zest of 1 lemon
1/2 tsp. Lemon extract
2 cups King Arthur all-purpose flour
1/2 cup rice flour

Preheat oven 300F-degrees.  Spray a 9" x 9" x 2" square pan with baking spray (or 2 ceramic shortbread pans).
In a stand mixer, using the paddle attachment, cream the butter and sugars together.  Scrape down the sides of the bowl and add the lemon zest and extract.  Beat again to combine.

Add the flours and mix on medium speed until the dough comes together.

Press dough into the prepared pan(s) and prick the surface with a skewer to ensure even baking. If you're baking in the square pan, lightly score the dough into squares.

Bake in preheated oven 35 to  45 minutes until golden brown.  Let cool about 5 to 7 minutes and then invert onto a baking rack.


Optional Lemon Glaze:
1 cup confectioners' sugar
juice of 1 lemon
2 tsp. Light Karo syrup
additional hot water to create a glaze

In a small bowl, mix up everything, but the hot water.  Add the hot water, one teaspoon at a time until the consistency of a thin glaze.  Spread onto the top of the shortbread and sprinkle with yellow sparkling sugar, if desired.


Use a sharp knife to cut through the squares.  Let the shortbread cool completely before serving.

Truly, there's nothing more comforting than a warm cup of tea with this shortbread when you're feeling lousy with a cold or just want to cuddle up on the sofa with a light comedy and a fire (I recommend "It's Complicated" with Meryl Streep, Alex Baldwin, and Steve Martin!) after a long day.  Enjoy!

Thursday, February 23, 2012

Savory Chili~Cheese Muffins


A couple of years ago, I featured a bread made with a mystery ingredient, compliments from one of my favorite mystery authors--JoAnne Fluke.  The spice bread's ingredient was a can of pork & beans, but you would have never known that from the delectable taste of it.

Tonight, while picking out ingredients to make a pot of soup, I saw a can of Bush's Chili Beans on the shelf, next to the cannellini beans I was using.  My memory flashed back to that bread and I thought I could easily make up a savory muffin version to go along with the soup I was making--Bean & Kale Soup.

It's been a rainy week that called for a pot of soup, but honestly I could eat soup any time and these muffins were the perfect accompaniment.

Savory Chili~Cheese Muffins
4 large eggs
1 cup vegetable oil
1-16oz. can Bush's Mild Chili Beans, pureed
1 1/2 cups granulated sugar
1 tsp. ground Cumin
1/2 tsp. Chili powder
2 green onions, chopped
1 tsp. baking soda
1/2 tsp. baking powder
1/2 tsp. salt
3 cups King Arthur all-purpose flour
3/4 cup shredded Pepper Jack Cheese
1 cup chopped walnuts (measured after chopping)

Preheat oven to 350F-degrees.  Spray a 12-cup muffin pan and a 6-cup muffin pan with a baking spray.

In a large bowl, whisk the eggs to combine, then, add the oil and whisk to thoroughly blend.  Stir in the pureed chili beans and sugar.  Add the remaining ingredients and stir until thoroughly combined.  Use a large scoop to fill the muffin tins almost to the top.  You will be able to get 18 regular sized muffins.
Bake in the preheated oven for 20 to 22 minutes until the tops of the muffins are firm to the touch.  Remove from oven and let cool about 10 minutes.  Then, turn the muffins on their side to finish cooling. (This allows their "bottoms" to dry!)

 I have another end-of-season cold and soup is just what I needed.  This recipe has so many possibilities, either sweet or savory, and I'm glad I came across it two years ago.  Enjoy!


Monday, February 20, 2012

Mardi Gras Trio Cookies

Mardi Gras (Fat Tuesday) begins tomorrow--the day before Ash Wednesday.  This festival of celebration may be different from city to city, but for many it means the last day of eating rich, fatty foods ;-D  My memory of Mardi Gras centers around my mother making pancakes on Shrove Tuesday; something we all looked forward to as the special treat of having breakfast for dinner and then, talking about what we would give up for Lent. 

Today, my daughter, Erin was very ambitious and made this beautiful King's Cake in the celebratory colors.
Maddie holds up the King Cake they'll eat tomorrow!
Since I spent most of the day in my studio, working hard, I opted for a quicker treat to bake.  The Trio Cookies are rolled in sparkling sugars in the traditional colors for Mardi Gras~Purple represents Justice ~ Gold represents Power ~ Green represents Faith and they're flavored appropriately to add a little surprise.

Mardi Gras Trio Cookies
1 cup (2 sticks) unsalted butter, at room temperature
1 cup granulated sugar
2 large eggs
1 tsp. Vanilla extract
3/4 tsp. baking soda
1/2 tsp. Kosher salt
3 cups King Arthur all-purpose flour (plus another 1/4 cup when mixing in the flavorings)

Green:
1/4 cup Pistachios, finely chopped
1/2 tsp. Almond extract
Purple:
1/2 tsp. Blackberry flavoring 
Gold:
1/2 tsp. Lemon extract
1 tsp. Lemon zest

Preheat oven o 350F-degrees.  Line a baking sheet with parchment.
In the bowl of a stand mixer, using the paddle attachment, cream the butter until fluffy.  Scrape down the sides of the bowl, then, with the mixer running on medium, slowly add the sugar.  Mix in the vanilla extract and scrape down the sides again.

In a separate bowl, mix the flour, baking soda and salt.  Add it to the dough, while the mixer is on low.  When all of the dry ingredients are added, turn off the mixer and scrape the dough onto a bread board.
  Divide the dough into thirds for adding the different flavors and colors.
 One, by one, I place a third of the dough in a bowl and stirred in the flavorings I was adding.  You're welcome to be creative and choose the flavorings you want to go with the colors.
Once all the flavorings have been added, pinch off enough dough to make a 1-inch ball and roll into the appropriate colored sugar.
Place on the lined baking sheet.
 Press the balls together and place the baking sheet into the preheated oven for 10 to 12 minutes.  The coolies should have a "golden brown" color around the edges.  Remove from the oven and let cool about 5 minutes before transferring to a rack to cool completely.
 I know my family would eat each colored ball separately to savor the flavors better and tomorrow, I will make pancakes.  What is your family tradition for Mardi Gras?  "Laissez les bons temps rouler" --Let the good times roll!  Enjoy!!    


Thursday, February 16, 2012

Chocolaty Chocolate Chip

Just in case you haven't had enough chocolate this week, I baked a chocolate~chocolate chip cookie to satisfy any chocoholic or take the stress of the day away...which is what I needed.  I'm laughing because thinking back, with eight children, maybe this is why chocolate was one of my mother's favorite flavors!

Chocolate, which comes from the cacao tree, is a legume.  I've recently learned that from taking the "What's Your Chocolate IQ?" test in the February issue of the food network magazine.  I only missed three questions out of 20, which put me in their "Super Sweet" category!--Which must mean, I have chocolate in my veins...LOL!  I know I have it in my genes ;-)

The earliest record of chocolate was in 1100 BC with the Aztec culture, who made a beverage called xocolatl, meaning "bitter water."  Subsequently, it was important in both Mayan and Aztec religious ceremonies where the priests offered up the cacao pods to their gods and served the drink.  However, it was the Europeans who added milk and sugar to sweeten it that has become what we all enjoy as chocolate today.  I was especially pleased, and know my mother would have been too, that bittersweet is actually considered "healthy" (in moderation).

Chocolaty Chocolate Chip Cookies
1 cup (2 sticks) unsalted butter, at room temperature
1 cup light or dark brown sugar, packed
3/4 cup granulated sugar
2 Vanilla beans, split and scraped or 1 T. Vanilla Extract
1/2 tsp. Red Velvet Cake Flavor
2 large egg
1/2 cup cocoa (I used a Cocoa Rouge)
2 1/2 cups King Arthur all-purpose flour
1 tsp. baking powder
1/2 tsp. baking soda
1/2 tsp. Kosher salt
1 1/4 cups bittersweet chocolate chips

Preheat oven to 350F-degrees.  Line a baking sheet with parchment and set aside.
In a bowl of a stand mixer, using the paddle attachment, cream butter.  Add the sugars and vanilla (beans or extract) and beat until fluffy, scraping down the sides between the beating.

Add the eggs, one at a time, beating well after each one.  Scrape down the sides.

In a separate bowl, mix the cocoa and the rest of the dry ingredients together, using a whisk to combine.  Add to the batter and on medium speed, beat to combine.  Stir in the chocolate chips.

Using a one-quarter-cup scoop, measure out the dough on the prepared baking sheet.  Bake in the preheated oven for about 12 minutes, rotating the pan once to ensure even baking.
 Let cool for 5 minutes, then, transfer to a rack to cool completely.  Makes 2 dozen 3-inch cookies.


Another thing I learned from this issue was that "If you treat yourself to chocolate, you're probably a more generous person."  Hmmmm, I think I know some people to send some to! Enjoy!!


Tuesday, February 14, 2012

Banana~Split Cheesecake

As I looked around my kitchen for inspiration for what to bake...I espied a couple of bananas hanging from the wooden rack.  I frowned.  I didn't feel like banana bread or muffins, but if I've learned anything from my mother, it is, "you don't throw anything out."

Literally, I've made every kind of banana bread combinations known to bakers, Bundt cakes, pudding and cupcakes, so what's left?  Well, I thought...I've never made a cheesecake and, now I had a plan.  However, I soon realized from the start that I didn't have graham cracker crumbs and had to substitute a package of Biscoff cookies that I did have. (You could have also use Nabisco Vanilla Wafers.)  I had so many ideas of what could go with a banana cheesecake--salted caramel, chocolate chips, peanut butter; the list goes on, but I had just bought a flat of California strawberries and decided on a take of a banana split.

Admittedly, I had ice cream on the brain since my sister and I had just reminisced how my mother loved to go to Farrell's Ice Cream Parlor in Springfield, Virginia, and order a triple hot fudge sundae--one of her favorite desserts.  In my final presentation, I had to add hot fudge in memory of my mother ;-)

Banana~Split Cheesecake
Crust:
8.8 oz. bag Biscoff cookies
2 T granulated sugar
7 T unsalted butter, melted

Preheat oven to 375F-degrees. Spray a spring form pan with a non-stick baking spray and line with a parchment round--makes for ease of presentation.
Place Biscoff cookies in a food processor and crush to fine crumbs.  You may need to use the pulse button to achieve an even crumb.
You should have about 2 cups of crumbs.  Add the remaining ingredients and mix.  Press crumbs into a 9-inch springform pan on the bottom and about 1 1/2-2 inches up on the sides.
Bake in the preheat oven about 9 minutes. I wrapped aluminum foil on the bottom and also placed the pan on a another baking sheet.  Remove and place on a rack to cool while you prepare the cheesecake.  Turn the oven down to 325F-degrees.


Cheesecake filling:
4- 8oz. pkg. Cream Cheese
2 T flour
1 1/4 cups granulated sugar
2 medium bananas, peeled and mashed (should have about 1 cup puree)


1 T Vanilla + 1 Vanilla bean, split and scraped
1 tsp. Banana Flavor
4 large eggs


In the bowl of a stand mixer, using the paddle attachment, beat the cream cheese until fluffy and no lumps remaining.  Scrape down the sides of the bowl and turn the mixture on medium to slowly add the sugar and the flour.  Scrape the sides again.  Add the vanilla, vanilla bean and banana flavoring and mix on medium once more.  Finally, turn on the mixer and add the eggs, one at a time, beating well after each addition.  Scrape down the bowl and remove the paddle attachment.


Pour into the 9-inch spring form and place on the middle rack of the oven.  Place a baking pan on the bottom shelf and add 1-inch of boiling water.  This method helps ensure your cheesecake doesn't crack in the middle.

 Bake 65 to 75 minutes until the center doesn't jiggle.  Turn oven off and crack the oven.  Let cool for about 30 minutes, then, remove to a baking rack to cool completely to room temperature.  Cover and let cheesecake chill for at least 8 hours or up to 3 days.  At this point, you could also freeze it for later.
Pineapple Topping:
1 20oz. can of Pineapple tidbits in juice, drained and cut into 1/2-inch pieces
1/3 cup Turbinado sugar
1 Vanilla bean, split and scraped


In a saute pan, on medium heat, place the sugar in the pan.  As it starts to melt, add the pineapple and vanilla, making sure to add in the scraped bean as well. When the mixture comes to a boil, turn down the heat to low and let the mixture cook for 30 minutes until a golden brown color occurs.  Remove the vanilla bean and transfer to a dish--refrigerate to cool.


Strawberry Topping:
2 pints of fresh strawberries, hulled and cut into 1/2-inch pieces
1/3 cup Turbinado sugar
1 Vanilla bean, split and scraped
1 T cornstarch


Repeat the method as in the Pineapple Topping.  The strawberries will release more juice, so you need to make a roux to thicken.  I mixed cornstarch with 2 teaspoons of water and blended to a smooth mixture.  Add to the strawberry mixture and cook another 2-3 minutes.  Remove the vanilla bean and transfer to a bowl to cool.
The hot fudge sauce I made comes from the Serendipity Sundaes book by Stephen Bruce with Sarah Key--it's one of my favorites because it doesn't have corn syrup in it which has anti-setting properties.


Fabulous Hot Fudge Sauce:

Makes about 1 1/2 cups
4 T unsalted butter (1/2 stick)
3 oz. bittersweet chocolate, chopped or use chips
1/4 cup unsweetened cocoa powder
1/2 cup granulated sugar
1/2 cup light cream
Pinch of salt
1 tsp. Vanilla extract


Combine the first six ingredients in a heavy-bottomed saucepan.  Heat to boiling, stirring constantly until smooth.  Remove from heat.  Add the vanilla and stir again.  Serve immediately or microwave 20 seconds to heat.


To assemble:
I spooned the pineapple topping in the center of the cheesecake and surrounded it with the strawberry topping.  I chilled the cheesecake once more for about 1 hour.
To plate:  I placed a ring of hot fudge around the dessert dish, then, cut a slice of cheesecake to placed it in the center.  Finally, a piping of fresh whipped cream on top finishes off the Banana~Split!


My mother would have asked for triple hot fudge with her cheesecake..."because you can never have too much chocolate." Enjoy! 


I hope you all had a wonderful Valentine's Day.  My hubby brought me pink roses, which my cat enjoyed as much as I did.  LOL!


Sunday, February 12, 2012

A Breathe of Spring~February's Give-Away

This past week I got to take in a little breathe of Spring by attending the 24th Annual Flower Show in Seattle, Washington.  I say breathe because as soon as you walk into the Exhibit Hall, you're greeted with the scents of Hyacinthe's, Lilies, Daffodils, Tulips, Primroses, Magnolia, Hellebores, to name a few. I look forward to this event each year to give me the assurance that Spring is definitely coming!
 This month's apron is bright with butterflies in pink, orange, and yellow hues--I loved the fabric the moment I saw it in the store and knew it would be perfect for February.  Who cares what Punxsutawney Phil predicts! 

The rules are simple~every time you post a comment your name is placed into the garden pot.  And, the more you post, the more chances you have to win...I'm feeling generous for being so tardy in my sewing-LOL!

Good Luck, XOXO


Friday, February 10, 2012

Red Velvet Scones

Valentine's Day is around the corner and while chocolate and roses maybe the most sought after, I like to start the day with breakfast, so I  came up with a special scone for the occasion. In addition, Go Red for Women in February has become as popular as the pink ribbon for breast cancer in October and I wanted to emphasize this as much as the one day we exchange gifts of love.

My Grandma Gladys died, at age 72,  of heart disease in 1973, the day before our daughter Kelly turned one year old.  Because of her condition, she never even got to hold her youngest great-granddaughter--something that made me extremely sad.  Awareness and prevention is the focus of various events that are held all over the country in hopes that one day heart disease and stroke will be a thing of the past;  heart disease still remains the #1 killer of women, ahead of the top three cancers.

Red Velvet Scones
4 cups King Arthur all-purpose flour
2 T. Dutch-processed cocoa
1 T. baking powder
1 tsp. baking soda
1/3 cup granulated sugar
1 tsp. salt
10 T unsalted butter, cut into 1/2-inch pieces
1 1/3 buttermilk
1 large egg
2 tsp. Red Velvet Cake Flavor (or 1 T red food coloring)

3 T. half & half
Sparkling Sugar
Preheat oven to 400F-degrees.  Line a baking sheet with parchment paper.

In a stand mixer, with a paddle attachment, mix all the dry ingredients.  Add the butter pieces, in batches, until it is mixed into the dry ingredients.  Whisk the egg and Red Velvet Cake Flavor (or food coloring) into the buttermilk.  While the mixer is running, slowly add the buttermilk mixture and beat just until the dough comes together.  Transfer the dough to a lightly floured bread board and knead a few times until the dough is smooth.  Roll out the dough to 3/4-inch thick and cut with a round or heart-shaped cookie cutter.
Transfer scones to a baking sheet and brush the tops with the half & half, then, sprinkle with the sparkling sugar.

Bake in the preheated oven 15 to 17 minutes until done.  Let cool while you make the Mock Devonshire Cream (optional, but sooooo good!)

Mock Devonshire Cream
8 oz. pkg. of cream cheese
1 cup heavy cream
1 cup confectioners' sugar
1 tsp. lemon zest
2 tsp. lemon juice

In a stand mixer, using the whisk attachment, beat the cream cheese until light and fluffy.  While the mixer is running, slowly add the heavy cream.  When the cream cheese and heavy cream are thoroughly combined, add the confectioners' sugar, lemon zest and juice.  Start the mixer on low and gradually speed up to high to whip the cream.  Place in a bowl and serve with the scones.  Additionally, you could also have some raspberry or strawberry jam to top the cream!
After breakfast, take a walk with the one you love for exercise...and some alone time--it's good for the heart.  Enjoy!