Wednesday, April 5, 2017

Easy No-Knead Soft Sandwich Bread & April's Give-Away Apron

I hear so many times from people how hard it is to bake bread.  Well, no more thanks to a new cookbook I came across; Bread, Toast, Crumbs by Alexandra Stafford.  This no-knead bread is super easy and these days with all I've got going, was perfect choice for my mid-week bake.

Like Ms. Stafford, I grew up with my mother baking bread, which she made look so easy.  She built my confidence to try yeast rolls from an early age and I've never been afraid to try anything again!  However, admittedly, yeast breads can be tricky; careful not to "kill" the yeast with too hot liquids or over-kneading or worse, over-proofing.  This recipe definitely takes all the fear out of making bread to impress your family.

Soft Sandwich Bread
6 cups (768g) King Arthur all-purpose flour
1 T Kosher salt
1 T granulated sugar
2 1/2 tsp. instant yeast
3 cups lukewarm water
1/2 cup vegetable oil, or other "neutral" oil

Softened unsalted butter, for greasing

In a large bowl, measure out all the dry ingredients.  Whisk together, then change to a rubber spatula and add the liquid (water + oil).  Mix until all the liquid is absorbed and the dough is formed into a sticky dough ball.

Cover the bowl with a damp towel or plastic wrap and set aside in a warm place to rise for 1 1/2 to 2 hours, or until the dough has doubled in bulk.

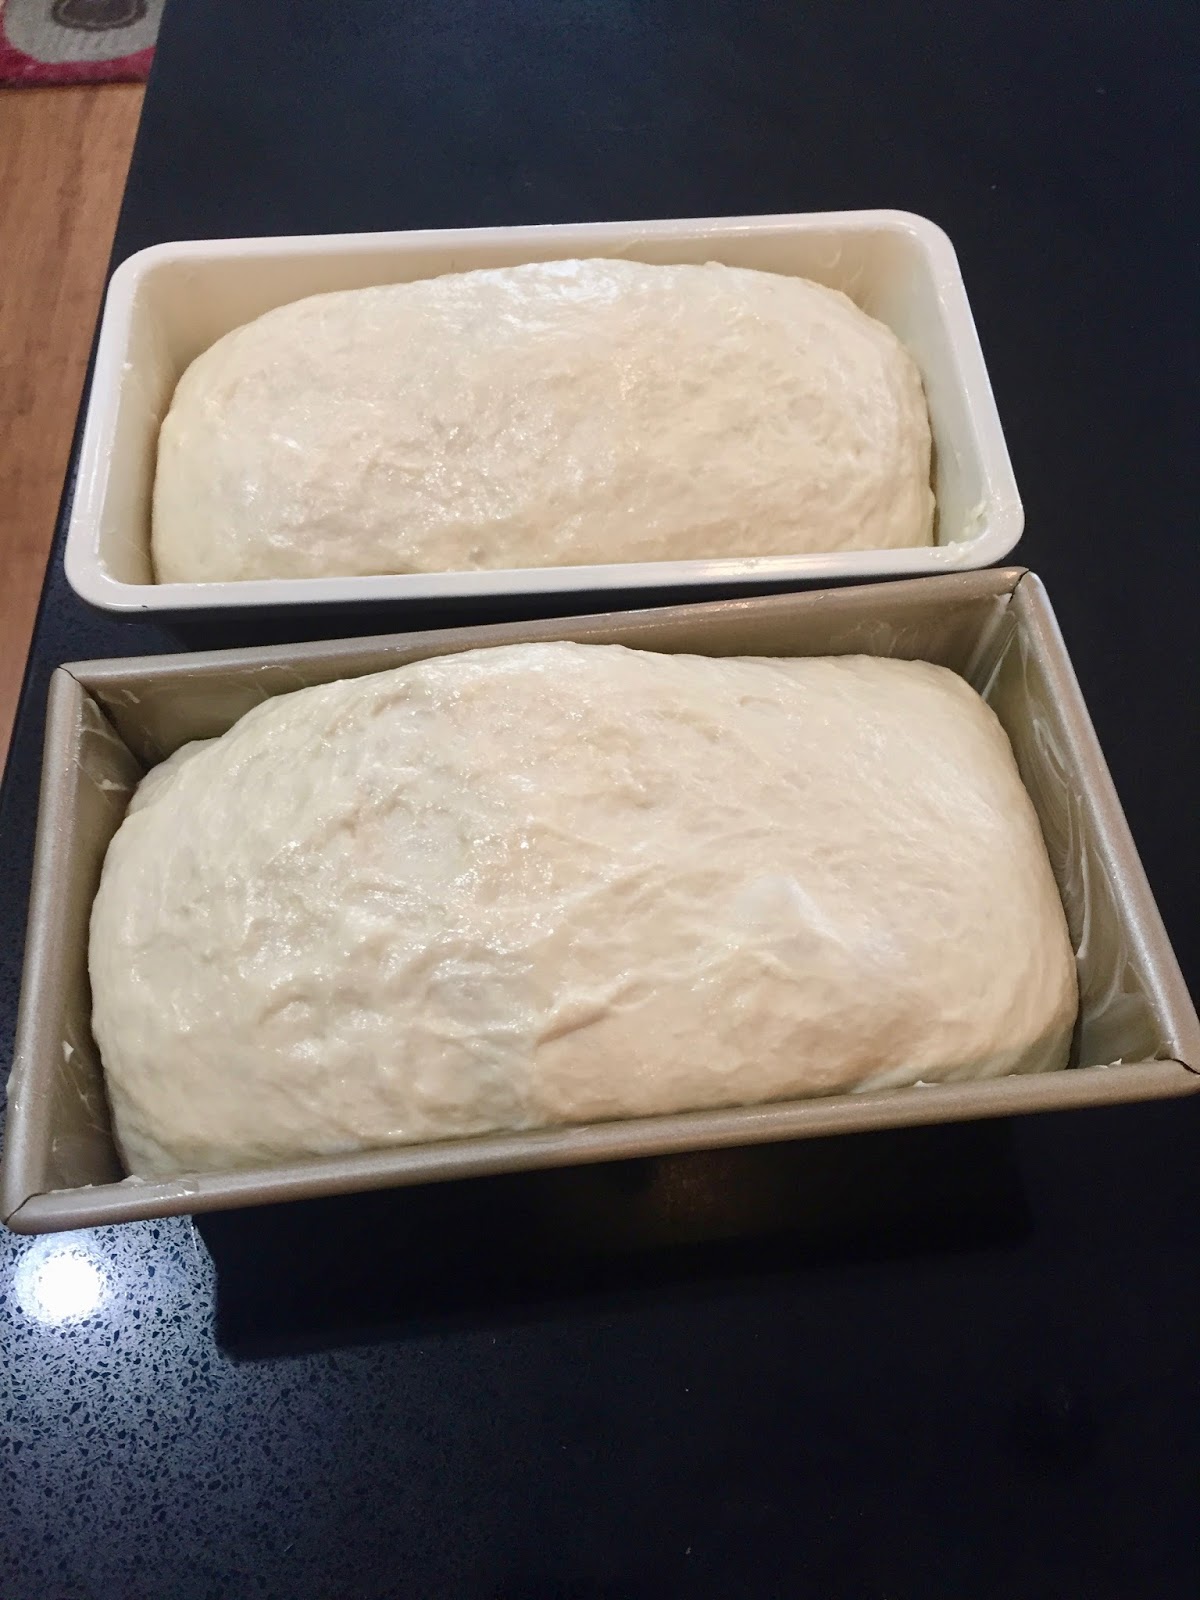
Using the soften unsalted butter, grease two 8 1/2 x 4 1/2-inch loaf pans.  Using two forks, deflate the dough by releasing it from the sides of the bowl and pulling it toward the center. Rotate the bowl a quarter turn as you deflate, turning the mass into a rough dough ball once more.

Using the two forks and working from the center out, separate the dough into two equal pieces.
Grease your hands with some of the softened unsalted butter and lift each half of dough into the prepared pan.  DO NOT COVER THE PANS.  Let the dough rise on the countertop near the oven or another warm place, draft-free for 20-25 minutes or until the top of the dough just crown the rims of the pan.  Preheat oven to 375F-degrees.

Bake in the preheated oven for 40 to 45 minutes, until the tops are golden brown and firm to touch.  Remove the pans from the oven and turn the loaves out onto a cooling rack, resting on their sides.
Allow to cool before slicing...if you can resist. Enjoy!
Now, for this month's Give-Away Apron...I chose Batiks that reminded me of the Cherry Blossoms blooming in Spring.  If you would like to win this apron, comment on any of the posts this month. Good Luck!

Monday, April 3, 2017

Nanaimo Bars & March's Apron Winner...

Nanaimo Bars were featured in a fundraising cookbook for Nanaimo, on Vancouver Island in 1952.  I saw them in the Spring issue of Sift magazine (published by King Arthur Flour) and the recipe was calling my name:-)

It's a layered bar, with just a quick 10 minute bake for the bottom layer only.  There are so many varieties to this cookie; from mint to coconut, and even mocha.  I chose to add coconut.  I've been wanting to make these ever since we took a trip to British Columbia when we lived in the Pacific Northwest.  I'm a sucker for a good bar cookie!

Nanaimo Bars
Bottom Layer:
1/2 cup (1 stick) unsalted butter, melted
1/4 cup sugar
1/3 cup unsweetened Dutch-processed cocoa
1/4 tsp. salt
1 large egg
1 cup sweetened shredded coconut
1/2 cup chopped walnuts
1 tsp. Vanilla extract
2 cups graham cracker crumbs

Middle Layer:
1/2 cup (1 stick) unsalted butter, at room temperature
2 cups sifted confectioners' sugar
2 T milk
2 T instant vanilla pudding mix
1/2 tsp. Vanilla extract

Top Layer:
1 cup (6 ounces) semi-sweet chocolate or chocolate chips
2 T heavy cream (or you can use unsalted butter or vegetable shortening)

Preheat oven to 350F-degrees.  Lightly grease a 9" x 13" baking pan.

In a medium saucepan, melt the butter and remove from the heat, then stir in the sugar, salt, and cocoa powder.  Mix the egg and vanilla extract and stir in the graham cracker crumbs, coconut, and walnuts.  Press the mixture into a greased baking pan.  Bake for 10 minutes.  Remove from the oven and cool completely.
For the second layer--Cream the butter and 1 cup of the confectioners' sugar together.  Combine the milk, vanilla and the pudding mix and add to this mixture.  Add the rest of the confectioners' sugar and beat until smooth.  Spread the mixture on top of the bottom layer and refrigerate until chilled.  About 1 hour.  (I was a bit impatient and it resulted in the top layer mixing a bit with the custard layer!)


For the top layer--Melt the chocolate and heavy cream (or butter or shortening) over medium heat; stir until the mixture is smooth. Pour over the custard layer and use an off-set spatula to spread.  Refrigerate again until the chocolate is set.  Cut into bars with a sharp knife.

These bars are well worth trying. Enjoy!

Now, for the winner of March's Give-Away Apron--Louise-Arden!  Please contact me and I will send this to you ASAP!

I will have April's Apron up tomorrow:-D

Friday, March 31, 2017

Rigatoni Pie

One of my favorite dishes that my mother made was Spaghetti Pie; you know, the leftover spaghetti mixed with eggs, ricotta cheese and baked in a pie plate with marinara sauce and mozzarella cheese on top.  So, when I saw this version using Rigatoni on FaceBook, I had to try it.  However, my version takes the original a step further by filling the tubes of Rigatoni with a mixture of ricotta, parmesan cheese and finely chopped spinach!

Rigatoni Pie

Filling:
1 cup Ricotta cheese (I use whole milk)
1 cup of fresh spinach, chopped and sauce with 1 T olive oil and 1 clove of garlic
1/2 cup freshly greatly parmesan cheese

1lb. Rigatoni, boil, drain, and rinse in cool water

1 jar (32oz) Marinara sauce
1 to 1 1/2 cups grated Mozzarella cheese
Additional Parmesan Cheese

Preheat oven to 375F-degrees and spray a 9" Springform pan with baking spray, then line with parchment.
Add about 1/3 of the Marinara sauce to the bottom of the Springform pan.
Now, the fun part...like little "soldiers" stand up the Rigatoni, covering the entire pan.
I filled a pastry bag, using Tip #804, but you could also fill a gallon plastic storage bag and cut a small hole in one corner.  Fill each tube and before you go "yikes," it took less than five minutes to do!
Spoon 1 1/2 cups of marinara sauce on top of the Rigatoni, then sprinkle with mozzarella cheese.

Place the springform pan on a baking sheet, lined with aluminum foil and also cover the pan with aluminum foil.  Bake in the preheated oven for 40 minutes.  Remove the aluminum foil on top of the springform pan and sprinkle some additional Parmesan cheese on top.  Lower the temperature to 350F-degrees and bake another 20 minutes or until bubbly and golden brown on top.
Allow to set about 10 minutes, then remove the sides of the springform pan.
Cut into wedges and serve.  With freshly baked rolls and a garden salad, this is a perfect meal.  Comforting thoughts of Mom's spaghetti pie came back. Enjoy!

Thursday, March 23, 2017

Spring Break


We are lucky enough to have our grands visiting this week; our grandson's Spring break and the granddaughters flew down to see him for a few days since their break isn't until April.  It's been fun to have these three here and is the reason I haven't been posting:-D

The weather has been beautiful and days were spent outside.  We have a wonderful park that we went to--Pullen Park and the kids enjoyed climbing and just appreciating the sunny weather. (They live in areas where winter continues to hang on!)

The girls left on Tuesday, but we packed a lot of fun into those four days they were here!

Our grandson and I made pizza last night and a Classic Vanilla Bundt Cake that was wonderful with fresh strawberries.  The recipe for the cake is by King Arthur Flour and I've given the link if you're interested in a cake for those summer berries.
http://www.kingarthurflour.com/recipes/classic-vanilla-bundt-cake-recipe

I'll be catching up with everyone soon--our grandson leaves tomorrow evening.

Tuesday, March 14, 2017

Pi Day--Strawberry~Rhubarb

March 14th...3.14 (159265359) is Pi Day and like so many years before, I love to bake a pie, whether it be sweet or savory.  Today, wishing spring would come back, I made a Strawberry~Rhubarb Pie.  It wasn't so much about the filling, but the pie crust.  Recently, I did an on-line class with American Test Kitchen on pies and especially, "Fail-Proof Pie Crust."  Isn't that what makes a great pie?  Anyway, I was intrigued by a new ingredient, vodka.  I had heard people say they always used it in their dough, but never tried it for myself.

My mom made good pies and her crusts were most always made with shortening, not butter, although a few times, I knew she used lard.  When I was first married, I used only shortening; the recipe from The Betty Crocker cookbook, but then I took a pastry course at the CIA and learned it was butter that made the best pate brisee.  Of course, you had to be careful not to overwork the dough and form gluten!  I developed my own recipe that I've used so many times before on my blog, incorporating vinegar, large egg, and baking powder to give a Never-Fail Pie Dough that even with over working, it's still flakey.  However, the use of vodka stilled "called my name" and after making up pie dough today, I will never go back to anything else!

Fail-Proof Pie Crust
12 T ( 1 1/2 sticks) unsalted butter, cut into pieces
1/2 c (8T) vegetable shortening, cut into pieces

Place the butter and shortening on separate plates and chill in the freezer at least 30 minutes. Also, in a 1-cup measure, add cold water and ice cubes and allow to chill.
Note:  You don't need a fancy vodka, but you should be storing it in the freezer!

2 1/2 cups King Arthur all-purpose flour (divided)
2 T granulated sugar
1 tsp. Kosher salt
1/4 cup chilled water
1/4 cup chilled vodka

In a food processor, mix 1 1/2 cups flour, sugar and salt and pulse a couple of times to incorporate.  Take the butter and shortening out of the freezer and scatter on top of the dry ingredients.  Pulse until no uneven clumps exist.  Add 1 cup flour and pulse 4 to 6 times.


Do not add the liquid to the food processor, but rather transfer this mixture to a large bowl.  Pour the water and vodka over the surface and use a rubber spatula to stir until the dough sticks together.
Divide the dough in half and wrap the 4-inch disk with plastic wrap.  Refrigerate 1 hour or up to 2 days.
Allow the dough to sit for 10 minutes before rolling out.  Makes enough for a 2-crust pie.

Lots of fruits and berries will be coming our way over the new few months of Spring/Summer; give this dough a try and see how wonderful it is.  Enjoy!


Friday, March 10, 2017

Orange~Chocolate Pistachio Sable'

Sable's is a French cookie that originated in Sable'-sur-Sarthe in 1670.  The word sable' means "sand" and it takes the place of the English word "breadcrumbs" in the context of baking.  Simply, the butter is rubbed into the sugar and flour to form particles of dough resembling breadcrumbs or sand! Today, I used my stand mixer and made these tender cookies.

I've always been impressed by these tender cookies in the bakeries and when I recently flew through Paris (on my way to Birmingham, England), I was in awe once more of the cases of beautiful cookies.  Since this week has definitely become Cookie Week, I decided to show you how easy these cookies are to make.  I've paired two of my favorite flavors, chocolate and orange and added roasted pistachios, but you can substitute for your taste.

Orange~Chocolate Pistachio Sable'

Orange Dough:
3/4 cup (170g) (1 1/2 sticks) unsalted butter, softened
Zest of one large orange
1 cup (120g) confectioners' (icing) sugar
1 large egg
1 T orange juice, fresh is the best
1 1/2 cups (188g) King Arthur all-purpose flour (plain flour)
1 1/4 cups (120g) Almond Flour
1/2 tsp. Kosher salt
1 cup (113g) chopped roasted salted pistachios

In a bowl of a stand mixer, using the paddle attachment, beat butter, confectioners' sugar and zest until fluffy--3 to 4 minutes.  Add the egg and juice and mix to combine; don't worry if the mixture  oks "curdled"--adding the dry ingredients will bring the dough together.  Gradually add the flours and salt, then the pistachios, beating just until they're combined.

Prepare an 8-inch square baking pan lined with plastic wrap and press the orange dough into it.
Place into the refrigerator to chill while you make up the chocolate dough.  No need to wash the mixing bowl!

Chocolate Dough:
1 cup (227g) (2 sticks) unsalted butter, softened
1 cup (120g) confectioners' (icing) sugar
1 T orange juice
1 tsp. vanilla extract
1 1/2 cups (188g) King Arthur all-purpose flour (plain flour)
1/2 cup (43g) unsweetened cocoa powder
1/2 tsp. Kosher salt
1 cup chopped roasted salted pistachios

1 cup (200g) Turbinado sugar for dipping the ends in before baking

Mix the chocolate dough as above for the orange dough.  Take out the pan with the orange dough from the refrigerator and press the chocolate dough on top.

Wrap the plastic wrap over the surface and place back into the refrigerator for at least 2 hours, until firm.

Preheat oven to 350F-degrees (178C-degrees).  Line two baking sheets with parchment paper.

Remove from refrigerator and use the plastic wrap to "lift" the dough from the pan.  Place on a cutting board and using a serrated knife, divide dough into four logs.  Slice the logs into 1/4-inch slices.
Dip the ends into the Turbinado sugar.
Place on the baking sheet, spacing them at least 1/2-inch apart--I did a little more.
Bake in the preheated oven 10 to 12 minutes or until firm and just beginning to brown at the edges.  Let cool completely on a rack.  Enjoy!

Tuesday, March 7, 2017

Malted Dark Chocolate Pecan Cookies

There's really nothing more comforting, as a kid or an adult, than a cookie.  I have fond memories of my mother baking peanut butter, snickerdoodle, and chocolate chip, among others, for our lunches or afternoon snack.   I also remember the "store-bought" ginger snaps that my grandparents kept in their cookie jar for us to have when we stopped in before our walk up the path to our home as we told them about our day.  And, when our daughters went to Mount Holyoke, I remember them telling me about the tradition of M & C's (milk and cookies) before retiring to their beds at night.

When I was in England, crisp cookies are called "biscuits."  The cookie has existed for as long as baking as been documented--back to the 7th century AD Persia, just shortly after sugar became common in the area.  They spread through England with the Muslim conquest of Spain and by the 14th century, they were common in all levels of society throughout Europe.  However, cookies came to America through the Dutch in New Amsterdam in the late 1620s.  The Dutch word, "kookie" was Anglicized to cookie by 1703.  Modern cookies, with butter and sugar creamed together was not common until the 18th century.  The chocolate chip cookie, which accounts for more than half of the cookies baked at home, was invented in 1930 at the Toll House Inn by Ruth Graves in Wakefield, Massachusetts.  I tweaked her recipe today and added Malted Milk Powder.

Malted Milk Powder is made from a mixture of malted barley, wheat flour, and evaporated whole milk.  Diastatic malt has enzymes that break down starch into sugar and this is what I used to add to my bread dough to help the dough rise and create a certain crust.  Today, it added a crispness to these cookies and I think, made them perfect dunkers!

Malted Dark Chocolate Pecan Cookies
(For my friends in Europe, especially England--I've converted measurements to grams as well)

14T (1 3/4 sticks) (200g) unsalted butter, melted and cooled
1 cup (175g) firmly packed light brown sugar
3/4 cup (165g) granulated sugar
1 large egg + 1 yolk
2 tsp. Vanilla extract
1/2 tsp. baking soda
1/4 tsp. baking powder
1 tsp. water
2 cups (300g) King Arthur all-purpose flour (plain flour)
3/4 cup (90g) Malted Milk Powder
1/4 tsp. Kosher salt
1 1/4 cups (200g) bittersweet chocolate chips
1 cup (120g) pecans, chopped

Preheat oven to 325F-degrees (163C) and line two baking sheets with parchment paper.

In a bowl of a stand mixer, using the paddle attachment, cream the melted butter and sugars together thoroughly.  Add the egg plus the yolk and mix together.  Add the vanilla extract and water, then cream once more.

Add the dry ingredients and mix on low, when almost incorporated, add the chocolate chips and pecans.  Mix to combine thoroughly.

Using a 1/4 cup scoop (or 1/4 cup measurement), measure out dough and place on the lined baking sheets, pressing down slightly on the mound of dough.

Leave space around the cookies to spread slightly.  I was able to get 6 large cookies per baking sheet.
Bake in the preheated oven for 20 minutes; I baked both sheets at once, rotating them on the oven shelf to ensure even baking and golden brown in color.
Remove cookies from the oven and allow to set on the sheet for 10 minutes, then transfer to a rack to cool completely. Enjoy and Happy Spring from North Carolina!


My trip to Birmingham, England was memorable and even though I didn't get out while during the trade show, I certainly got to meet a lot of new friends.  Here's our booth:


We laughed that my sweater matched the carpet between the booths!