Wednesday, January 30, 2013

Strawberry Sweet Buns


My mother used to make us, what she called "Fruit Pizza" in the summertime.  Usually the fruits were sliced peaches or plums placed on top of a sweet dough that had been stretched to fit a long baking sheet and then, a heavy sprinkling of sugar and cinnamon over the fruit; enough to feed a large family!  Subsequently, I like to take her ideas and add my own twist because that's what she always encouraged me to do.

Today, I made up a quick brioche-like dough to create individual fruit pizzas or as I have named them--Strawberry Sweet Buns.  I've started to see strawberries from California in the market,  so I know they're pretty fresh and along with some of my homemade strawberry jam, from last summer, I knew this would be my choice of fruit.  It's not to say, that peaches with some homemade peach jam, or raspberries with raspberry jam or blueberries with...well, you get the picture, wouldn't be just as good:-D

The garden strawberry was first cultivated in Brittany, France in the 1750s; prior to that, wild strawberries were the common source used in baking and preserving.  I know my Sis would loved these sweet buns, as she was often caught in the strawberry patch at my grandparent's house!  When we both lived in California, we could see acres of strawberry plants, around Oxnard, mound with black plastic covering their roots.  Not only did that plastic keep weeding down, but it absorbs the sunshine and produces earlier crops by warming up the ground.  The Strawberry Festival in Oxnard, California was an event held in May and we'd all looked forward to, not only the attractions, but the wonderful treats made from strawberries.  My daughters' favorite was "fried dough" with strawberries and whipped cream on top.  These sweet buns do bring back that memory as well...baked, not fried, of course:-D

Strawberry Sweet Buns
Yeast dough:

1 T. dry Saf-instant Gold Yeast
1/2 cup warm water
1/2 tsp. honey

Mix all the ingredients and proof the yeast in a 1-cup glass measure for 5 to 7 minutes

4 1/2 cups King Arthur all-purpose flour + 2 to 4 T as needed
2 tsp. salt

Place dry ingredients into a bowl of a stand mixer, using the dough hook, briefly mix these two ingredients together.

3/4 cup milk
1/3 cup honey
1 large egg
1/2 cup (1 stick) unsalted butter, very soft (but not melted)

In a small sauce pan, over medium heat, mix the milk and honey together.  Stir while heating and remove after the honey has blended into the very warm milk.

Add the milk and honey to the dry ingredients and blend together about 1 minute.  Add the egg and the proofed yeast and mix again.
Add the softened butter, a tablespoon at a time and "knead" with the dough hook until the mixture pulls away from the sides of the bowl, adding a tablespoon of flour as needed, but keeping this dough soft.
Lightly flour a bread board and turn dough out onto the board.  Knead a few times to get a smooth ball.  Place in a large bowl that has been brushed with melted butter and then, cover with plastic wrap.  Allow to rise about 1 to 1 1/2 hours--until doubled.

 Meanwhile, prepare the filling:

1 1/2 cups strawberries, washed, hulled, and cut into 1/2-inch pieces
 1/2 cup (preferably homemade) strawberry jam
Streusel:
4 T unsalted butter, at room temperature
1/2 cup light brown sugar, firmly packed
1/4 cup King Arthur all-purpose flour
1/2 tsp. ground cinnamon
1/2 tsp. ground cardamon

Mix all the dry ingredients together, then cut in the butter to create the streusel.
Punch down dough and divide into eight pieces.
 Roll each piece into a round ball and set in place on a parchment-lined baking sheet.  Brush the smooth balls with 1 large egg + 1 T water, whisked together, then, sprinkle with some granulated sugar and place plastic over them just to rest while you preheat the oven to 375F-degrees.


My oven took about 20 minutes to preheat.  This time allows the dough to rest and soften again.  Press down the dough to flatten (like pizza!) 
Add about 1 tablespoon of strawberry jam in the center.
Divide strawberries among the pastries, on top of the jam.
Finally, add the streusel; sprinkling it on top of the fresh berries.
 Bake immediately in the preheated oven for 13 to 15 minutes, until golden brown and bubbly.
Allow to cool, then mix up a vanilla-bean glaze to drizzle on top.

1 cup confectioners' sugar
1 T light Karo syrup
4 to 5 T heavy cream
1 vanilla bean split and scraped (or 1 tsp. vanilla extract)

Mix all ingredients for a thin glaze.
Now, how would you like to have these in the morning or with afternoon tea?  On a rainy day, it was like having a bit of sunshine~
...right in my kitchen. Enjoy!


Sunday, January 27, 2013

[Senate] Bean Soup & Cornbread


One of the best things about growing up in Maryland was the proximity to Washington, D.C. and having class trips to the Smithsonian, National Art Gallery, the Memorials, the White House, the Capitol...well I could go on and on.  Being exposed to the richness of history in one city gave me a sense of pride and I never tired of the yearly field trips starting as early as 1st grade.
(photo from the internet)
Today, with rain and a chill in the air, I was trying to decide what to make for our dinner when the thought of Senate Bean Soup came into my head.  I was in 6th grade when we visited the Capitol Building and the National Art Museum and had planned ahead of time to save up some babysitting money to be able to have lunch in the Senate's restaurant with my friends.  While they were placing hot meals on their trays, I opted for a bowl of bean soup with a square of cornbread.  Looking back, I know I was drawn to the familiar; my mother made the best bean soup and even though it was probably cost-effective for a large family, I saw it as a very special meal when she made her recipe. 

Over the last 25 years, since switching my diet to vegetarian, I've had to make my own version of my mother's soup, eliminating the ham hocks that she cooked (until the meat fell off the bone) with the navy beans.  Imitating that flavor that has been made since 1903 when Senator Knute Nelson from Minnesota requested the soup to be a part of the lunch meal at the restaurant in the Capitol Building, was no easy feat.  However, I think I've come up with a pretty good substitution and I can still have my memories.

Navy Bean Soup (with kale)
2 cups dry navy beans
1 small onion, peeled and diced
2 cloves garlic, minced
1 carrot, peeled and diced
1 - 2 stalks of celery, diced
2 T olive oil
6 cups water + 3 "Not-Chick'n" bouillon cubes (or substitute 6 cups of vegetable broth)
6 to 8 drops of Liquid Smoke
salt & pepper to taste
1 bunch of fresh kale, washed thoroughly, remove the center stem and chopped (optional)

Wash and pick over the dry navy beans, removing any "stones" or discolored beans.  Place in a medium sauce pan and cover with water.  Bring beans to a boil, then place a lid on the pan and allow to sit for one to two hours.  

Prepare veggies.  Place a soup pan or Dutch-oven, over medium heat and after a minute, add the olive oil, then the veggies and saute until soft.  Drain the beans and add to the veggie mixture.  

Add the water and bouillon (or vegetable broth) and Liquid Smoke and bring to a boil.  Turn the heat down to low and cover with a lid.  Continue to cook 1 to 1 1/2 hours or until beans are tender.  About 15 to 20 minutes before the beans are done, add the kale, if using.

While soup is cooking, make up your favorite cornbread.  I've included my easy recipe because I associate this soup with cornbread:-D

Cornbread
1 cup King Arthur all-purpose flour
1 cup cornmeal
1/4 cup granulated sugar
1 T baking powder
1/2 tsp. salt
4 T unsalted butter, melted
1 large egg
1 cup milk
1/4 cup sour cream

Preheat oven to 375F-degrees.  Spray a 6-cup mini bundt pan with baking spray.
In a large bowl, mix all the dry ingredients.  In a small bowl, mix the egg, milk, melted butter and sour cream, then, add it to the dry ingredients and stir to combine.
 Spoon batter into the prepared pan.  Bake for 18 minutes.
Meanwhile, melt 2 T butter and 2 T honey in a small saucepan.  After 18 minutes, remove pan and brush this mixture onto the tops of the cornbread bundt pan.
Return to the oven and bake an additional 2 to 3 minutes.  Remove from the oven and allow to cool slightly, then turn out onto a parchment-line rack.
Soup was perfect for this weather.  What comfort food did you make today with the cold weather outside?  Enjoy!


Friday, January 25, 2013

Tunnel of Lemon Bundt Cake

In 1966, a woman named, Ella Helfrich, took second place in the annual Pillsbury Bake-Off with her recipe for Tunnel of Fudge Cake.  She incorporated a box of Double-Dutch Chocolate Icing in the cake which produced a fudgy center reminiscent of under cook brownies...and it was delicious.  My sister first baked this and brought it to my mom's for one of our family get-togethers.  An overnight success with more than 200,000 requests for the recipe, that didn't even win the grand prize!  Several years ago, Pillsbury stop producing the boxed icing--reasons unknown, but not to worry there are several recipes out there that recreate this incredible cake with it's fudge-like center and that's what inspired me today.

Lemon was one of my mother's favorite flavors...next to chocolate and since I just bought a bag, I decided to experiment with an idea that's been floating around in my head.  Have you ever had one of those?  With just a few changes, I was able to recreate a tunnel of lemony filling that resembles a curd and, furthermore, there is no yellow food coloring or photo touch up on the color of this cake.  The golden yellow colour comes from lemons and eggs!

Tunnel of Lemon Bundt Cake
1 3/4 cup (3 sticks + 6T) unsalted butter, at room temperature
1 3/4 cup granulated sugar
zest of 2 lemons
1 T Lemon Juice Powder
6 large eggs
2 cups confectioners' sugar
2 3/4 cups King Arthur all-purpose flour
1 cup Lemon Bits

Preheat oven to 350F-degrees.  Spray a 12-cup bundt pan with a baking spray and set aside.

In a stand mixer, using the paddle attachment, cream the butter and sugar until fluffy--about 5 minutes.  Add the zest and Lemon Juice Powder and mix once more.

Add the eggs, one at a time, beating well after each addition and scraping down the sides of the bowl with a spatula, as needed.

Add the confectioners' sugar gradually while the mixer is running on Speed #3.  Scrape down sides once more and remove the bowl from the stand.

Stir in the flour and Lemon Bits, mixing thoroughly to combine.
Spoon batter into the prepared bundt pan.  Bake for 45 to 50 minutes.
 Because the center is "soft," normal testing methods of using a wooden skewer won't work.  Look for the cake to start pulling away from the sides of the pan.  Remove from the oven and leave in the pan for 90-minutes.  Yes, that's 1 1/2 hours!!
After the time, turn the cake out onto the serving plate.  Allow to cool completely (about 1 hour more) before cutting into it. The original Tunnel of Fudge did have an glaze, so I made one too:

1 1/2 cups confectioners' sugar
juice of 1 lemon (about 3 to 4 T)
2 tsp. light Karo Syrup

Drizzle the glaze over the cake and serve.

See the tunnel of luscious lemon curd! 
Mission complete!  Now, whether I feel like chocolate or lemon...I have a recipe to satisfy that craving. Enjoy!


Thursday, January 24, 2013

A Touch of Spring

I just feel so badly for all my family & friends who are in the midst of this cold front that has settled over them.  I decided this morning to share a wreath I made in paper with my new dies and to give you a preview of Spring to keep you warm.  One of my favorite writers, Hal Borland said...

"No Winter lasts forever,
No Spring skips its turn!"


  I'm sending warm wishes to all my friends. Enjoy!

Wednesday, January 23, 2013

Vermont Cheese Rolls

One of my favorite poems, that we read in English 201, was the Rubaiyat by Omar Khayyam..."a jug of wine, a loaf of bread and thou." Of course, for my hubby, a good sharp cheddar is what he'd add and so I did one better--I added some Vermont Cheese Powder!

This powder is the same as the packet you find in Kraft Mac & Cheese, so if you don't want to order it, use a whole packet. 
The chill of the day called for homemade bread and I felt the need to knead:-D  I look through the pantry and pulled out some bread flour, sugar, honey from Natalie, and the cheese powder.  Hubby likes rolls and they bake quicker, which with my work load, was perfect.  Easily, this recipe would make two loaves, if you prefer.

Vermont Cheese Rolls
6 cups King Arthur Bread Flour
1/3 cup Vermont Cheese Powder
1/4 cup granulated sugar
2/3 cup 2% milk
4 T unsalted butter
1 egg
2 tsp. sea salt
2 T dry yeast
1/2 cup warm water (105F-degrees)
2 T honey 
Additional 3/4 cup to 1 cup water and melted butter for pans

In a stand mixer, using the bread hook attachment, add the flour, cheese powder, sugar and salt and mix about 30 seconds to combine.  In a 1 cup glass measure, add the warm water, the yeast, and the honey and whisk to combine.  Allow the yeast to proof for 5 minutes, until foamy.

In a small sauce pan, heat the milk and butter on medium, just until "bubbles" form around the outside edge.  Remove from the heat and while the mixer is running on Speed #2, add the milk and butter, then add the egg and continue to mix.  Add the foamy yeast and while the mixer is running, pour additional water, about 3/4 cup or until the dough pulls away from the sides of the bowl.

Knead in the mixer an additional 2 to 3 minutes, then, turn dough out onto a lightly floured bread board.
The dough should easily come out of the bowl and both the dough hook and bowl should be clean.  Knead several minutes until the dough is smooth (as my mother said, "a baby's bottom!")
Brush melted butter inside a large bowl or dough bucket and place the dough, right-side down, then turn it right-side up and seal with plastic wrap or the lid.
Let rise about 45 minutes or until doubled.  Turn the dough out onto the bread board and divide into 12 pieces.  Form into round, flat rolls and place on a baking sheet, brushed with melted butter. Brush roll tops with the melted butter also.
Cover once more with plastic wrap and let rise about 30 minutes while you are preheating the oven to 375F-degrees.
Remove the plastic wrap and lightly brush with additional butter and sprinkle with sesame seeds, if desired.

Bake in the preheated oven for 18 minutes or until golden brown.  Remove from oven and cool completely before slicing...if you can wait!
Hubby was playing tennis tonight and the menu called for a veggie burger on the rolls with steamed broccoli and baked potato as sides.  I'm thinking a lovely pot of soup for tomorrow if the rain continues--who am I kidding, this is the Pacific Northwest, of course it'll be raining.  Enjoy!


Tuesday, January 22, 2013

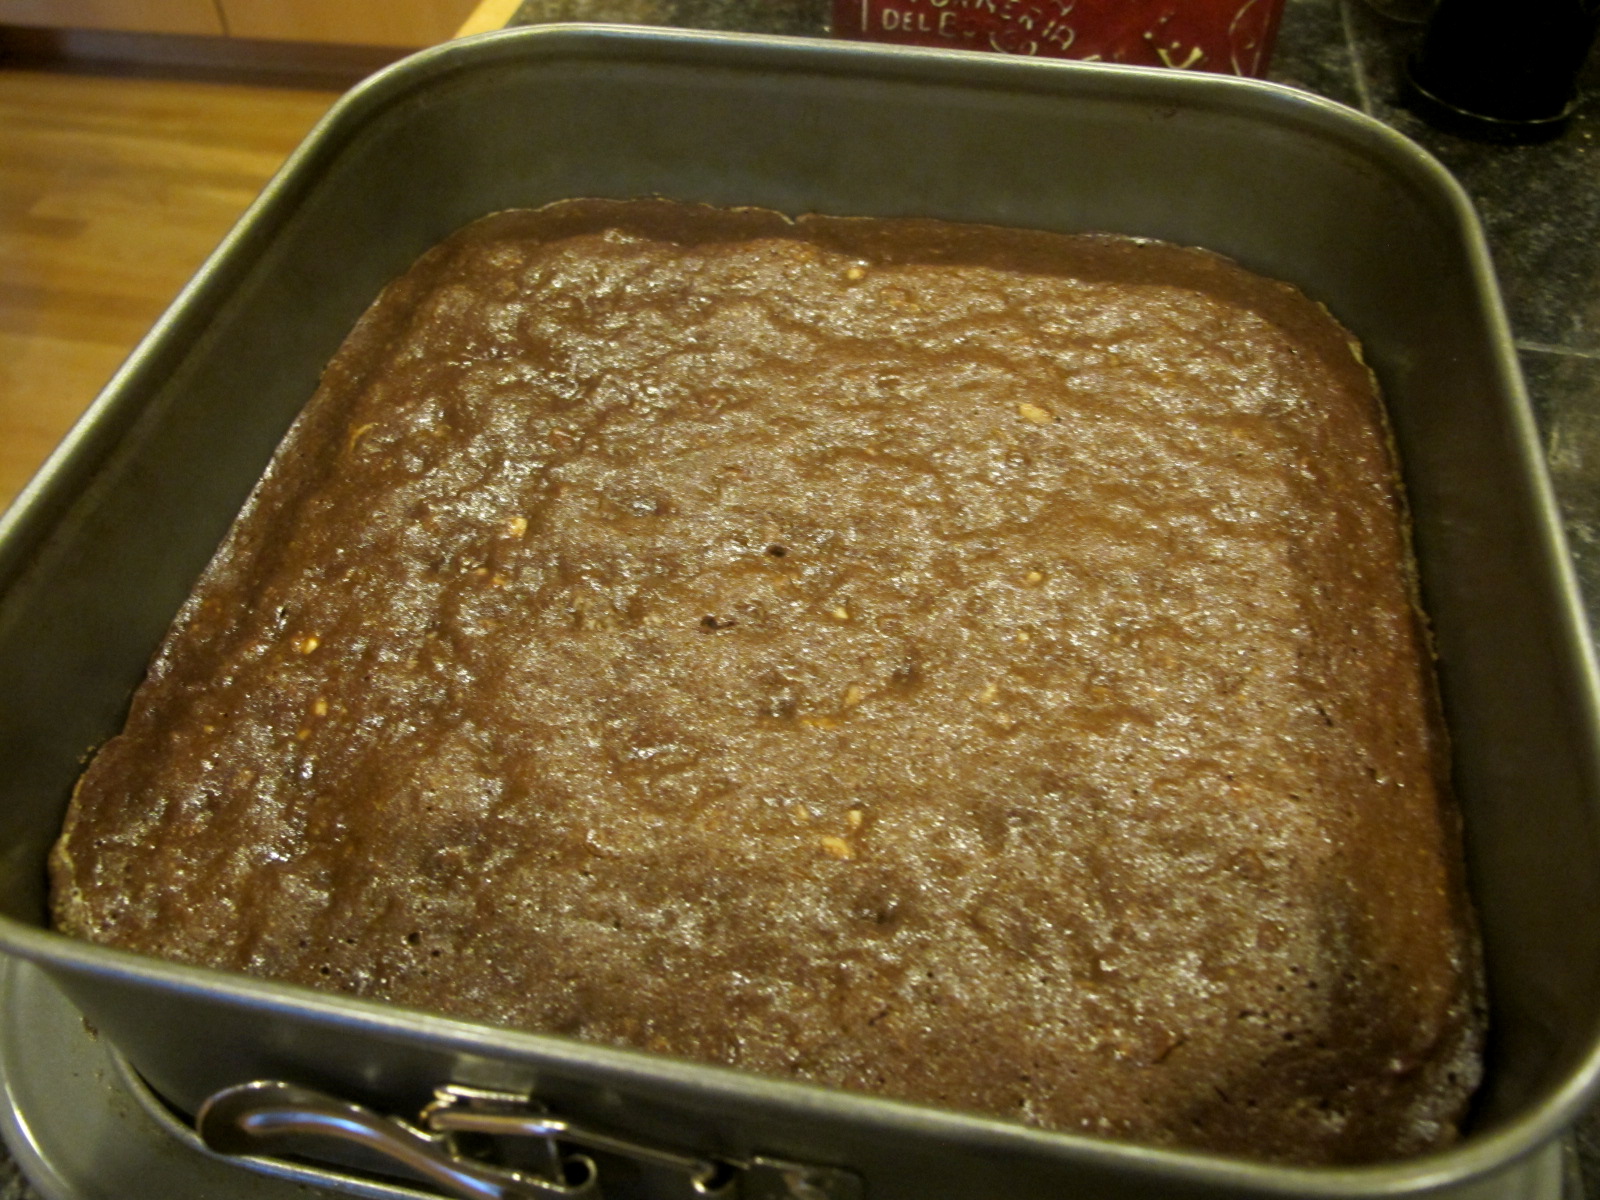
Recipe Found ~ Denver Brownies


Funny how things happen.  I mean, what are the chances that just a month or so ago, I was reading an interview with Julia Child and in it was mentioned these delicious brownies she once tasted.  They are called Denver Brownies and I had made a note to ask some friends, who happen to live in Colorado, if they had ever heard of them and could they get me the recipe? Something, I hadn't gotten around to doing. 

Well, this past weekend, I met up with my hubby who had a business trip to Portland, Oregon, and like we always do, we wandered up to Couch Street to visit Powell's Bookstore.  I should have taken some photos of the store because it is one of those bookstores that you can only imagine exists, but I was just so excited to wander through the Gold, Purple, Blue, Rose, etc....rooms and peruse the books that I wasn't thinking (I will try to get some photos the next time!)  In the baking section, the Rose Room, which I spent my most time in, I came across a 1977 edition of Maida Heatter's Cookies book.  As I turned the pages reading the stories she shared, there it was on page 124--Denver Brownies.  Not only the recipe, but Maida tells her story about the time she was on tour with her chocolate book and had made fudge sauce on a television program.  A receptionist tells her that when Julia Child was here, they made these brownies for her to taste and she loved them!

I think Maida and Julia would want me to share them with you.  After all, Valentine's Day is literally around the corner and these double-iced brownies would be perfect for your loved ones.  Maida does make mention that they do not ship well, but they certainly do freeze well.  You can make them ahead of time or if it's just the two of you...like my hubby and I, it's better that they can freeze and not be tempted to eat them all.

Denver Brownies
Preheat oven to 325F-degrees.  Line a 9-inch square pan with aluminum foil, shaping to fit the corners and press into place.  Brush the foil with melted butter.  (I used my 9-inch square spring-form pan and did not use foil!)

In a sauce pan, measure:
1/2 cup (1 stick) unsalted butter, but into pieces, at room temperature
1/3 cup honey
6 oz. semi-sweet or bittersweet chocolate chips (or a bar, coarsely chopped)
2 T water or black coffee

Over moderately low heat, stir this mixture until the chocolate and butter have melted.  Remove from the heat and stir in, with a wooden spoon,  the following, first the extract, then the eggs:
1 tsp. Vanilla extract
2 large eggs
Homemade Vanilla Extract is the best!

Add:
3/4 cup King Arthur all-purpose flour, sifted
1/4 tsp. baking powder
1/4 tsp. salt


Whisk vigorously with a wire whisk until smooth and shiny.  Add:
1 1/3 cups of chopped walnuts

Pour into the prepared pan and smooth the top.  Bake for about 22 to 25 minutes until a toothpick, inserted in the center, comes out cleanly.

Remove from the oven and brush the top of the brownie with:
2 T. bourbon, brandy, or rum (I used brandy!)

Cool the brownies, then cover the top with a rack and remove the pan and the foil.  Use another rack to turn the brownies right-side-up again.  (The cake will be about 3/4-inch high.)

White Icing

1/2 cup (1 stick) unsalted butter at room temperature
1 tsp. vanilla extract
2 cups sifted confectioners' sugar

In a small bowl, using an electric mixer, beat the butter until soft.  Add the vanilla and then, gradually add the confectioners' sugar.  Continue to beat until fluffy.  Spread the white icing over the top of the cake, using an off-set spatula, until smooth.  Refrigerate.


Chocolate Icing

6 oz. semi-sweet or bittersweet chocolate chips or coarsely chopped chocolate
1 T vegetable shortening
1 T unsalted butter

Place all ingredients in the top of a small double boiler over hot water on moderate heat. Cover until partly melted, then, uncover and stir until completely melted and smooth.  Remove from the heat.

Pour in a thick ribbon over the white icing, working quickly before the chilled white icing sets the chocolate.  With a long off-set spatula, smooth the top.

Refrigerate.

To cut:  The chocolate might "cracked" when first removed from the refrigerator while cutting, so allow the brownies to stand at room temperature and use a serrated knife to cut into 1-inch squares...or if you're feeling generous, larger than an inch...which is what I did!

Surprises in life come at the most unexpected times--this one was a good one. Enjoy!


Wednesday, January 16, 2013

CHA and a New Beginning

The reason I've been MIA from blogging is that I was away at the Craft & Hobby Association (CHA) Winter Show in Anaheim, California.  This has been a busy year for me, preparing for this show with a new line of dies done by Sizzix.   For over 15 years, I have been creating 3-dimensional paper flowers with craft punches, but as I strive to achieve the most natural-looking blooms possible, I realized that dies were the way to go.
The line is called...Susan's Garden (catchy, huh!!) and was launched at this show with rave reviews...thank you very much!  The dies are a Thinlet by Sizzix and work beautifully in the Big Shot and Vagabond (as well as other machines available).  Instructions for creating the flowers are included in the packaging and now that I'm "official," I will in the next month (or so) have a website where I'll share tips and projects.  I even have a Garden Faerie die that I've dressed up in petals displayed in the lighted tree!
Two of my designs--Black-eyed Susan and Peony are on a steel-rule die can cut fabric as well as paper; the two pillows I did on this bench shows off a quick way to create dimensional design in quilting!

It was a great show and I loved seeing old friends, as well as, meeting new ones.  I arrived home late last night and once I get laundry done, I'm anxious to do some baking--Enjoy!