Monday, April 12, 2010

Remembering Dad

My sister telephoned this morning and said three words, "Today's Dad's birthday."  "I know," I said, "I was going to call you."  My dad passed away in 1995 and would have been 90 years old today, but I had started thinking, a week ago, about what his favorite dessert was that I would bake today.  My conclusion, he loved everything my mother made! Even the time she mistakenly added cloves instead of chili powder to her chili, he ate it and told her it was delicious!  Now, that's real love.

I decided on an apple pie, but the new way I make it...Slab Apple Pie.
I came up with this a few years ago as a way to pack a piece of pie for my husband's lunch at football games.  I bake the pie in a 10" x 15" baking sheet and can get twelve pieces of pie that travels well.  It goes together quickly and I can vow that it freezes well, just in case you can't finish it.  I wrap it in wax paper for "game days" but plating it with a scoop of vanilla ice cream would be good too.

Slab Apple Pie...for Dad
Dough:
4 cups all purpose flour
1 tsp. salt
1  tsp. sugar
1 tsp. baking powder
1 3/4 cups Crisco butter-flavored shortening, cut into cubes
1/2 cup ice cold water
1 egg
1 tsp. apple cider vinegar
In the KitchenAid, combine dry ingredients and mix well with the paddle attachment.  Add the shortening and mix until coarse crumbs.  Mix the water, egg, and vinegar and whisk with a fork to combine.  While mixer is running, add the wet ingredients and mix to combine.
  Turn out onto a floured board and form into two disks.  Wrap in plastic wrap and refrigerate for 20 minutes.  Meanwhile, make the filling.
Preheat oven 400F-degrees.

Filling:
8 cups of apple (I used Granny Smith and Honey Crisp, but any cooking apple will do)
2 T lemon juice  (1/2 lemon)
3/4 cup granulated sugar
1 tsp. cinnamon
1/2 tsp. cardamon
2 T Boiled Apple Cider
1/4 tsp. salt
Peel and slice apples.  I use a corer, but then, slice the slices in half.

Place sliced apple in a large bowl. Squeeze the lemon juice over the apples.  Add the sugar, spices, and boiled cider, stir together to combine.  Set aside.  Take dough out of the refrigerator and roll out into a rectangle.

Roll up on the rolling pin to place onto the baking sheet.

Add the filling on top of the dough, distributing the apples evenly.  Roll the top dough in the same manner as the bottom.  Place on top of the filling, seal edges and crimp.
 
Use a small knife to cut slits in the top; I did twelve. You can sprinkle the top with granulated sugar, or my favorite, add a glaze after baking. Bake in the oven 35 to 40 minutes until golden brown and the juices are flowing.  Remove from oven and spread glaze over the top while the pie is warm.  Let cool one hour before cutting.


Glaze:
1 cup confectioners sugar
2 T maple syrup
2 T unsalted butter, at room temperature
1-2 T milk or cream
In a small bowl, cream the butter.  Add the sugar and maple syrup and mix to combine.  Stir in milk or cream to create a pourable glaze.
Add a scoop of vanilla ice cream and yum, yum.  Happy Birthday, Dad...we miss you!


Saturday, April 10, 2010

D is for Donuts

It's Saturday morning, the weather is...aah, sunny and I have lots to do before the realtor comes on Monday.  My Dad's birthday is on Monday (he would have been 90 years old) and I was thinking today about how he made breakfast on Saturdays for our family before going to the commissary.  Of course, it consisted of bacon and eggs, but there was usually a donut left from my Grandfather's visit earlier in the week, that I would take before anyone else got up. (I've been blessed with my father's gene of rising at the crack of dawn!)  Let's say, I've always had a thing for something sweet in the morning and that's why Toaster tarts, donuts, and scones fit the bill!

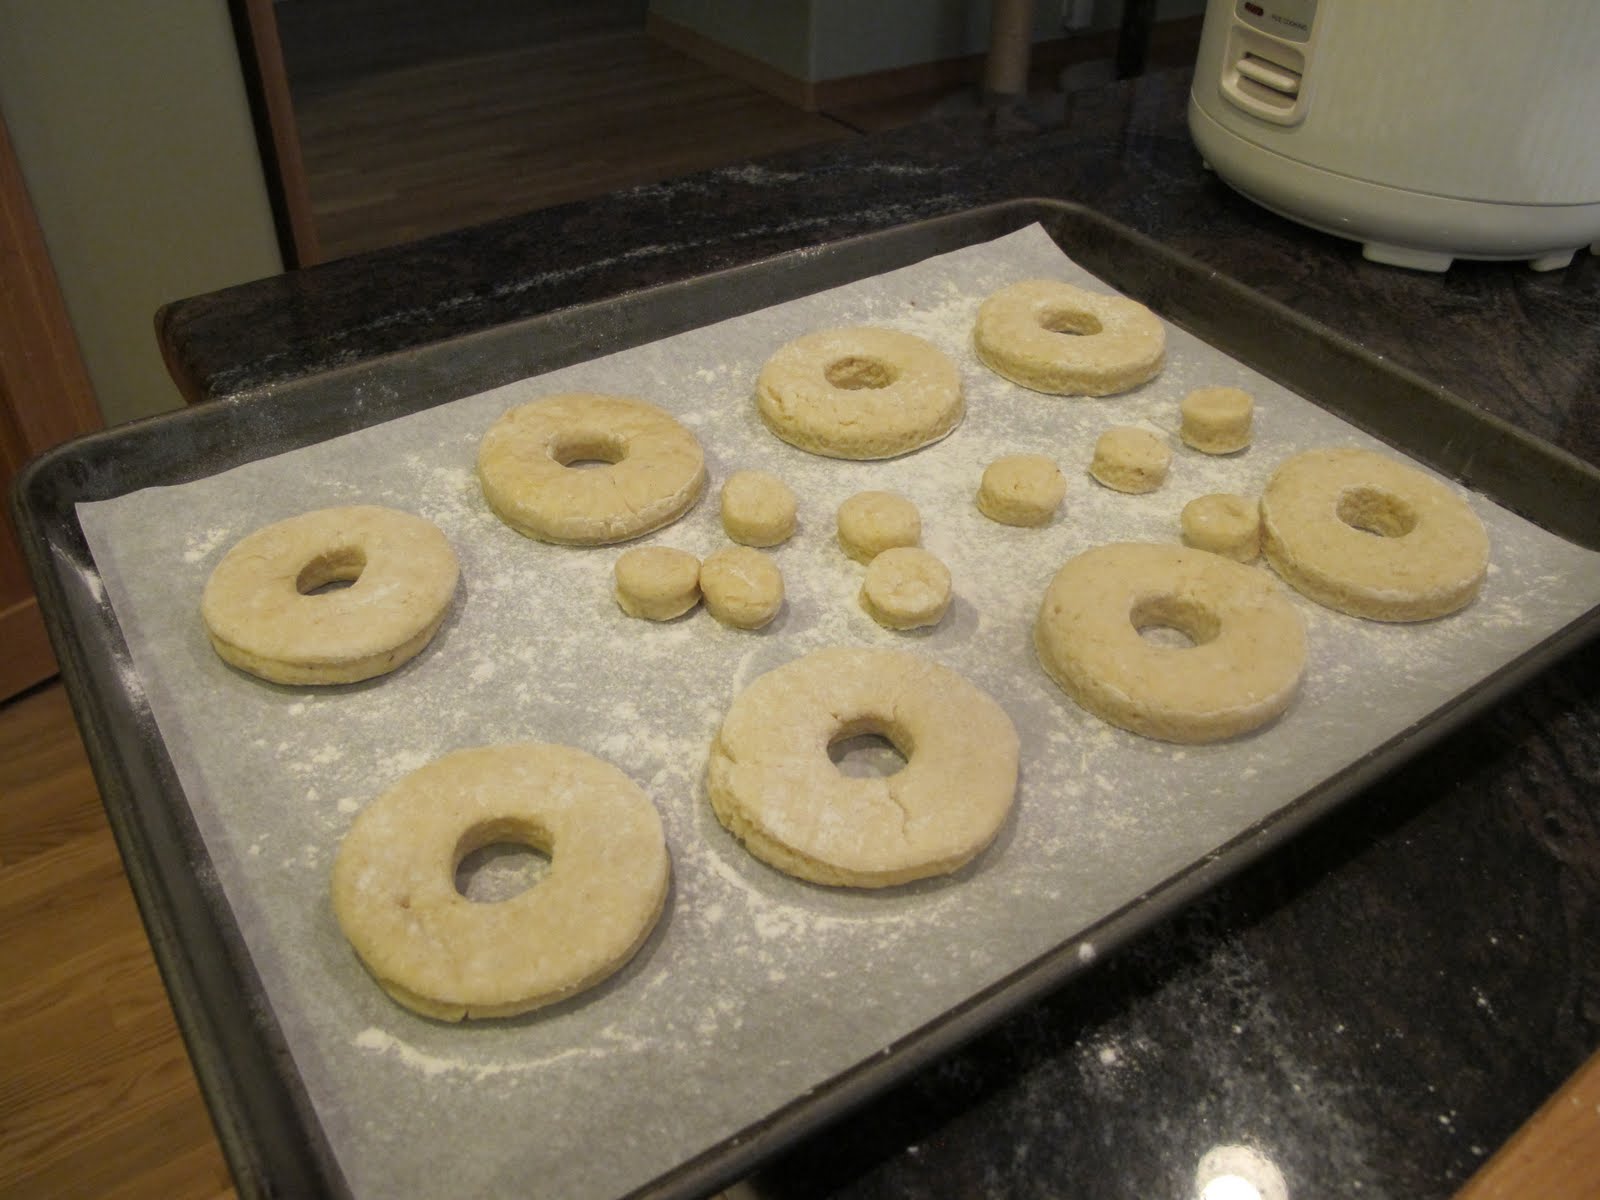
I came across a new cookbook-Donuts by Elinor Klivans, at Williams-Sonoma the other day, .  I already own her Big Fat Cookies and Chocolate Cakes cookbooks, so I knew the recipes would be good.  I love cake donuts, but there are yeast donuts,  beignets, zeppoles, churros, etc.; something for everyone.  I chose the old-fashioned buttermilk donuts and it was everything I wanted in a donut.

I have a Delonghi Cool Touch/Roto Fryer that I bought several years ago and I recommend this model for a couple of reasons. First, the temperature is controlled and I don't have to hang a thermometer over the side of a large dutch oven and, most importantly, it "fries" in just 2 inches of oil because closing the lid adds a steaming feature to cook your food quicker, so less oil is absorbed. Of course, you can use a saute pan and Elinor goes over that under "tools for making donuts."  These are wonderful treats to make with your family.  Let the kids cut out the shapes and if you glaze them, they can dip them and add sprinkles.  Like cupcakes, these would be fun to do for birthdays!

old-fashioned buttermilk donuts by Elinor Klivans
1 1/4 all purpose flour
1 cup cake flour
1 tsp. baking powder
1/2 tsp. baking soda
1/2 tsp. salt
1/2 tsp. grated nutmeg
In a large bowl, sift together these dry ingredients and set aside.

l large egg
1/2 cup granulated sugar
1 T unsalted butter, melted
1/2 cup buttermilk
1 tsp. pure vanilla extract
oil for frying (Canola or Peanut)
In a mixing bowl, beat the egg and sugar.  Add the melted butter, vanilla, and buttermilk.  Add the flour mixture and beat, on low speed, just until mixture comes together.  The dough will be soft and somewhat sticky.  Cover the bowl with plastic wrap and refrigerate for 30 minutes.  (Go check your email, do a load of laundry...) 
While the dough is chilling, start your oil, as directed by Elinor Klivens or by the Delonghi fryer.
Turn dough out on a generously floured board.  Roll into a 10" circle by 1/2" thick.  Use a 3-inch round donut cutter, cutting our as many donuts as possible.  Gather up scraps and repeat rolling and cutting.

Once your oil is up to the 360F-degree temperature, lower 2-5 donuts in the hot oil.  Deep fry until  dark golden, 1 1/2 minutes.  Turn donuts over and cook on the second side, about 1 minute longer.  Fry "like" shapes together.  In other words, do the donuts first, then do the holes together.
You can dust generously with confectioners' sugar (I used glazing sugar, which is confectioners' sugar with cornstarch!) or shake in a bag with cinnamon/sugar, or as I like them, glazed:
1 cup of glazing sugar
1-2 T of hot water
Dip the tops in the glaze and add sprinkles, if desired


Nothing tastes better than a warm donut, freshly made.  No preservatives added and they're lots of fun to make.  I plan on trying all of them...except the "maple-bacon donuts", but I know a few people who would love them. Enjoy!

Friday, April 9, 2010

Go Bananas Biscotti

When I make biscotti, I imagine one day I'll be having one in a little cafe in Tuscany, dunking it...well, not in coffee, but maybe a Diet Coke or as biscotti bakers do, in wine.  I know the Italian-style are different from the American version, but I'll enjoy it nonetheless after a day of wandering through beautiful gardens.

Well, that day is far away, but making biscotti and enjoying a few after a long day of packing (did I mention we're moving?) and cleaning is a guilty pleasure.  Banana Biscotti is a little unusual, but I got this idea after my friend, Rosie just came back from New Orleans.  I was thinking why not a biscotti that replicated Banana's Foster.  That wonderful dessert of carmelized bananas that is served over vanilla ice cream.  And, I just didn't feel like baking a loaf of banana bread...again.

The name biscotti is from the Latin, bis coctum, "twice baked," and the earliest mention of them was in Rome during the second century.  The hard, dry version that Marco Polo and Christopher Columbus traveled with has been replaced.  The Italian-style doesn't incorporate any fat (butter or oil) and that's why I prefer the American-style.  It's more tender, lighter, and crunchier and even kids appreciate them.  Changing a plain biscotti's taste and texture is easy once you get the feel for the dough.  Be careful not to add too much flour or they may become too crumbly.
Go Bananas Biscotti
1/2 cup (1 stick) unsalted butter, room temperature
3/4 cup light brown sugar
2 large eggs
1 banana, mashed
1/2 tsp. banana extract
1/2 tsp. butterscotch extract
1 tsp. pure vanilla extract
1 1/2 tsp. baking powder
1/2 tsp. salt
2 1 /2 cups all purpose flour
1 cup butterscotch morsels
1/2 cup finely chopped pecans
Preheat oven to 350F-degrees.  Lightly grease or line with parchment paper, a large baking sheet.
Alternatively, you can use a biscotti pan like I did.  In a the bowl of the KitchenAid, using the paddle attachment, beat the butter and brown sugar until creamy.  Add the extracts, then, the eggs and mashed bananas.  The mixture will look curdled.  Add one cup of flour, baking powder, and salt.  Beat, just until combined.  Add the rest of the flour, the morsels, and nuts and fold in with a spatula.  Turn dough out onto the prepared pan and form into a log 14" long x 2 1/2" wide.  Use a wet dough scraper to smooth the top of the dough. 

Bake dough for 25 minutes.  With the biscotti pan, I had to bake it for 30 minutes. Remove pan from oven and let cool.  Lower oven temperature to 325F-degrees.  Use a serrated knife to cut 1/2" to 3/4" thick slices.  Place on a large baking sheet and bake for 25 minutes.  Remove from oven and let cool.  Store in an airtight container.  Mangia!

Tuesday, April 6, 2010

Tasty Toaster Tarts

My family will tell you...I love Pop Tarts.  Always have.  However, being able to make my own is even better.  I came across this recipe through a YouTube video done by Joanne Chang of Flour Bakery in Boston, Massachusetts.  King Arthur adapted her recipe for the home baker and, I will attest, they come out perfectly.  I chose this morning to make the Cinnamon/Brown Sugar filling, but I have also made them with Strawberry Jam.  Here is the recipe and my step by step photos to help you create one of my favorite breakfast treats.

Pastry (Pate Brisee)
2 cups All purpose flour
1 T sugar
1 tsp. salt
1 cup (2 sticks) unsalted butter, cut into pats
1 large egg
2 T milk

Cinnamon Filling
1/2 cup brown sugar
1 tsp. cinnamon
4 tsp. flour
1 large egg, to brush on pastry before filling
Mix the filling ingredients, except for the egg, and set aside

Jam Filling
3/4 cup Raspberry or Strawberry Jam
1 T cornstarch mixed with 1 T cold water
In a small saucepan, mix the jam with the cornstarch/water mixture.  Bring the mixture to a boil and simmer, stirring for 2 minutes.  Remove from the heat and set aside to cool.

Make the dough:
Whisk the flour, sugar and salt together.  Work in the butter, with your hands, just until you have large lumps of butter still visible.  Next, whisk together the egg and milk.  Add to the dough and use your dough whisk to stir in.


Dump the "shaggy" dough onto your bread board.  You will do what's called frissage to incorporate the butter and create a flaky dough. 


Frissage is a baking term, meaning to "smear".  Using the heel of your hand smear the butter into the dough.  This technique will create the flaky layers and a very tender crust.
Once you have completed this technique, the dough comes together easily into a disk.  Wrap with plastic wrap and refrigerate for 30 minutes.

Divide dough into two halves.  Roll each half into a rectangle, 1/8-inch thick, and trim to a 12 x 9-inches.  (Save dough scrapes to bake while your tarts are chilling.) Lightly score the rectangle into 3"x4" rectangles.  You will have nine.

Place the first dough "sheet" on a piece of parchment and roll out the second disk the same way.  Brush the dough, you have scored into 9 pieces, with the beaten egg.  Place 1 tablespoon of filling in the center of each tart.  Place the second layer of dough over the first one and cut through the score lines.  Use a fork to press all around the edges.  Place the tray in the refrigerator and chill another 30 minutes.  Preheat oven to 350F-degrees.  Place dough scrapes on a baking tray and sprinkle with cinnamon/sugar mixture.  Bake 12-14 minutes, or until golden brown.

Bake toaster tarts for 20-30 minutes until golden brown.  Mix a simple glaze of 1 cup confectioners' sugar and 1-2 T hot water.  Spread onto the warm tarts.  Yum, yum.  Enjoy!

April's Give-Away

I love butterflies and I love watching them go from flower to flower tasting the sweet nectar.  When we lived in Connecticut, I had beautiful Buddlejas (butterfly bush) in our yard that attracted especially the Monarch butterflies.  One afternoon, I watched for over an hour while more than 50 came to the bush to feed.  It inspired me to write this...and choose a butterfly patterned fabric for my Apron give-away.

Nature's Lesson 101
I saw a butterfly, flutter by
  in no particular hurry.
Taking its time, I don't know why,
  without a care or worry.

Landing on each petal to take a taste,
  this I know to be true;
Seemingly slow and without haste,
  but from flower to flower it flew.

As peaceful as the day went by,
  I couldn't help but feel sad.
Inevitably a short life for this butterfly,
  without too many days to be had.

And yet, this moment in time I see,
  no matter how short and eluding;
Reminds me to rejoice and be happy
while nature is exuding.

I hope you all are appreciating the beautiful Spring that is unfolding.  Take time to be with the people you love, but moreover, notice the strangers that come into your life.  We're all in this together and really, like the butterfly, we're only here for a short time.  Live, love, and laugh!
 

Sunday, April 4, 2010

Say, Cheeeeeeeeeeeeeeesecake

The SoNo Cheesecake lived up to every expectation I had.  The sweet, tart of the raspberries partnered with the salty crunch of the pistachios created one of the most perfect cheesecakes I've ever eaten.  Not to mention, how beautiful the cheesecake came out by using a water bath.
Absolutely no crack!  The cheesecake is dense, yet moist and literally melted in your mouth.  The technique called for to heat the bottom, which I did using a small cookie sheet over a gas burner, made it so easy to remove the springform bottom and place the cheesecake on a platter.
I warmed some apricot jam, strained it and brushed the top and sides.  Then I decorated the top with fresh raspberries and applied chopped pistachios to the sides.
This was a very easy cheesecake to make and the results were spectacular!  Even my husband said, "this is the best cheesecake ever!!" Enjoy!

Saturday, April 3, 2010

Rainy Day Potato Leek Soup

What happened to our lovely spring weather?  This weekend that phrase is on everyone's lips here in Seattle.  Oh, I know what you're saying, "It rains every day there!"  Well, no.  That's a horrible myth started by someone who didn't want anyone (on the outside) to realize what a beautiful place this is to live.  But, it is raining this weekend and the leeks looked wonderful at Whole Foods, so a soup is born.

I love soup and could have it every day...even in the summer.  This potato leek soup is my own version and is so simple to make.  The name is somewhat deceiving, though, because I actually use three types of onions; leeks, yellow-skin, and scallions.  Also, this recipe is vegetarian, but you could easily add smoked salmon or crab as a garnish or chicken cut into chunks if you wanted a heartier soup for the meat-lovers in your life.  As my mother would say, "try it...you'll like it."

Potato Leek Soup
1 medium yellow onion, chopped
3 leeks, white part sliced, and cleaned well
1 bunch scallions, sliced thin (include some of the green)
4 medium potatoes (I used Yukon Gold), cut into cubes
3 cloves garlic, minced
2 T unsalted butter
3 T olive oil
salt & pepper to taste
1 T dried dill 
3 cups vegetable broth (or you can use chicken stock)
2 cups half & half
In a large saucepan, over medium heat, melt butter and add olive oil.  Add the yellow onion and saute a few minutes to soften.  Add the leeks and scallions and continue to stir until the onions become translucent.  Add the potatoes and saute a few minutes.  Add the vegetable broth and stir.  Reduce heat to low and cover pot.  Cook about 20 minutes or until the potatoes are tender.  (I stick the point of a knife into them to check).  Remove cover.  Season to taste with salt and pepper, then, add the dill.  Add the half & half and stir well.  Heat another ten minutes being careful not to boil; you don't want to curdle the cream...just heat through.  Serve with a crusty bread and add a salad for a complete meal.  Enjoy!  

Friday, April 2, 2010

Hot Cross Buns...Hot Cross Buns...one a penny, two a penny, Hot Cross Buns

Hot Cross Buns, as we know them, have been around since 1361 when a monk, Fr. Thomas Ratcliff fed them to the poor at St. Alban's Church in England.  However, similar buns date back to pre-Christian cultures when the "cross' stood for the four phases of the moon during harvest time.

For me, they are definitely one of the traditions I hold onto from my mother.  She baked them on Good Friday, but you can actually serve them anytime during Lent, including Easter Sunday.  Her recipe is a little unique and I have, as usual, made a few changes to update it through the years.  One thing you will notice is that she used buttermilk.  I like the use of buttermilk, but whole milk will work also.  I've added the citrus zests through the years, but if you don't like zest, omit it.  Typically, cinnamon is added, but the cardamon is extra.  I'm partial to cardamon because it gives that unique flavor that no one can guess what it is from.  Lastly, I like to make the buns up and place them on a large baking sheet which allows almost two inches between each bun.  I figure, it makes the bun its own entity.  However, you can bake these in a 9" x 13" pan and produce a softer, pull-apart bun.  Lastly, you can make up the dough the night before, place it in a buttered rising tub (or bowl covered with plastic) and place it in the refrigerator to do a "cold rise."

Hot Cross Buns

3 eggs
1/2 cup sugar
3/4 cup buttermilk (you could also use whole milk)
6 T. unsalted butter
2 T. yeast
5-6 cups All-purpose flour
1 tsp. salt
1 tsp. cinnamon
1/2 tsp. cardamon (optional)
1 T. lemon zest
1 T. orange zest
1 cup currants

Start by covering the currants with boiling water, then, set aside while you're making up the dough.
In the bowl of the KitchenAid and using the paddle (to start with), mix the eggs, sugar and salt to combine.  Meanwhile, heat in a 2-cup measure, the buttermilk and butter in the microwave for 1 minute.  (Cut the butter into small pieces so it will melt quicker).  While the mixer is running, add the milk/butter mixture and combine.  Keep mixer running on low and add the 2 tablespoons of yeast.  Turn mixer off and let the mixture set for 5 to 10 minutes for the yeast to proof.
Add 2 cups of flour, spices and citrus zest and mix well.  Change to the dough hook and continue to add flour, one cup at a time until the dough has pulled away from the sides.  Drain the currants and pat them on paper towels to dry.  Add to the dough and mix until combined.
Turn dough out onto a bread board and knead.
Place in a bowl that has been brushed with melted butter.  Cover with plastic wrap and let rise for 1 to 1 1/2 hours (until doubled in size).  This is a rich dough and with the currants, it takes a little longer for the dough to rise--be patient.

Turn dough out and roll in a long roll.  Now, divide in half, half again, half again, and half again until you have 24 pieces.
Roll the pieces by placing the palm of your hand over the dough, gently press down against the board while you roll into a ball.
Once you have all the buns made, cover with plastic wrap which has been lightly sprayed with a vegetable oil spray.  Again, let rest about an hour. Preheat oven to 375F-degrees.
Once the buns have doubled, use kitchen shears to cut a "cross" in the top.  Brush the buns with an egg wash (1 egg yolk with 1 tablespoon of water).  Place in the oven and bake 16 to 18 minutes until golden brown.  Half way through the baking process, turn pan for even browning.

Meanwhile, make the glaze.
1 cup confectioners' sugar
1 T. meringue powder
2-3 tsp. hot water
1 tsp. Vanilla Bean Crush extract

Whisk the glaze ingredients together until you have a pipeable glaze. While the buns are still warm, pipe the glaze into the "cross".
..."If you have no daughters, give them to your sons.  One a penny, two a penny, Hot Cross Buns."  Enjoy!

Wednesday, March 31, 2010

Easter Egg Hunt

Spring...I remember, all too well, this time of year.  I would have finished sewing our daughter's Easter outfits and they would have picked out their favorite patten leather shoes and hats to complete their ensemble.  I was looking forward to baking Mama's Hot Cross Buns (which I'll do tomorrow for Good Friday!) but I also loved making our own candy Easter eggs.  The first recipe comes from Mama; well, actually, The Washington Post.  It was the early 60s and she wanted to make Easter eggs instead of buying them.  There's an unique ingredient, but don't let that deter you because they really are good and better yet...you know exactly what the ingredients are!

COCONUT CREAM EASTER EGGS

3/4 cup mashed potato (no seasonings or milk)
2 c unsweetened cocount
1/4 tsp. salt
1 tsp. pure Vanilla extract
1/4 tsp. Coconut flavoring (optional)
6 cups confectioners' sugar

Peel 2 medium potatoes and dice.  Cook until tender and drain.  Mash or "rice" the potatoes and measure out 3/4 cup.  Place in large bowl and let cool completely.  When cooled, add the coconut, salt, and extract/flavoring.   Stir well.  Add confectioners' sugar, 1 cup at  time, stirring until it's all incorporated.  Place mixture in a bowl and cover.  Refrigerate overnight.
Next day, shape the mixture into eggs and place on a tray.  Refrigerate at least an hour.

PEANUT BUTTER EASTER EGG

1 stick unsalted butter, at room temperature
8 oz. cream cheese, at room temperature
2 lb. confectioners' sugar
1 1/2 cups creamy peanut butter
1 1/2 tsp. pure Vanilla extract
1/2 tsp. Peanut Butter flavoring
1/2 tsp. salt

In the KitchenAid and using the paddle attachment, beat together butter and cream cheese until fluffy.  Add the confectioners' sugar and mix well.  Add the peanut butter, salt, flavorings and beat until well-blended.  Place this mixture in the refrigerator to chill 1-2 hours.  Remove from refrigerator and form into egg shapes.  Return eggs to the refrigerator or do like I did, place in the freezer for 30 minutes while preparing to temper the chocolate.

TEMPERING CHOCOLATE
Chocolate tempering, which is melting chocolate and then, cooling the chocolate to a predetermined temperature, is a necessary process for achieving professional chocolates.  The recipe my mother used, back in the 60s, called for adding an ounce of food parafin to give the chocolate its shine and get it to set up.  I learned to temper chocolate at The Culinary Institute in New York when we lived on the east coast.  I've never gone back to adding anything to chocolate since then!

3 bars (9.7 oz) Scharfenberger Bittersweet chocolate
Chocolate Temper Thermometer
Set up a double boiler.  I use a silicon bowl over a saucepan of simmering hot water.
Heat the chocolate to a temperature of 120F-125F-degrees.  Remove the chocolate and cool chocolate to 86-degrees.  This can be done by adding small amounts of additional chopped chocolate.


Raise the temperature again by placing over the heat.  The thermometer should read between 88F-90F-degrees. (88F-degrees for white or milk chocolate; 90F-degrees for dark).

Now, the chocolate is ready to dip the eggs in.  Since the eggs have been refrigerated (or frozen) watch the thermometer.  Return bowl to the simmering hot water to maintain temperature.  (Alternatively, you can place the bowl on a heating pad.)

You can use "dipping forks", a skewer, or what I found worked best...my hand.  For this reason, this process allows your children to help.  (88F or 90F-degrees is cooler than bath water!!)  Wouldn't these make wonderful gifts for family and friends...Enjoy!

and the Lucky Winner is...


CONGRATULATIONS to Nicole!  You're the lucky winner of this month's apron.  Enjoy!  Please contact me with your mailing address and I will send this out to you.  Love, Susan

In the next few days, I will have April's apron up for the next Give-Away...promise!

Monday, March 29, 2010

Chocolate Macaroon Poundcake

I noticed on Kelly's blog that she has made Matzoh Caramel Butter Crunch to go along with Purely Decadence Coconut frozen dessert for their Seder.  Macaroons are a traditional treat during Passover, so I came up with a pound cake to imitate that treat.  It tasted so much like a macaroon, I forgot I was eating cake!

Chocolate Macaroon Poundcake 

Preheat oven 350F-degrees.  Spray a 12-cup bundt pan with a flour/oil baking spray and set aside.

1 cup (2 sticks) unsalted butter, at room temperature
2 cups sugar
3 large eggs, at room temperature
1 cup milk
1/2 cup sour cream
1 tsp. pure vanilla extract
2 3/4 cups all-purpose flour
1 tsp. baking powder
1 tsp. salt
1 cup mini chocolate chips


Use the paddle attachment to beat the butter and sugar together until fluffy.  Add eggs, one at a time, beating well after each addition.  Mix milk, sour cream and flavorings, set aside.  Sift flour, baking powder, coconut milk powder, and salt.  Pour half of the "liquid" in the mixing bowl on low speed, then, add half of the dry ingredients. Mix to combine.  Repeat this step once more, ending with the dry ingredients.  Stir in the coconut and mini chocolate chips. Pour batter into the prepared bundt pan and bake for 45 to 50 minutes, or until a toothpick comes out clean from the center.  Cool 5 minutes, then turn out onto a cake plate.  Make chocolate glaze.

4 oz. bittersweet chocolate
4 T. unsalted butter

Melt ingredients on low heat in a small saucepan.  Stir until combined.  Pour over top of the bundt pan.  Enjoy!


Baking and Passover


Yesterday began the Festival of Passover.  I know this because I just returned from visiting my daughter and son-in-law, who is Jewish, in Kentucky.  Kelly and Matt are doing their traditional Seder dinner tonight with friends and I decided to do some baking.
I wanted to make Challah.  I know, the Festival of Passover is also known as the "Festival of Unleavened Bread," so you wouldn't have this during Passover, but maybe when it ends it would make a wonderful conclusion.  This recipe was given to me, when I worked at Social Security Administration in the 70s, by the Director of Statistics.  Even back then I baked all the time and brought in treats to my fellow employees.  It's a simple yeast bread, but with spectacular results.  I did it my food processor, but you could easily do it in the KitchenAid, using a dough hook.  (Follow directors for your mixer)

Challah

6 cups All-purpose flour
3 T. Sugar
1 T. Salt
4 T. shortening
2T Active Dry Yeast
1 1/2 - 1 3/4 cup warm water (additional for proofing yeast)

In a 1 cup glass measuring cup, measure 1/2 cup warm water (about 105-degrees) and the 2 tablespoons of yeast.  Add 1/2 tsp. sugar (from the 3 T needed) and whisk slightly.  Let proof 5-7 minutes until foamy.  Meanwhile, in the bowl of a food processor, measure 6 cups of flour, the rest of the sugar and salt.  Pulse several times, then, add shortening and pulse again.  When the yeast is ready, add to the bowl and pulse again.  While the food processor is running, add warm water until mixture pulls away from the sides and goes into a "ball".  Turn out onto a board, lightly dusted with flour, and knead several times until smooth.
Place dough into a bowl, sprayed with a vegetable spray, turn over and cover with plastic wrap.  Alternatively, you can put it in a large plastic tub or even a zip-lock gallon-sized bag for the rising step.
Let rise, about 45 minutes.
When the dough has risen, turn out on the board and divide into 4 pieces.

Put one of the quarters aside and roll the three remaining pieces into ropes.  Braid the three pieces, starting in the middle and working out to the ends.  Place this braid on a lightly greased baking sheet.

Take the last piece of dough, that you set aside, and divide it into three pieces.  Braid these smaller ropes just like you did the large braid.  Place on top of the first braid.
Cover and let rise another 30 minutes.  Meanwhile, preheat the oven to 375F-degrees.  When the dough has doubled, spray with Quick Shine or brush with 1 egg yolk mixed with 1 tablespoon of water and sprinkle with sesame or poppy seeds.
Bake in preheated oven for 45 minutes.  Remove to a rack and let cool completely before slicing.

This is a wonderful bread for sandwiches because the crust is crunchy and the inside is soft.  Enjoy!