Saturday, February 27, 2010

Snickerdoodles Anyone?


I love snickerdoodles.  It is sometimes confused as a sugar cookie that has been rolled in cinnamon, however, the distinction would be the addition of cream of tartar, which you don't find in a sugar cookie dough.  I loved when my mother made snickerdoodles; the aroma from the oven of these wonderful cookies would make me stop what I was doing in anticipation of eating one.   I've discovered that the snickerdoodle dates back to 19th century New England, although some think they came from Germany.  I just know this recipe was originally from my grandmother, who cut it out from a 1958 Good Housekeeping magazine.  I don't remember her making them a lot, but my mother would.  I copied her recipe when I got married, but through the years, I've altered it a bit.  However, one thing I always use is shortening, not butter.  I've tried snickerdoodle recipes with butter and they don't have the same crispness to them, which is just as important as the characteristically cracked surface.

1 cup shortening (I use Crisco's butter-flavored, in a stick)
1 1/2 cups sugar
2 large eggs
1 tsp. pure vanilla + the seeds from 1 vanilla bean
3 cups All-purpose flour
2 tsp. Cream of Tartar
1 tsp. Baking Soda
1/2 tsp. Kosher salt


Roll cookies in: 1/2 cup sugar (I used organic cane sugar), 1 T. Cinnamon, 1/2 tsp. Cardamon (optional)

Cream shortening and sugar until light and fluffy.  Add eggs, one at a time, then, add the vanilla and seeds.  Sift the dry ingredients and add to the mixture. Blend together and chill dough 30 minutes to 1 hour.
Preheat oven to 375F-degrees.  I used a one-third cup scoop (for a large cookie) to measure out the dough, then roll it in the sugar/spice mixture.  Place on a parchment lined baking sheet.  Press each cookie down, slightly or use a fork to criss-cross across them (just like a peanut butter cookie).  Bake this larger version 12 minutes (or until light, golden brown) rotating the pan half-way through the baking time.  Remove to rack to cool.  This larger cookie makes approximately 20 cookies, but if you go for the "walnut-sized" as is typical, you will get about 3 dozen.
Note:  The smaller size will bake in 8 to 10 minutes.

Now, get yourself a glass of milk and enjoy these with your kids!

Monday, February 22, 2010

Unbelievably Good Cinnamon Buns

My memory for cinnamon buns doesn't come from my mother baking them. In fact, I don't remember her ever baking them. I do remember her hot cross buns that I will share with you all on Good Friday, but that will have to wait. No, this memory is with my daughters, not making buns, but stopping for an afternoon treat after shopping at the mall. These buns were big and we'd share them while chatting about fashion, what happened at school that day, their latest music fads, etc. Sometimes, we'd meet up with one of my friends, Mary Jayne, who would also love these incredible treats. When she joined us, I remember watching her pick out the raisins from her bun and making a neat pile of them on her plate. We'd all laugh at her "raisin hill" and it was one of those memories that today still makes me smile.
I came across this recipe on one of my favorite sites, http://www.betterbaking.com/ and was fascinated about the description..."Cake Mix Cinnamon Buns." Now, anyone who knows me, knows I have never bought (or made) a cake from a cake mix, but this intrigued me to try it. Admittingly, I felt guilty buying a cake mix and used the self-checkout so no one would think I was making a cake from a mix! The buns turned out incredibly good. However, in order to make this my twist, I've done some tweaking and here's my version. (You'll notice I don't mention the fact there's a cake mix in the batter!...still feeling guilty.)  

In the KitchenAid with the paddle attachment, mix:

1 pkg. Yellow (or white) cake mix (I chose Duncan Hines Super Moist Yellow Cake)
3 cups All-purpose flour
2 cups bread flour
1/2 tsp. cinnamon
1/4 tsp. cardamon (optional, but really good)
Meanwhile, add 2 T. (or 2 pkgs.) Active Dry Yeast to 1/2 cup very warm water. Whisk in 1/2 tsp. sugar and let mixture proof.
In a 2-cup measuring cup, add 1/2 cup milk (I used 1%, but 2% or whole milk would work) and 4 T. unsalted butter. Microwave on high for 45 seconds or until butter is melted. Add warm water to the bring the measurement up to 2 cups liquid. Add to the dry ingredients and mix. Then, add the proofed yeast mixture and mix well. Switch to the dough hook and continue to knead, adding in additional flour (1/2 cup at a time) until dough does not cling to the sides. Brush melted butter inside a plastic tub or a glass bowl and turn your dough into it. Turn the dough once, then, put the lid on (or plastic wrap) and let the dough rise for 30-40 minutes.


Meanwhile, mix 1/2 cup sugar, 1/2 cup light brown sugar, 1 T. cinnamon and 1/2 tsp. cardamon (optional) in a bowl and set aside. Also, set out one stick of unsalted butter to soften.

Sprinkle work surface with flour and turn tub (or bowl) upside down, keeping the tub over it while dough rests for 5 minutes. Remove tub and roll dough out to a 15 x 20-inch rectangle. Spread the softened butter over the surface, using an off-set spatula, then, sprinkle with the sugar/cinnamon mixture. Roll up, starting at the edge closest to you, tightly and pinching the ends across the seam when you come to the end. Turn the seam downward. Slice the roll in half, then, each half in half. Finally, the "quarters" into thirds. Place each slice, with the spiral facing up into a buttered 9 x 13-inch baking pan. (I used a sheet of parchment on the bottom, which I also buttered). Press each slice slightly to flatten. Repeat until all twelve are in the pan.


At this point they can go into the refrigerator, covered loosely with a large plastic bag for a "cold rise". This is ideal for all the busy Moms who would like to impress their family with hot cinnamon rolls that didn't come from a tube. Bring them in and set them on the counter, covered, while you preheat the oven to 350F-degrees. If you're baking them the same day, like I did, cover them with plastic wrap and a towel and let them rise for an additional 20-30 minutes. Bake for 35 minutes, turning the pan once.


Let them rest while you make up the glaze:
In a bowl, mix 2 cups confectioners' sugar, 3-4 T. milk, and 1 tsp. pure vanilla. Add additional milk to get a thin, spreadable glaze. Pour over the buns and let set. I like to cut the buns apart at this point. Serve warm

*Even though Mary Jayne didn't like raisins, you could sprinkle the dough with them or even chopped pecans after you sprinkle the sugar. Enjoy!

Saturday, February 20, 2010

Feeling a little green...


We've definitely been lucky this year...weatherwise. We've gone from Fall to Spring and as you can see from the photos I've taken of my yard, the primrose are blooming, my peonies are up, some as much as 4-inches, the daffodils are ready to burst and my bushes and flowering trees are full of color!


So, I'm feeling a little green and my baking reflects it today with a Pistachio-Chocolate Chip Pound Cake. Pistachios are one of my husband's favorite and pairing it with bittersweet chocolate will make it one of yours. The recipe comes courtesy of King Arthur Flour--The Baking Sheet/Vol. XXI, No.2/Early Spring 2010 issue. If you're not aware of this little publication, let me tell you, you're missing a lot. It is published every other month and it is filled with wonderful, tested recipes "dedicated to the pure joy of baking." Need I say more!


I baked the cake in a coffee cake pan because it makes more batter than a 9 x 5-inch loaf pan will hold. However, if you want to bake it in a loaf pan, you'll have enough to make two 3 x 5 1/2-inch loaves to give as gifts or stash in the freezer for a St. Patrick's Day treat.


Pistachio-Chocolate Chip Pound Cake

Preheat oven 350F-degrees. Choose the pan(s) you'll be using and grease them.
Cake:
3/4 cup ( 1 1/2 sticks) unsalted butter, softened
1 3-ounce pkg. cream cheese
1/4 cup pistachio paste
In the KitchenAid with the paddle attachment (or a medium bowl), beat these ingredients together until soft and fluffy.


1 1/2 cups sugar
1/2 tsp. salt
1 3/4 cups King Arthur unbleached all-purpose flour
1 tsp. baking powder
Add the dry ingredients and mix to combine. The batter may be stiff.


1/2 tsp. vanilla extract
1/4 tsp. Pistachio extract (or use 1/2 tsp. almond extract)
3 to 4 drops green food coloring (optional)
Add the flavorings and food coloring, if using and mix again.


5 large eggs
Add eggs, one at a time, beating well after each one. When done, the batter will be very fluffy.


1 cup (6 oz.) bittersweet chocolate chips
1/2 cup shelled pistachio nuts, rough chopped
Stir in the chips and nuts.


Bake in the preheated oven. Loaf pans-60 to 70 minutes. Small loaf pans-about 45 minutes. Danish tea Loaf pan (12 x 4 x 4)-60-70 minutes. Coffee cake pan, I used took 45 minutes. Remove the cake from the oven and allow to cool on a rack for 5 minutes. Turn it out on a platter to cool.


For the glaze:
Melt:
3 ounces chopped bittersweet chocolate
3 ounces of heavy cream


Stir until smooth and cool to lukewarm. Pour over the top of the cake and sprinkle with additional chopped pistachio nuts.  Sla'inte agus ta'inte...(Gaelic for Good Health and Wealth.)  Enjoy!

Tuesday, February 16, 2010

Laissez le bon temps rouler...

The king's cake is believed to have originated in France on or around the 12th century. The yeast cakes are made round to symbolize the circular route that was used by the wise men and traditionally an item such as a bean, coin or a small plastic baby to represent the Christ child is placed inside. I didn't bake a king's cake this year for Mardi Gras nor did I hide anything inside, but instead opted to do cupcakes with a Swiss Meringue Buttercream decorated with the traditional bright colors; Purple represents justice, green represents faith, and gold represents power.  Laissez le bon temps rouler...Let the good times roll!

Another tradition that my mother started was to have pancakes on "Fat Tuesday." I use to believe we got pancakes for dinner because we were suppose to fast for the beginning of Lent on Ash Wednesday and didn't get a meal again until dinner that night! However, I so looked forward to my mother's buttermilk pancakes for dinner, whatever the reason, and I hope these cupcakes create the same sweet effect before the start of Lent for your families.


Golden Cupcakes
1 1/2 cups (3 sticks) unsalted butter
2 cups sugar
5 large eggs
2 tsp. pure vanilla extract
1 tsp. Princess Cake/Cookie flavoring
3 cups cake flour (I used Queen Guinevere's Organic)
1 1/2 tsp. baking powder
1/2 tsp. baking soda
1/2 tsp. salt
1 cup buttermilk
Preheat oven to 350F-degrees. Line muffin pans with "tulip" parchment cups or cupcake cups. In the KitchenAid bowl, using the paddle attachment, beat the butter and sugar together until fluffy, 3 to 5 minutes. With mixer running add eggs, vanilla and flavoring. Meanwhile, sift the dry ingredients and add to the bowl, alternating with the buttermilk, ending with the flour. Beat until all the dry ingredients are incorporated
Use a 1/3 scoop to fill the cups. Makes 24 regular sized cupcakes or 12 extra large. Bake 20 to 25 minutes or until a toothpick inserted in the middle comes out clean. Let cool completely.


Swiss Meringue Buttercream
5 large egg whites (use the leftover egg yolks to make Creme Brulee!)
1 1/4 cups sugar
1 tsp. pute vanilla extract (or your favorite flavoring)
2 cups (4 sticks) unsalted butter, room temperature

In the KitchenAid bowl, combine the egg whites and sugar and whisk together. Place them over a pan of simmering water to create a double-boiler. While whisking constantly, cook 5 to 7 minutes until the sugar is dissolved and the temperature of the egg white mixture reaches 140F-degrees. (Use a candy thermometer.) Remove the bowl, wipe the bottom with a towel, and place it back onto the mixer. Using the whisk attachment, mix on low speed, gradually increasing to high speed until stiff, glossy peaks form, about 10 minutes. Turn the mixer to a medium speed and add the softened butter, 1 tablespoon at a time. Continue mixing until all the butter is incorporated. Your mixture may look like it's "curdled", but don't be alarmed. Turn the mixer up to a higher speed and watch it come together into the most luscious buttercream. Add the vanilla or your favorite flavoring.

I used a 6B tip to pipe the frosting, then sprinkled with colored sugar in the colors of Mardi Gras. Enjoy!
Posted by Picasa

Monday, February 15, 2010

A Valentine's Day Memory...

I'm late in posting this most special recipe that I will share with all of you. I could make the excuse that I'm still getting over jet lag, but I've chosen to take a stand of "why should just one day be devoted to love!" After all, lyricists write, "Love is a Many Splendor Thing," "All You Need is Love," "All 4 Love," "The Power of Love," "Stop, In the Name of Love," "Because You Loved Me," " I Will Always Love You," "Endless Love..." must I go on? Why can't we have this feeling all year long for the people close to us? So here is a memory from my past that centers around my maternal grandparents, Frank and Gladys Huekels, for Valentine's Day, but heck, why not bake them anytime just to say I Love You?

Each Valentine's Day, my grandparents would make heart-shaped cookies for all the grandchildren. My grandfather would mix up the dough, by hand, and my grandmother would trace around a pattern with a paring knife, but both of them would icing the confections that we all looked forward to.
I remember when my grandfather had the brilliant idea to create a heart-shaped cookie cutter from a slat of an old Venetian blind they had taken down that would expedite cutting out the shapes. Mostly, I remember the smile on my grandmother's face of how easy and fast this cookie cutter made her task. It was little things like that which showed the love between them.

I love making these cookies and remembering. Mine are a little smaller because I've got to ship them to my children and grandchildren and they're less likely to break in the mail, but the ones my grandparents made were 3 times this size.


Valentine's Day Sugar Cookies

1 lb. (4 sticks) unsalted butter, room temperature
1 1/4 cups sugar
1 large egg and 1 large egg yolk
1 T. Pure Vanilla extract
1/2 tsp. Almond extract
3 3/4 cups all-purpose flour
1/2 tsp. baking powder
1/2 tsp. salt

In a mixing bowl, cream butter until fluffy. Add the sugar and continue to cream mixture. Add the egg and egg yolk and mix to combine. Add the extracts.
Sift the flour, baking powder and salt. Add to the bowl and mix together. (Alternatively, you can stir in the dry ingredients if you want to get your workout in!) Divide dough into two disks, wrap in plastic wrap and refrigerate for at least 1 hour.
Roll dough to 1/4-inch and cut out desired shapes. If you're making more than one shape, make sure you bake like-shapes together for even baking.
Bake in a preheated 350F-degree oven for 12 minutes or until the edges are a golden brown.
You can icing them with a Royal Icing or do a simple glaze like my grandparents did:
Glaze: 2-3 cups of confectioners' sugar, 4-6 T. hot water, 1 tsp. light Karo Syrup. Beat with a mixer, adding addition hot water to create a spreadable glaze. Enjoy!
Posted by Picasa

Thursday, February 11, 2010

Sweet, Salty Caramel Brownie for your Valentine

In Seattle, we're lucky enough to have one of the best chocolatiers, Fran's Chocolates
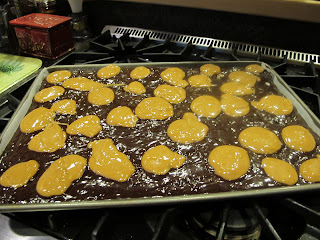
. My daughter, Kelly and I love the Salt/Caramel Chocolates and can literally eat a whole box without blinking. I thought, "wouldn't it be great to recreate that wonderful taste in a brownie?" So, I began this morning with a purpose and with great success, I must add, to have come up with a brownie that will tickle the socks (and anything else you may desire) off your Valentine!

Sweet, Salty Caramel Brownie
In a small saucepan, combine 1 bag (14 oz) of Kraft's caramels and 1 can (14 oz) Sweetened Condensed Milk. Heat over low heat, stirring intermittently to prevent scorching, until completely melted. Set aside.

In the mixing bowl of your KitchenAid, combine 1 lb. (4 sticks) of unsalted butter, and 1 lb. semi-sweet chocolate chips. and 6 ounces of unsweetened chocolate. Place over a large saucepan with simmering water (you're creating a double-boiler) and melt the butter and chocolate. When melted, place it back on
the KitchenAid and add 6 large eggs, one at time, mixing well after each addition.


Add: 2 cups Sugar
2 T. vanilla
1 T. espresso (optional, but really enhances the chocolate)
1/4 tsp. Butternut flavoring (optional)
Then, sift: 1 cup all-purpose flour
1 T. baking powder
1 tsp. Kosher salt
Stir into the chocolate mixture.
Finally, mix 12 ounces of Semi-Sweet chocolate pieces with 1/4 cup all purpose flour and add to the mixture.
Pour into a prepared pan (butter a 12 x 17-inch sheet pan, add parchment on top and butter the parchment). Place dollops of the melted caramel on top and use a knife to swirl it through the batter.
Finally, sprinkle the top with 2 T. Fleur de sel (Coarse Sea Salt) or more depending on taste.
Bake in a preheated 350F-degree oven for 20 minutes. Take the pan out of the oven and rap it against the counter to release any air bubbles. Return the pan to the oven for 10 minutes more. Don't overbake.

For that special Valentine Dessert, I've added a scoop of Purely Decadent Pomegranate Chip, (a really good Vanilla would be good too) and drizzled warm caramel on top. Yum!


Or, keep it simple. For a special lunch box surprise, wrap up the brownie and write a little note to your loved one. These brownies really have the combination I was craving--Sweet, Salty Caramel & Chocolate. Enjoy!
Posted by Picasa

Sunday, February 7, 2010

February's Give-Away and Gung Hay Fat Choy!

On Sunday, February 14, 2010, The Year of the Tiger starts. This year, the date has special significance since it also happens to fall on Valentine's Day, making it a doubly auspicious day to celebrate in the West. If you were born under the sign of the tiger, like myself, you are one of the most caring and thoughtful signs in the Chinese zodiac. You have a lot to say on the best way to right society's wrongs, and quite capable of defending children, friends, and loved ones against all enemies. In honor of our new granddaughter, Madison, the February Give-Away is an apron done from a line of fabrics entitled "Chinese Take Out." I also baked up homemade Fortune Cookies, which are easy to make, but challenging to create. I recommend you start with two at a time because they set up fast.

Ingredients: 2 large egg whites
1/2 tsp. pure vanilla extract
1/2 tsp. pure almond extract
3 T vegetable oil
8 T all-purpose flour
1 1/2 tsp. cornstarch
1/4 tsp. salt
8 T granulated sugar
3 tsp. water

1. Write (or type) fortunes on pieces of paper that 3 1/2 inches long and 1/2 inch wide. Preheat oven to 300F-degrees. Use a piece of parchment paper to draw two 4 inch circles on the underneath side. Flip it over and place on a baking sheet.

2. In a medium bowl, lightly beat the egg whites, vanilla extract, almond extract and vegetable oil until frothy, but not stiff.
3. Sift the flour, cornstarch, salt and sugar into a separate bowl. Stir the water into the flour mixture.
4. Add the flour into the egg white mixture and stire until you have a smooth batter. The batter should not be runny, but should drop easily off a wooden spoon.
5. Place level tablespoon of batter onto the cookie sheet, spacing them at least 3 inches apart. Gently tilt the baking sheet back and forth and from side to side so that each tablespoon of batter forms into a circle 4 inches in diameter.
6. Bake until the outer 1/2-inch of each cookie turns golden brown and they are easy to remove from the baking sheet with a spatula.
I baked these about 10-12 minutes.
7. Working quickly, remove the cookie with a spatula and flip it over in your hand. place a fortune in the middle of a cookie. To form the fortune cookie shape, fold the cookie in half, then gently pull the edges downward over the rim of a glass, wooden spoon or the edge of a muffin pan. Place the finished cookie in the cup of the muffin tin so that it keeps its shape.

Remember...if you want a chance to win this apron, all you have to do is "comment."
Posted by Picasa

Remembering...

Yesterday would have been my mother's 90th birthday; she passed away in 1987 from a brain tumor at the age of 67. Although lemon meringue pie was her favorite fruit dessert, German's Sweet Chocolate Cake was her favorite cake and so that's what I baked today. It's one of those special desserts that's not only decandent, but comforting. It's easy to bake so don't get scared off by the ingredients.


Preheat oven to 350F-degrees. Spray three 8 or 9-inch round cake pans with a flour/oil spray (Baker's Joy) and line the bottoms with parchment paper.
Microwave 1 pkg. (40z.) Baker's German's Sweet Chocolate, broken into squares with 1/2 cup water
on HIGH for 45 sec to 1 minute. Stir until chocolate is completely melted. Set aside.
Beat: 1 cup (2 sticks) unsalted butter, softened
2 cups sugar
until light and fluffy. Then add: 4 egg yolks, one at a time, beating well after each addition.
Blend in melted chocolate and 1 1/2 tsp. vanilla

Mix: 2 cups all-purpose flour, 1 tsp. baking soda, and 1/4 tsp. salt. Add flour mixture alternately with 1 cup buttermilk*, beating well after each addition.

In a separate bowl, beat egg whites on high speed until stiff peaks form. Gently stire into batter. Pour evenly into prepared pans. Bake 30 minutes or until a toothpick, inserted in the centers, comes out clean. Remove from oven and let cool 15 minutes before turning layers out onto a rack. Cool cake layers completely then spread with Coconut-Pecan Frosting.

Coconut-Pecan Frosting: Beat 4 egg yolks, 1 can (12 ozs) evaporated milk, 1 1/2 tsp. vanilla until well blended. Add 1 1/2 cups sugar and 3/4 cup (1 1/2 sticks) unsalted butter. Cool on medium heat approximately 12 minutes or until thickened and golden brown, stirring constantly. Remove from heat.
Add: 1 pkg. (7 oz) Baker's Angel Flake Coconut and 1 1/2 cups chopped pecans. Mix well. (Makes enough frosting to do three layers)
*Substitue: If you don't have buttermilk, just add 1 T. lemon juice or vinegar to 1 cup milk; let stand 10 minutes.

My mother was not only a wonderful baker, but an accomplished watercolor artist, knitter, seamtress,  gardener and successful at pretty much anything she attempted.  She raised eight children and was married to my Dad for almost 50 years before her passing. I miss her everyday, but I will share a special gift she gave me and why this blog is so named "My Mother's Apron Strings." When I got married, almost 42 years ago, she gave me a sash cut from one of her aprons. At the time I thought it signified letting me go to create a home and raise a family. Now, I look back and believe she gave it to me as a way to hold on to her. Thank you for all my gifts...I miss you.
Posted by Picasa

Friday, February 5, 2010

Peanut Butter Bull's Eye Cookies


When I can't sleep, my mind drifts into creating recipes (or paper flowers). The other night I came up with an idea to combine two of my favorite chocolate confections...Reece's Peanut Butter Cups and Lindt Truffles. This recipe starts out with making a ganache, as you would with truffles and then, wrap the truffle center in a peanut butter cookie dough. Very easy to make and oooooooh so good!
In a 1 quart saucepan, heat 2 cups of heavy cream just until bubbles start around the edge. Pour over 12 ounces of chocolate. I used a 9.7 bar of Scharffen Berger Bittersweet Chocolate that I chopped up and added Semi-sweet Chocolate pieces to make 12 ounces. Stir until you have a creamy, chocolate ganache. Refrigerate for 2-3 hours or until set.
When the ganache is harden, use a small cookie scoop to create small balls of truffles. Refrigerate until ready to use.   Preheat oven 350F-degrees/convection. Meanwhile, make the Peanut Butter Cookie: In the bowl of your KitchenAid mixer, beat 1 cup unsalted butter, at room temperature with 1 cup + 2 Tablespoons of light brown sugar and 1/2 cup granulated sugar (1/4 cup more for dipping). Scrape bowl and add 1 large egg. Beat well.
Add flavorings: 2 teaspoons vanilla and 1/4 teaspoon Peanut Butter oil (optional, but enhances the flavor). Beat well again. Add dry ingredients: 3 1/2 cups all-purpose flour, 1 tsp. baking soda, and 1/2 tsp. salt. Mix together until all the dry ingredients are incorporated. Don't overmix. Place truffles on a parchment-lined baking sheet. Scoop up approximately 1 tablespoon of peanut butter dough (about the size of a large walnut). Roll into a 5-inch log and wrap around the truffle.
.

Lightly spray the bottom of a glass or a pastry/tart tamper with vegetable spray, dip it into the additonal 1/4 sugar and lightly flatten the cookies. Bake in preheated oven 12 minutes or until cookie is golden brown. Let cool 5 to 10 minutes on the baking sheet before removing to rack to cool. The result is a crispy peanut butter cookie with a creamy chocolaty center.  Makes 5 dozen.  Enjoy!
My next endeavor might be a white chocolate truffle wrapped in a dark chocolate cookie...now wouldn't that be a treat for your Valentine?
Posted by Picasa

Monday, February 1, 2010

...And the Winner is...

So, the first "Give Away" goes to Sodermoto! The shoe is packaged and ready to be sent. If you will send me your address through my email, STierneyC@aol.com I will get it to you. Thanks for your comment to the blog. Look in the next few days for February's Give Away (I'm a little behind due to my trip).
Posted by Picasa