Showing posts with label CHEESE. Show all posts

Thursday, October 31, 2013

The Great Pumpkin Cheese Ball

Happy Halloween!  No one knows for sure where carving pumpkins for Jack O'Lanterns came from, but it is believed it started in Ireland--I'm Irish, so I'll go with that assumption!  The carving of turnips, beets, and gourds into grotesque looking figures to represent spirits and goblins was a common practice in both Ireland and the Scottish highlands on this day.  Today, we go a little more crazy and  a lot more artistic than these early ones, but the thought is still there--scare off evil spirits.

My sister, Barbara, introduced me to cheese balls.  She often brought them for the "appetizer table" at Mom's at holidays or picnics.  I've made quite a few for my family since then and love changing up the ingredients to meet my mood!  It's easy to do and who doesn't like cheese.

The Great Pumpkin Cheese Ball
1-8oz. pkg. cream cheese
1-8oz. container of Boursin cheese with garlic & herbs
1 tsp. Worcheshire sauce
4-8 drops of hot sauce
Pinch of salt and pepper
1/3 cup finely chopped red bell pepper--save the stem for the "Pumpkin"

1 scallion, chopped finely
2 cups grated sharp cheddar cheese
1/3 cup grated Parmesan cheese 

1 cup Cheez-it Crackers, ground finely
Assorted crackers and veggies

 In a stand mixer, using the paddle attachment, mix the cream cheese and Boursin cheese together.  Add the next 5 ingredients and mix again.  Stir in the cheeses.
Grind the Cheez-It crackers in a food processor and place on wax paper.  With clean hands, form the cheese mixture into a ball and roll into the cracker crumbs.

Once you've coated the cheese ball completely, use the back of a dinner knife to form the sections of the pumpkin.

Set the cheese ball on a platter and add the stem from the pepper to garnish.  Place assorted crackers or veggies around the platter and serve.

I've decided to have some, with a cranberry juice, but a nice glass of wine would be perfect; I just need to be awake for the Trick or Treaters that will be coming shortly.

The Vera Bradley Tote goes to Nancy C.  Please email me your address so I can get it mailed to you.

I'm sure my grands are anxious to go out.  I made Ari's costume; he wanted to be a knight, Maddie is going as a Power Ranger and Emmie a Lion.
Sir Ari with his trusty Squire!
My girls!
I hope y'all have a safe Halloween. Enjoy!

Saturday, March 30, 2013

Does Anybunny Like Biscuits...

Biscuits were one of my favorite quick breads that my mom made; fluffy and just waiting to be loaded up with butter and/or jam.  My hubby had requested that I make the Amish Breakfast Casserole again this morning and instead of toast, I decided to make biscuits to go along with it.
A biscuit is a baked, floured-based product that has it's origins in Europe, but has a totally different form.  The biscuits, found here in North America, are flaky and have more of a connection to a scone rather than the British version, which we would call a cookie.

My mother always made biscuits with buttermilk, which I also use, but I've changed and use butter rather than the shortening she would cut into the flour and I mix in two cups of grated cheese.  Also, I brush my biscuit tops with a beaten egg and she usually brushed hers with melted butter.  Finally, I leave space between my biscuits because I love that the sides brown too; typically biscuits are set side-by-side in a pan.

This recipe is easy to mix up (less than 15 minutes) and bakes in a hot oven in 13 to 15 minutes, so having a warm bread for breakfast is very do-able!

Cheesy Buttermilk Biscuits
3 1/2 + 1 T King Arthur all-purpose flour
2 T baking powder
1 tsp. sugar
1 1/2 tsp. salt
9 T cold unsalted butter (preferably European for a higher fat content), cut into small pieces
2 cups grated cheese
2 T chives, minced (optional)
1 3/4 buttermilk

1 egg, beaten to brush on top

Preheat oven to 425F-degrees.  Line a baking sheet with parchment paper.

In a stand mixer, using the paddle attachment, mix the dry ingredients together. Add the chives, if using.  While the mixer is running, add the small pieces of butter and mix until incorporated.  You may have small pieces still visible.   Add the cheese and then, while the mixer is running, slowly pour the buttermilk in.  Mix only until incorporated!
 Transfer the dough to a lightly floured bread board--it will look "shaggy."
Lightly dust the top of the dough with flour and knead just until the mixture comes together.
Lightly dust the top again, and roll dough to about 1-inch in thickness.
Now, the trick that my mother taught me and it is what makes beautiful, high biscuits...Lightly flour a biscuit cutter and press into the dough--DO NOT TWIST to release, but rather press and pull-up! I think of it as more a move Jack LaLaine would have done and not Chubby Checker:-D

Yes, that's the secret to high biscuits.  If you twist, it "closes" the dough and keeps it from rising as high as it should!

Place biscuits onto the prepared sheet and brush tops with a beaten egg.  Bake in the preheated oven 13 to 15 minutes, until golden brown.
I add space between my biscuits!

Hmmm, warm flaky biscuits...does anybunny want some? Enjoy!
 

Friday, April 13, 2012

Spring, White Bread, and National Grilled Cheese Day

Since I missed mentioning it was National Grilled Cheese Day yesterday, never mind, in fact, it's actually National Grilled Cheese Month!  This comforting sandwich, that can literally be eaten anytime of day, has become one of the most ordered entrees at restaurants and diners.  I know that our grandson, Ari, asked for it to eat every restaurant we went when he was here during the holidays...and usually for lunch when we were home.

It was a gorgeous Spring day and after getting a jump start on planting my Fuschia baskets, I decided to make a loaf of bread so I could have a grilled cheese later.

The "starts" are small, but in a month or so I will have spectacular blooms that the humming birds will adore!
Of course, cheese and bread have been around since early times, but it was in the early 18th century when the 4th Earl of Sandwich came up with putting something between bread and the term "sandwich" was used.  In the 1920s, processed cheese was introduced,  but before that an open-faced version with grated cheddar cheese was the choice.  Now, with a "lesser expensive" cheese the common person/family could take advantage of this meal.  Furthermore, it is said the top slice of bread was added to make the meal more filling!

With the combinations of cheeses, breads, and accouterments that can be added (tomato, avocado, meats, etc.) this a near perfect sandwich for any occasion and should have a month devoted to it.

White Sandwich Bread
1 cup warm water (+ additional to create a smooth dough)
1/4 cup milk, warmed in the microwave about 30 seconds
1/4 cup honey
2 T (or 2 pkgs.) active dry yeast
Kosher salt
3 T Potato flour
4 1/2 to 5 cups King Arthur all-purpose flour
4 T unsalted butter, softened to room temperature (+ more for bowl and loaf pan)

In a stand mixer, using the paddle attachment, measure the water, milk, honey and salt.  Mix to combine.  While the mixer is running, sprinkle the yeast over the ingredients in the bowl.  Turn off and let set about 5 to 7 minutes until the yeast gets foamy.

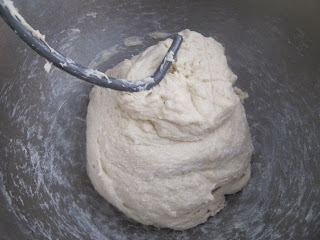
Add the potato flour and 3 cups of the all-purpose flour.  Mix to combine, then, change to the bread hook.  Add the softened butter and the 1 1/2 to 2 cups of flour.  Mix on speed #2 until the dough clings to the hook, adding any additional water, one tablespoon at a time.
Turn dough out onto a flour bread board and knead 7 to 10 minutes until you have a smooth ball.
 Place 2 T butter in a bowl and microwave about 40 seconds.  Place the dough in the bowl and immediately turn it bottom-side-up.
Cover with plastic wrap and let rise 1 hour.  Turn dough out onto the board once again and roll to a rectangle.  Roll up long edges and pinch together to form a tight seam.  Place seam side down into the buttered loaf pan(s).
I used a Pullman loaf pan to make one large loaf, but this dough will easily make two loaves in 9"x5" pans.

Brush melted butter on top of the dough, then, cover again with plastic wrap.  Let rise another 35 to 45 minutes until doubled.  Meanwhile, preheat oven to 375F-degrees.

Bake for 10 minutes, then, lower oven temperature to 350F-degrees and rotate pan.  Continue to bake another 25 to 30 minutes or until a thermometer reads internally 190-204F-degrees.
 Turn out onto a bread board and let cool completely. I know...this is really hard not to slice off a "hunk" of warm bread and slather it with butter;-)


Now, for the grilled cheese...I cut two slices and used two slices of American cheese.  It's what I grew up with even though the best grilled cheese I ever had was in Los Angeles two years ago made with a combination of four cheeses!

Spread butter on top and the bottom and place, either in a large saute pan or as I did, a panini maker.

Grill until that golden crust and the cheese is oozing out the sides, which was about 6 to 7 minutes on the panini maker.

I had a great day gardening and enjoying a wonderful sandwich from my childhood.  My friend, Louise said on Facebook..."a lot of restaurants offer them on the kid's menu--what about adults!"  I agree, you're never too old or too young to enjoy a grilled cheese.  Enjoy!


Thursday, February 3, 2011

Smoked Cheddar & Chive Cornbread Muffins

There is something about cornbread muffins that just goes so well with a pot of chili. Also, I have to say, with my chives popping up again, it gave me the idea to add some, along with smoked cheddar in these muffins to pump up the flavor.

Cornbread was something my mother "whipped" up, especially with soups and chili, and watching her blend the ingredients was mesmerizing.  I had that memory as I started pulling ingredients out of the pantry and refrigerator to make my muffins.  I also decided to try out a smaller version of the pie maker I had bought last Fall, thanks to my generous sister who gave me a gift certificate to King Arthur Flour Catalogue.  I didn't have to heat up the oven and in addition to making pies, this appliance does muffins and cupcakes!
Of course, I'll give you directions for baking them in the oven with a regular muffin pan.  These would a great addition to any Super Bowl party, especially with a pot of chili.

Smoked Cheddar & Chive Cornbread Muffins
1 1/2 cups all purpose flour
1 cup cornmeal
2 T granulated sugar
1 T baking powder
1 tsp. kosher salt
1/4 cup (1/2 stick) unsalted butter, melted
2 large eggs
1 1/4 cups buttermilk
1/3 cup sour cream
1 cup grated smoked cheddar
1/4 cup T fresh chives or 1 T dried

Preheat oven 400F-degrees.  Lightly spray muffin pan with baking spray.  
In a large bowl, measure all the dry ingredients and whisk together to combine.  Make a "well" in the center of the dry ingredients and add the melted butter, eggs and sour cream.  Use a spatula to mix with the dry ingredients.  Slowly add the buttermilk, continuing to stir to combine.  Finally, fold in the grated smoked cheddar and the chives.
I use a scoop to divide the batter in the muffin tin.  This recipe will make easily 12 muffins or, in my case using the "Babycakes," it made 18.  Bake muffins for 18-20 minutes or until a toothpick comes out clean.  It actually only took 6 minutes to bake the muffins in the Babycake.


The muffins come out golden brown and so moist.  The unique flavor of the smoked cheddar elevates the taste and the chives are an added bonus.  
Whether you're just thinking about your Super Bowl party or you're overwhelmed with snow, these muffin are sure to please your family and friends.  Enjoy!