Showing posts with label COOKIE. Show all posts

Tuesday, May 24, 2016

Peachy Keen Cookies with Streusel Topping

I love turning one dessert into another; this is an example of one of my favorites--Peach Pie and now it's a cookie!  I think this would be perfect for all the picnics coming up this summer.

I had Peach Jam that I preserved from last year from South Carolina peaches and it's soooo good, but I can imagine this with Strawberry, Raspberry or Blueberry.

Peachy Keen Cookies
3/4 cup (12 T) unsalted butter, at room temperature
1/2 cup granulated sugar
1 large egg
1 tsp. vanilla extract
1/2 tsp. almond extract
1 cup Almond Flour
2 cups King Arthur all-purpose flour
1/2 tsp. salt

1/2 cup Peach jam (preferably homemade:-D)

Streusel Topping
1/3 cup firmly packed light brown sugar
2 T King Arthur all-purpose flour
2 T unsalted butter
1/2 tsp. cinnamon
1/8 tsp. salt

Mix the sugar, flour, salt and cinnamon together.  Use a pastry cutter to cut in the butter to form the streusel.

Egg wash: 1 large egg + 1T water

In a stand mixer, using the paddle attachment, cream the butter and sugar together.  Add the egg and beat to combine.  Scrape down the sides of the bowl with a rubber spatula.  Add the extracts and beat to combine.  Add the flours and salt and mix just until the dough comes together.

I use a plastic pie crust bag and put the dough in there.  I rolled it to 1/4-inch thick.
If you don't have this, form the dough into a disc and chill at least 1 hour.  Then, you will have to roll out the dough on a lightly flour board.

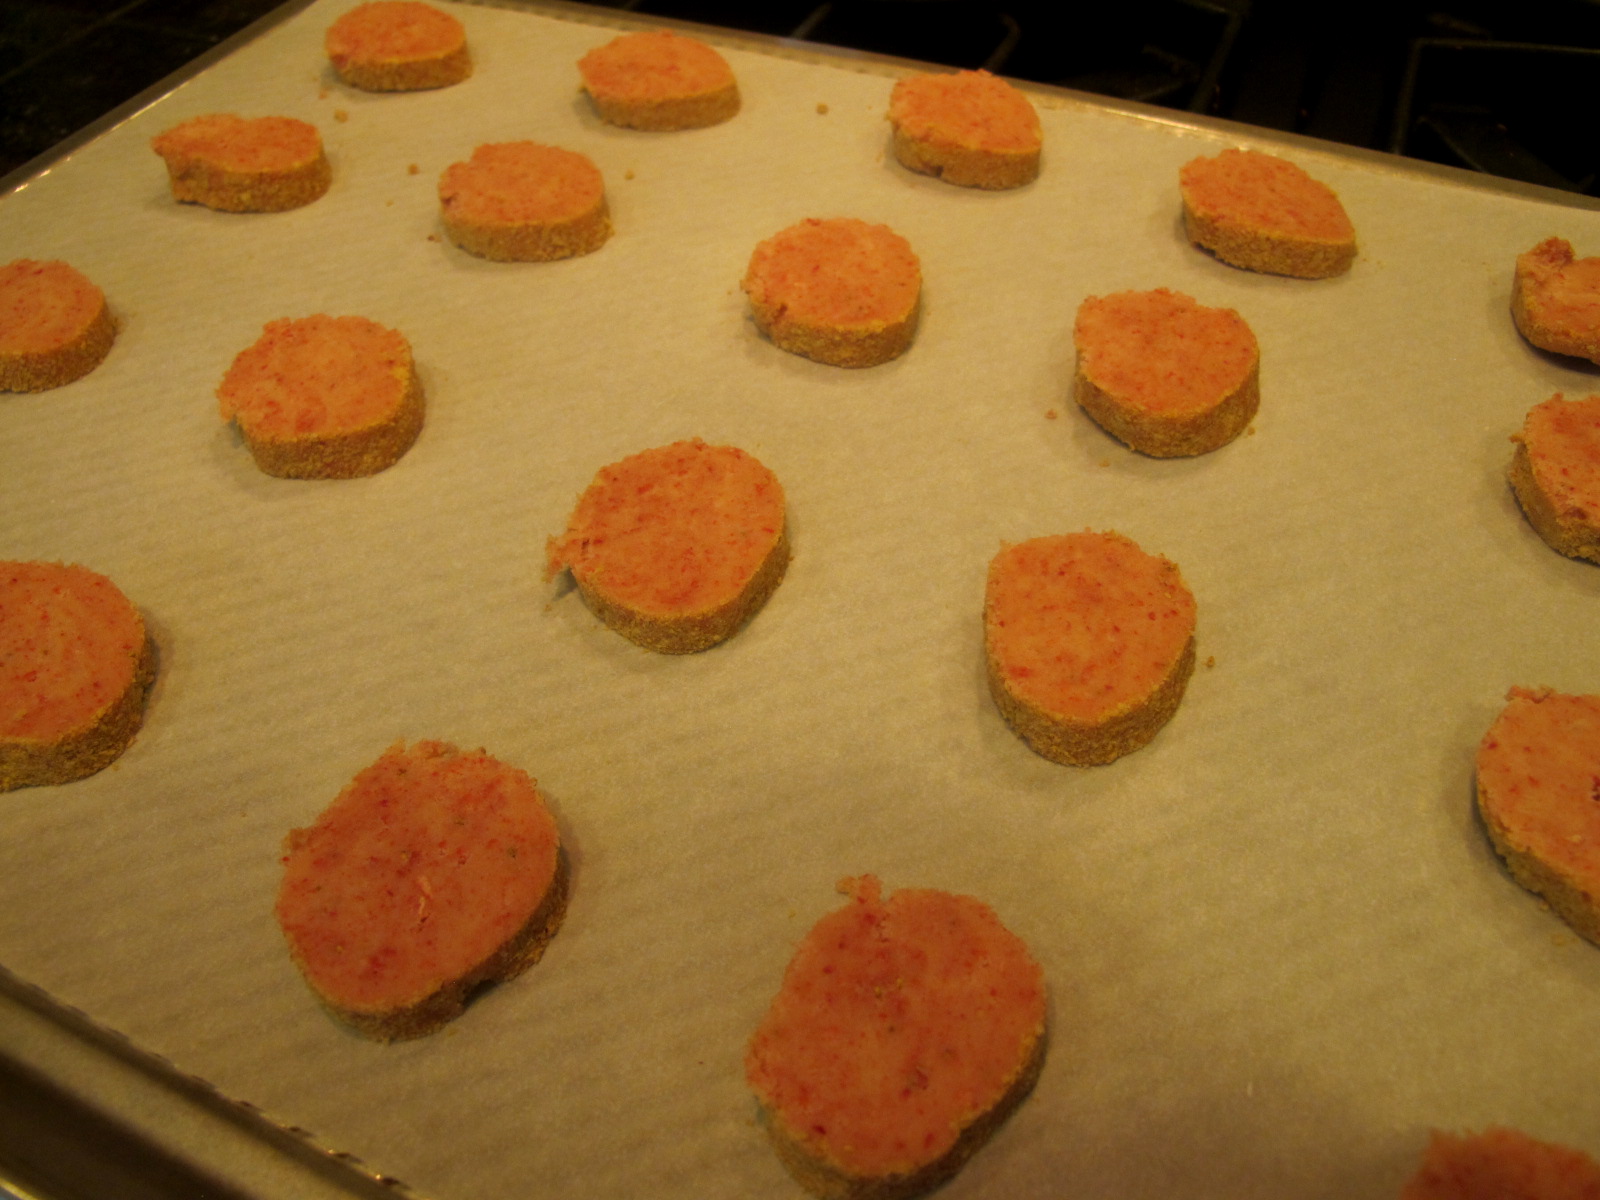
Preheat oven 375F-degrees and line a baking sheet with parchment.  Use a 3-inch round cutter and cut out the cookies.  Place the cookie rounds on the parchment-lined sheet, leaving about 2 inches in between.
Place about 1 tablespoon jam in the center of the cookie round.
With the scrape dough, roll out and use a crimping wheel to cut strips.  Create a "lattice" across the rounds.
Brush the top with the egg wash and sprinkle with the streusel topping.

Bake in the preheated for 13 minutes...until golden brown.  Remove from the oven and transfer to a rack to cool.  As a final touch, dust with confectioners' sugar.  Enjoy!

Thursday, July 9, 2015

Chocolate Cookies with White Chocolate Chunks


Mid-week and it's HOT...I'm talking mid 90s and humidity that makes it feel over a 100-degrees! My baking has to be done in the morning for sure and I thought of course, chocolate will make everything better.  And, I wanted to bake a treat for the crew that's working on the treehouse amid this weather.

Finishing touches need to be done--railings, screens on all sides, screen door installed, interior walls with blackboard paint, swings, including a tire swing and a sliding pole.  Pretty grand for our Grands!


I chose white chocolate to add to these brownie-like cookies; it's my favorite.  Consisting of cocoa butter, sugar, and milk solids, it's technically not chocolate since it does not contain cocoa solids.  During the manufacturing process the dark solids become separated from the fatty content and don't recombine.  This means that "white chocolate" contains only trace amounts of caffeine and theobromine (bitter alkaloid of the cocoa plant) and lack the antioxidants that bittersweet chocolate touts as a healthy choice.  White chocolate was launched in 1930s by a Swiss company Nestle, but it wasn't until 1945 that Kuno Baedeker would develop a white chocolate bar for The Merckens Chocolate company in America.   I also think it gives a nice contrast to the bittersweet chocolate I melted for the basis of the cookie, but you might decide to add more dark chocolate and that's your choice, of course:-D

Chocolate Cookies with White Chocolate Chunks
1/2 cup unsalted butter, softened to room temperature
1/2 cup granulated sugar
1/3 firmly packed light brown sugar
1 large egg + 1 large egg yolk
1 1/2 tsp. vanilla extract
6 oz bittersweet chocolate, melted using a double boiler method
3/4 cup King Arthur all-purpose flour
1/4 unsweetened alkalized cocoa powder 
1 tsp. baking powder
1/2 tsp. Kosher salt
3 (4 oz) white chocolate bars, cut into 1/2-inch chunks

Sift together the dry ingredients, using a sifter or you can place in a separate bowl and use a wire whisk to blend.  Set aside.

Chop the bittersweet chocolate finely and place in a bowl over a pan with simmering water, making sure the water isn't high enough to touch the bottom of the bowl.  Melt over low heat.  Remove bowl and allow to cool slightly.
 In a stand mixer, using the paddle attachment, cream the butter and sugars thoroughly.  Add the egg, egg yolk and vanilla extract and blend together.  Scrape the sides of the bowl with rubber spatula as needed.

Remove the bowl from the stand and using the rubber spatula, add the flour mixture gradually.  Incorporate thoroughly and then add the chopped white chocolate.

Chill the mixture about 25-30 minutes.  Meanwhile, preheat oven to 350F-degrees.  Line baking sheets with parchment paper.  Use a 2-tablespoon-sized scoop to measure out the dough and place on the lined sheets.  Make sure you leave about 2-inches between cookies.  Bake for 12 minutes, approx. (mine took a little less because I use the Convection setting on my oven).

Allow the cookies to cool about 7-10 minutes before transferring them to a rack to cool completely.

My sister will probably have her's with a cup of black coffee mid-afternoon, but I chose to take a break, pour a glass of lemonade and sit out on the screened in porch and watch the construction process...reading my latest book.  Enjoy!


Tuesday, March 10, 2015

Red Velvet~Cherry Chip Oatmeal Cookies

There's nothing like a good cookie...and this is a good cookie!  I was inspired by a new product from Nestles'--Toll House "DelightFulls; a filled baking morsel.
It comes in several flavors (I've used the Peanut Butter filled already), but today, I decided on the Cherry flavored filling.  As my sister and I say, "I wonder how they did it?", but they did.  These chips are just a little larger than regular chocolate chips, so they must have used Elves:-D  Combined with the Southern flare of Red Velvet and the wholesomeness of oatmeal, these cookies are sure to Delight you too!

Red Velvet~Cherry Chip Oatmeal Cookies
1 cup (2 sticks) unsalted butter
3/4 cup granulated sugar
3/4 cup firmly packed light brown sugar
2 large eggs
1/2 tsp. Almond flavoring
1 tsp. Vanilla extract
1 T Red Velvet flavoring (or you can use red food coloring
2 T Cocoa (I used Cocoa Rouge to boost the flavor and color)
Both of these products can be found at King Arthur Catalogue  
1 1/2 cups King Arthur all-purpose flour
3 cups Old-fashioned Oatmeal
1/2 cup dried cherries, chopped
1 tsp. baking soda
1/2 tsp. salt
1 pkg. Nestles' Toll House Cherry-flavored baking chips

Preheat oven to 350F-degrees.  Line two baking sheets with parchment and set aside.

In a stand mixer, using the paddle attachment, cream the butter, then add the sugars and beat until fluffy.  Add the eggs, one at a time, beating well after each addition and scraping down the sides of the bowl with a rubber spatula.  Add the flavorings, extract, and cocoa and mix again.

Add the dry ingredients, dried cherries, then the chips and mix just until combined.

Scoop the cookies with a #20 scoop (about 1/4 cup) onto the lined baking sheets, leaving about two inches between them.  Use your fingers to press down slightly on the scooped dough.
Bake for 12 minutes in the preheated oven.  Allow the cookies to cool slightly, then remove to a rack to cool completely...or if you're like me, a warm cookie is almost like heaven!
Now, who cares what the weather brings--Enjoy!
 

Saturday, January 31, 2015

Red Velvet Shortbread


One of the best things about attending the Craft & Hobby Association (CHA) trade show is getting to see friends...and new products.  Susan Balfour of Katy Sue Designs has been a friend and over the last few years, she has been designing molds for use in baking and clay.  She's given several molds to form fondant in and place on cupcakes, but this year she expanded to some mat molds.
I loved these entwined sweet hearts, which she gifted to me to try with my baking...and I did. I used my favorite shortbread recipe and keep in mine a cookie that has no leavening is what you'd want to use.

Red Velvet is certainly a "Southern" thing--Adams Extract, a Texas company, is credited with bringing red velvet cake to American kitchens.  I've created lots of recipes with Red Velvet, so why not shortbread.

Red Velvet Shortbread
1 1/2 cup (3 sticks) unsalted butter, softened at room temperature
1 cup confectioners' sugar (icing sugar) + extra for dusting the mold
1 T Red Velvet flavoring or red food coloring
1 tsp. Vanilla Extract
1 T Dutch-processed Cocoa
3 cups King Arthur all-purpose flour (plain flour)

Preheat oven to 325F-degrees.  Line two baking sheets with parchment paper and set aside.

In a stand mixer, using the paddle attachment, cream the butter thoroughly.  Add the confectioners' sugar and cream again.  Add the Red Velvet flavoring (or food coloring) and vanilla and mix again.

Add the flour and cocoa and mix just until combined.  Form the dough into two disks and roll out between parchment paper.
Roll out to 3/8-inch thick between the parchment.  Remove the top sheet of parchment, dust the mold with additional confectioners' sugar, tap to remove the excess, and place on the dough.  Using your rolling pin to impress the image.
 
I used a 3-inch square cookie cutter to cut the dough, then transferred it to the baking sheet.  I also, used a skewer to add some "air holes" to ensure thorough baking.
I also scored a diagonal line across the cookie because I wanted the end result to be triangles. Bake in the preheated oven for 25 minutes.
Just in time for Valentine's Day, these Red Velvet cookies and a sweet card are sure to impress your loved ones.  Enjoy!
One of my new lines--CountryScapes!
  

Monday, September 16, 2013

Getting My Groove Back...September's Give-Away Apron & Peanut Butter Sandwich Cookies

I use to be good at moving; we've done it enough times.  However, maybe I was in one place too long (almost 12 years) and this move took a lot out of me!  Happily, I'm recuperating and "getting my groove back."

The first item on my agenda, this past weekend, was to sew an apron for the Give-Away.  Admittedly, this is actually the fabric I bought for an apron for August, but I think it's bright, cheery feel is perfect for an end-of-season last hurrah as the weather changes to chilly nights and rainy days.  You know the rules...just comment on any of the posts for the month of September and you're entered.
Now, on to baking.  That's been a challenge in a new kitchen that doesn't have nearly the cabinet space I had, so organization has been my biggest chore.  However, September brings a new school year beginning and I wanted to do a cookie that was reminiscent of when I was a child coming home to share the excitement of my class with my mother and finding homemade cookies awaiting.

It makes me sad that so many children have a peanut allergy today and even a simple PB & J sandwich isn't allowed in the lunch box at most schools, especially private ones.  I know this because I spent 9 days with my granddaughters (a perk of living closer) and couldn't pack either one my favorite sandwich!
Me and My Girls! 
These Peanut Butter Sandwich Cookies take it one step further by adding a filling of, yes, more peanut butter.  Something I would have definitely cheered for when I got home from school.  They also remind me of one of my grandfather's favorite cookies by Burry's, Gaucho Cookies, and a stop off at my grandparents house was also in order before walking up the path to our home.
Photo borrowed from internet


Peanut Butter Sandwich Cookies

8T (1 stick) unsalted butter, at room temperature
3/4 cup firmly packed light brown sugar
1/2 cup granulated sugar
1 tsp. vanilla extract
2 large eggs
1 cup crunchy (or smooth) peanut butter
1 1/2 cups King Arthur all-purpose flour
3/4 tsp. baking soda
1/2 tsp. baking powder
1/4 tsp. Kosher salt

Filling:
4 T (1/2 stick) unsalted butter, at room temperature
2/3 cup crunchy (or smooth) peanut butter
1/2 cup confectioners' sugar

In a stand mixer, using the paddle attachment, cream the butter, peanut butter and sugars thoroughly.  Add the vanilla, then, the eggs, one at a time, beating well after each addition.  Scrape down the sides of the bowl with a rubber spatula as needed.

Add the dry ingredients on low speed or fold in with the rubber spatula, as I did.  Let this dough chill at least 1 hour and overnight is okay too.

Preheat oven to 375F-degrees and line a baking sheet with parchment paper.  Use a 1-ounce scoop and drop the dough onto the sheet, leaving about 2 inches apart.
Use a fork, dipped in granulated sugar to do the familiar "criss-cross" on top of the cookies.

Bake in the preheated oven for 12 minutes.  Remove and allow to cool on the baking sheet for 5 minutes before transferring to a rack to cool completely.

Mix up the filling - place all the ingredients into a bowl and with a hand mixer, cream to combine.  Spread filling onto one underside of a cookie, then top with a similar sized one.


Oh, I'm feeling groovy now and back to almost my old self.  These cookies were a big hit when I my hubby took them to a mixed-doubles tennis gathering at the club we've joined...yeah! a place to share my baking habit with.  Enjoy!

Saturday, June 30, 2012

RED ~ Strawberry Cheesecake Sandwich Cookies


The 4th of July is around the corner (yes, it's almost July!!) and I can't help thinking about all the glorious picnics we had at my parent's house.  This was probably my mother's favorite holiday; maybe because all our family and their friends came together or my dad would buy a couple of bushels of Chesapeake Bay Blue Crabs for the feast--which she loved.  Anyway, for me, my memories go back to the baked goods, wonderful salads, and the softball game that followed in the field my grandfather cleared for us.
Yes, that's me (years ago!) eating crab
That's Kelly (from behind) in her "sleeping bonnet" that Grandma bought her in Williamsburg--She wanted to wear it for the patriotic occasion!
Life was much simpler then and the joy that day brought is forever etched in my mind.  We would start a day or two earlier deciding the menu and beginning to bake.  Pies, cakes, and brownies, but there were also the yeast rolls for the hot dogs and hamburgers, in case anyone didn't want to pick crabs.  Salads consisted of her famous potato salad, cole slaw, and a garden salad--fresh from my grandparents garden and my sister made her wonderful macaroni salad.

It's a day that is part of our heritage and a remembrance of all those that fought for our freedom.  In honor of the Red * White * Blue, over the next few days I'm baking to show off the colors.  Today, I'm starting with Red ~ Strawberry Cheesecake Sandwich Cookies, a recipe I've created to not only show off the color, but one of the desserts that so often appeared on the buffet table!  I found these remarkable snacks called "Just Strawberries," that are 100% natural freeze-dried strawberries to accentuate the color and the flavor to add to my cookie dough.

The cookie dough is one of my favorites (with a few changes) from my grandmother who first introduced me to "ice box cookies." Along with their cheesecake-like filling, these cookies make the perfect bite for picnics or tea parties.

Strawberry Cheesecake Sandwich Cookies
1 1/2 cups (3 sticks) unsalted butter, at room temperature
1 cup granulated sugar
3/4 cup confectioners' sugar
3 large egg yolks
2- 1.5 bags "Just Strawberries"
1/2 tsp. Strawberry Flavoring 
1 tsp. Vanilla Bean Extract Crush or Extract
3 1/2 cups King Arthur all-purpose flour
1/2 tsp. Kosher salt

1-2 cups of Graham cracker crumbs (for rolling)


In a stand mixer, using the paddle attachment, cream the butter and sugars together until fluffy.  Add the egg yolks, one at a time, beating well after each addition and scrapping down the sides of the bowl as needed.  
In a mini food processor, grind the freeze-dried strawberries to a powder.
With 2 bags you will get 1 cup of "powdered" strawberries.  Add to the batter, along with the strawberry flavoring and Vanilla extract.
Again, scrape down the sides of the bowl and add the dry ingredients.  Mix just to incorporate all the flour.  Use a spatula to "pull" dough together and turn out onto a bread board to divide.

I cut my dough into fourths for ease in storing in the refrigerator.  Form each section into a 1 1/2" diameter roll.  
Place the graham cracker crumbs on a parchment lined baking sheet and roll the dough to coat the sides.  Place in plastic wrap and chill the dough for at least 2 hours.  (At this point the rolls can be placed in a gallon freezer bag and stored in the freezer for up to 3 months.)

 Preheat oven to 325F-degrees.  Line a cookie sheet with parchment paper.  Use a serrated knife to slice the dough into 1/4"-cookies.  Place on the cookie sheet, about 1-inch apart and bake in the preheated oven for 10 minutes.  Let rest on the pan for a few minutes and then transfer to a rack to cool completely.


Cheesecake Filling
4 oz. cream cheese, at room temperature
4 T unsalted butter, at room temperature
1 Vanilla bean, split and scraped (or 2 tsp. vanilla extract)
3 cups confectioners' sugar
1/3 cup Strawberry Jam

In a stand mixer, using the paddle attachment, blend the cream cheese, butter, and vanilla bean paste together.  Add the confectioners' sugar, one cup at a time, beating well on medium to incorporate thoroughly.  Stir in the Strawberry Jam.  
I used some of my homemade Strawberry Jame
 Use either an off-set spatula or a piping bag with a #12 round tip to fill the cookies, underneath side up, then, top with a "like" size cookie.'

 The cookies, if not serve immediately, should be kept in a cool, dry place--mine are in the plastic container in the refrigerator awaiting our picnic.  You could also freeze them if desired.  This recipe easily makes about 3 to 4 dozen cookies, depending on the size of the roll.
Family picnics give us so many good memories--I hope everyone has a wonderful 4th of July. Enjoy!