Showing posts with label BAR COOKIES. Show all posts

Tuesday, July 31, 2012

Lemon~Ginger Chip Bars

This week, it's just Maddie & Me.  We both miss Ari, although when I said I was going to bake this morning, Maddie announced, "I don't have to share, right, Mimi?"  They both love to bake and that makes me happy because it's my passion.  I have such great memories of baking with my Mom and her letting me discover how much fun it is...never a chore, and they're discovering that too. 

I couldn't quite decide what I was going to bake until I remember a new product I had bought from King Arthur Flour a while back--Lemon Juice Powder.  It provides a really nice boost of lemon flavor to cookies, cakes, icings, sauces and glazes--perfect for this bar.  Maddie seemed open to my experimenting with it as well as adding Lemon Chips and Ginger Chips.

Lemon ~Ginger Chip Bars
1 cup (2 sticks) unsalted butter, softened to room temperature
1 cup confectioners' sugar
1/2 cup light brown sugar, packed
2 large eggs
1 tsp. vanilla extract
1 tsp. Lemon Juice Powder
2 3/4 cup King Arthur all-purpose flour
1 tsp. baking soda
1/2 tsp. baking powder
1/2 tsp. Kosher salt
1/3 cup Mini Ginger Chips
3/4 cup Lemon Chips

Preheat oven to 350F-degrees.  Spray a 9" x 13" baking pan (I used my spring-form pan) with a non-stick baking spray.

In the bowl of a stand mixer, using the paddle attachment, cream the butter and sugars thoroughly.  
Scrape down the sides of the bowl as needed.
Add the eggs, one at a time and beat well after each addition.  Add the vanilla and lemon and mix on medium for 1 minute.  Scrape down the sides once again.  
Add the dry ingredients and mix on low to combine, then on medium for 1 minute.  Stir in the lemon and ginger chips.  Spoon cookie batter into the prepared pan.  Spread to smooth.
Always let your assistant lick the utensils to test the batter--YUM!
Bake in the preheated oven about 18 minutes or until golden brown and firm to touch.
Let cool 10 minutes.  If you have a spring-form pan, remove the sides to cool thoroughly.  Mix up glaze.

Glaze:
1 cup confectioners' sugar
1 T Light Karo Syrup
1/4 tsp. Lemon Juice Powder
2 T hot water

Blend all ingredients together and do your best "Jackson Pollack" to drizzle the glaze on top!
I asked Maddie if she wanted to try a bar and she said, "Mimi, can I have the center one?"
"Yes, you may!  Enjoy!!

Wednesday, March 28, 2012

Oh! Cherry, Not All Alone Bars


One of my favorite songs, is "Oh, Sherry" by Journey...yes, I'm a Journey fan and Steve Perry's vocals for this 80s rock band was the inspiration for these cherry (instead of Sherry), white chocolate, and pistachio bars I baked today.
http://www.youtube.com/watch?v=ysTjJaYX0WA

I discovered it's also the 100th Anniversary of the gift of the cherry trees (Sakuras), from Japan to our Nation, and in celebration of this beautiful gesture I wanted to honor this occasion with my recipe.  The unseasonably warm weather in Washington, D.C. brought out the blossoms early, but nonetheless, spectacular.  I've been lucky enough to have lived in the Maryland/D.C. area and visit Tokyo to witness this moment when Spring has indeed arrived.  Just driving down the Basin, you are in awe of these pink beauties standing in a rows as if they are debutante's at their coming-out ball.  All over Japan, they celebrate this time by having family picnics under the trees, called Hanami--literally means "viewing flowers," which is the primary reason for this event, but a variety of Japanese performing arts are also part of this tradition.

Oh! Cherry, Not All Alone Bars

2 cups + 1 T (4 sticks + 1T) unsalted butter, melted and cooled slightly
3 1/3 + 2 T light (or golden) brown sugar, packed
2 T molasses
2 Vanilla beans, split and scraped or 1 T Vanilla extract
4 large eggs
4 cups flour
2 1/2 tsp. baking powder
1 tsp. Kosher salt
1 1/4 cups dried cherries, soaked in 3/4 cup hot water with a Pomegranate/Cherry Green Tea bag
2 cups white chocolate chips
1 1/2 cups chopped pistachio


Preheat oven to 350F-degrees.  

Melt butter and  use approximately 1T to brush the 12"x17" baking pan with, then line bottom with parchment and brush with more butter.

Bring 3/4 cup of water to a boil (I did mine in the microwave for 1 minute).  Add the tea bag (if using), then the dried cherries.  Let steep about 30 to 40 minutes.  Drain, reserving liquid and coarsely chop the cherries.

In the bowl of a stand mixer, using the paddle attachment, measure the brown sugar, vanilla (beans or extract) and molasses.  Beat on medium to blend.  Add the slightly cooled butter while the mixer is on low to slowly incorporate.  When it looks like most of the butter has been absorbed by the sugar, raise the speed to medium and beat well.  Test the  bottom of the bowl, underneath, for temperature before adding the eggs (you wouldn't want scrambled eggs in your mixture:-)  Add the eggs, one at a time, beating well after each addition.  Scrape down the bowl and beat again.

Add the dry ingredients--flour, baking powder and salt and mix on med/low to incorporate--don't over mix.  Remove from the stand and with a spatula, make sure all the flour mixture is indeed incorporated.  Stir in the chopped, dried cherries, 1 cup of the white chocolate chips, and 3/4 cup of the pistachios.  
Spoon mixture into the prepared pan and spread evenly.

Sprinkle top with the remaining 1 cup white chocolate chips and 3/4 cup of pistachios.

Bake for 10 minutes, then lower oven temperature to 325F-degrees and rotate pan.  Bake an additional 16 to 18 minutes, until golden brown.

Optional Glaze:
1 cup confectioners' sugar
2-3 T reserved cherry/tea liquid
1 T light Karo syrup

Mix all the ingredients together and drizzle over the bars, if desired. 


Sharing the beauty of nature is truly a wonderful gift--Happy Anniversary Cherry Trees. Enjoy!


Thursday, March 1, 2012

Maple Sugar Bars

Maple Sugar Bars or as some would call them, Maple Brownies, is a recipe I came across in my recent issue "Early Spring 2012" of The Baking Sheet by King Arthur Flour Company.  It is published six times a year and is filled with just wonderfully, tested recipes that have inspired me for years.

It's been twelve years since my husband and I took a trip to Norwich, Vermont, mostly to visit the King Arthur Flour Company and see where I had been spending all my money! LOL!!  However, in the few days we were there, we also explored the surrounding areas and visited a maple farm (also called a Sugar bush or Sugar wood) and a dairy farm, where heavenly cheese was being made.  Our trip home was quite pleasant with our bounty of bread from King Arthur's Bakery, fresh cheddar cheese, and maple candy!

I admit, I was quite intrigued with the whole maple syrup process and want to share with you some interesting facts so you too can better appreciate this product.
  • The three types of trees tapped to collect the sap to make syrup are the Sugar Maple, Black Maple and Red Maple.
  • A syrup must be made entirely of maple sap to be labelled maple!
  • Vermont is the largest producer with 5.5% of the global supply.
  • Maple trees can begin being tapped between the ages of 30 to 40 years old and up to over 100 years old.
  • Usually the tapping begins in late winter to early spring and can can for 4 to 8 weeks depending on the weather (cooler is the best for the collection).
  • It takes 20 to 50 litres (depending on the concentration) to get 1 litre of syrup!
  • The syrup can be heated longer to create maple sugar, maple butter or cream, and maple candy.
  • Whereas, trees are tapped by boring holes in the trunk, modern Sugar Farms use a series of tubing to speed up the collection.
Beatrice Vaughan is the author of this recipe I am sharing with you today.  As she says, "it isn't a low budget treat" because of the price of the maple sugar, "but the maple wallop it packs, and the fact that the cookies stay moist and chewy for days makes it worth it."  I certainly agree and the cool weather we're having, in addition to the incredible aroma in my kitchen, brings me back to our trip and makes me long for a visit to this area again.

Maple Sugar Bars
I doubled the recipe to bake in a 13" x 9" pan.  However, you can easily divide the ingredients in half for a smaller version done in an 8" pan.
12 T unsalted butter ( 1 1/2 sticks) softened to room temperature
2 cups maple sugar 
2 large eggs
1/2 tsp. maple flavoring (I did not double this ingredient for the larger amount)
1/2 tsp. vanilla extract (I used Vanilla-Butternut flavoring)
2 cups King Arthur all-purpose flour
2 tsp. baking powder
1 tsp. salt
2 cups broken walnut meats, toasted in preheated oven for 6 minutes


Preheat oven to 350F-degrees.  Lightly spray a 13"x9" baking pan with a baking spray and set aside.

In a stand mixer, using the paddle attachment, cream the butter and maple sugar together.  Scrape down sides as needed.  Add eggs, one at a time, beating well between each addition, then, add the flavorings.  Whisk the dry ingredients and STIR into the batter to combine.  Stir in the broken walnut pieces. 
Spread the mixture into the greased pan.  I used an off-set spatula to assist the spreading.

 Bake in preheated oven for 25 minutes until the edges are a golden brown and just begin to pull away from the pan.  Remove from the oven and cool on a rack.
I discovered using my "pizza slicer" is a perfect tool for getting nice straight lines when cutting cookies into bars.
 I was able to get 24 (2" x 2") bars from this recipe.

These bars are moist and chewy and each bite I am reminded of watching the large vats of sap being heated to create such wonderful products.  Enjoy!

Wednesday, January 4, 2012

Ooey Gooey Coconut Bars

I'm sorry for being gone so long; I wish I could say it was because I was having loads of fun and adventures with Ari, but sadly, the guys brought the flu from Spain and I've been ill since before Christmas.  I'm starting to feel a little more like myself and even ventured into the kitchen this morning to bake some bagels for everyone and replenish the cookie jar.

The concept of these cookies has their origins from the Borden's Sweetened Condensed Milk creation called 6 (or 7)-layer bars.  Touted as one of the easiest cookies to make, I know I've been enjoying them since I was a little girl in school.  I kept these pretty simple and only added coconut and chocolate chips, but feel free to sprinkle with pecans or butterscotch chips like the original.  And, by the way, you'll notice I used a mixture of graham crackers and Biscotti cookies to make the crust...because I didn't have 3 cups of graham cracker crumbs.

Ooey Gooey Coconut Bars
3 cups graham cracker crumbs (or a combination of crumbs)
3/4 cup (1  1/2 sticks) unsalted butter, melted
1/2 tsp. salt
 
Preheat oven to 350F-degrees.  Brush some additional melted butter on the bottom of a 9" x 13" baking pan and line with parchment.  Set aside.
Pour melted butter over crumbs and mix thoroughly.  Distribute on the bottom of the pan and use the bottom of a measuring cup press down in the pan.

Filling:
2 cups coconut
1 cup bittersweet chocolate chips
1 cup white chocolate chips
2 cups - 2 T (Sweetened Condensed Milk)


Layer the chocolate and coconut (and any other ingredients you desire).  Finally, pour the Sweetened Condensed Milk over the whole mixture.


Put pan in the oven and bake 26 to 30 minutes.  Remove from oven and let cool for 10 minutes, then, take a knife or spatula to go around the edges and loosen the bars.  (I used my spring form pan.)


Ari was my official taster and said, "Mimi, these are good!"


...but then, any super hero would!

Wednesday, September 7, 2011

Macaroon Jam Bars


I've come up with a lot of "dynamic duos" in baking in the past and this recipe is no exception.  This time, I decided to combine a rich shortbread-like base under a coconut macaroon topping with a luscious jam in between the two.  Sounds good and I guarantee it's tastes as good as it sounds.

Here in the United States, macaroons are mostly a dense, coconut and egg white cookie, sometimes dipped in chocolate and very much like their "ancestors" from Scotland that were more cake-like. The sophisticated macarons from France which are made from ground almonds and egg whites, colored in beautiful pastels and layered with a flavored Swiss buttercream are just as good, but wouldn't work for these bars.  I decided to do a jam between the layers, but instead of the usual oat base, this is a shortbread with added  dessicated coconut (unsweetened coconut) to enhance the macaroon on top.  You can change up the flavor with variety of jam you use; I used up two flavors I had in the refrigerator from what I previous had preserved--Strawberry and Strawberry/Peach, but raspberry, cherry, even blueberry would have been great.


Macaroon Jam Bars
Cookie base:
14 T (1 3/4 sticks) unsalted butter, melted
2/3 cup granulated sugar* 
2 1/2 cups King Arthur all-purpose flour
1 tsp. baking powder
1/4 tsp. Kosher salt
1 cup dessicated coconut (unsweetened)

Preheat oven to 350F-degrees.  Spray a 9" x 12" baking pan with a non-stick spray--you can also line with parchment.
In a stand mixer, using the paddle attachment, mix up all the dry ingredients, then, gradually add the melted butter and mix until evenly coated.  Don't worry, it will still be crumbly.
Spoon into the prepared pan and use your fingers to press firmly.
Bake in the preheated oven about 15 to 18 minutes or until golden brown.  Don't over bake.
Macaroon topping:
1 14oz. pkg. Baker's sweetened coconut
1/4 cup sugar
3 large egg whites
2 tsp. Vanilla extract
pinch of salt

2 cups of your favorite Jam
In a medium mixing bowl, add all the ingredients for the macaroon topping.  Mix by hand to incorporate all the ingredients.
Measure 2 cups of jam.  When the cookie base comes out of the oven, first use an off-set spatula to spread the jam over the top.
Next, spoon dollops of macaroon topping and spread to cover the jam, being careful not to mix the two together.  Bake in the preheated oven 18-20 minutes more until macaroon topping is browned.  Let cool before cutting into bars.

Another dynamic duo of flavors that would be a great lunch box treat or afternoon snack...and while the kids are at school, have a cup of tea and Enjoy!

Tuesday, June 21, 2011

Golden Fruit Bars


Awhile ago, my daughter, Erin and I were talking about cookies and she asked me if the Golden Raisin Biscuits were still available in the grocery store?   I hadn't bought them since she lived at home and  said, "I don't know, but I will check when I go shopping."  These "store bought" cookies were a favorite of our family and I had never tried to replicate them because they were perfect!  However, "necessity is the mother of invention" (aka, difficult situations inspired ingenious situations), and as I sadly discovered they were no longer being made, I decided to try to come up with my version.

The biscuits were made by the Sunshine Baking Company, but it was bought by Keebler and then, later Kellogg.  The cookies were discontinued in 1996.  I did discover that in the 1960s, the Sunshine Baking Company actually replicated the recipe from a Scottish baking company called Crawford's in Edinburgh.  These biscuits are still available (I found them online through Amazon) and are called Garibaldi--Golden crispy biscuits filled with currants.  Of course, I bought a carton and shared them with my daughter and sister!

My attempt today is softer than the biscuits we remember, but I decided it was the taste I wanted and the texture was secondary.  Both the Garibaldi biscuits and the Sunshine Raisin Biscuits were definitely more cracker-like, but for the home baker, these come pretty close. I've named them fruit bars because if you don't like currants, substitute dried cranberries, raisins, or even cherries.

Golden Fruit Bars

2 cups King Arthur All-purpose Flour
1 cup King Arthur Organic Wheat Flour
3/4 cup granulated sugar
1 T Vital Wheat Gluten
1/4 cup Baker's Special Dry Milk
1 tsp. baking soda
1 tsp. baking powder
1/2 tsp. salt
1 cup Vegetable Oil
2 T Light Karo Syrup
2 cups dried currants

Egg Wash: 1 large egg + 1 T milk

Equipment: 12" x 17" or 13" x 18" sheet pan

Place the dried currants in a bowl and cover with boiling water.  Let set 45 minutes to an hour.  Drain thoroughly and set aside.

In the bowl of a food processor, add the first eight ingredients to the bowl and pulse to combine.  Combine the Karo syrup and the vegetable oil in a measuring cup and while the processor is running, pour through the feed tube into the dry ingredients.  Stop the machine when all the liquid has been added.  Add the currants and pulse several times to combine.  The mixture will resemble "wet sand".

Dump the mixture onto the sheet pan, distributing the dough to completely cover the bottom.  Press down with your fingers.  

If desired, place a piece of parchment paper over the top and with a pastry roller, smooth the surface.  You can also use a pronged roller to prick the surface or use a fork.

Let dough chill while you preheat oven to 325F-degrees.  Remove the pan from the refrigerator and brush the egg wash over the top of the cookie--this step gives the "golden" brown color the biscuits are known for.  

Bake in the preheated over for approximately 18-20 minutes or until golden brown.  Remove from the oven and while warm, cut into squares.  Let cool completely!  


These bars tasted wonderful, but not as dry and crisp as the original, which was okay by me.  I love the simplicity of these cookies and know they will be appreciated by my family--mission complete or as Maddie and Ari would say..."Ta Da!"  
 Enjoy!


Thursday, April 28, 2011

Hula Bars


I started out naming these cookies, Brown Butter~Macadamia~Chocolate Chip Bars.  What a mouth-full! And, even though it tells you what's in them, it just didn't relay the memory to me, and that's what was important.

When I was seven, my mother enrolled me in an after school ballet class offered by Parks & Rec.  I loved it and my mother thought it made me more graceful.  (I was told, I had the habit of running instead of walking and we all know what that leads to--a lot of skinned knees.)  When the program ended, but I wanted to continue, she found a dance school for me.  For the next eight years of my life, on Saturday morning and then, an added Thursday evening, I took ballet, jazz, and Hula.  My mother sewed costumes for all my recitals and she and my dad took turns taking me to classes.  I never missed a class, even though, when I was 12 and had injured my legs at school one day.  I was diagnosed with traumatic arthritis and couldn't walk for three weeks. However, that didn't stop Dad from carrying me into class to watch the steps for our upcoming recital in a few months.  I finished with 8 years of perfect attendance because of the dedication and support of my parents...and I'd like to think I'm a bit more graceful!


However, these aren't called Ballet Bars, but Hula Bars.  It was my mother's memory of living in Hawaii, when my grandfather was stationed at Pearl Harbor, that led me to take hula.  I have to admit, I loved it just as much because of the story the dance would convey.  I was good enough to be part of a troupe the school singled out to do mini-recitals for clubs and organizations (i.e., Knights of Columbus, USO, etc).  A funny coincidence, but my future father-in-law told me he once remembered our troupe coming to the Knights of Columbus for Hawaiian Night and dancing...how lucky his son was!


Hula Bars
2 cups (4 sticks) unsalted butter, melted and browned 
2 1/2 cups dark brown sugar, packed
1 cup granulated sugar
4 large eggs
1 T Vanilla extract
4 cups King Arthur all-purpose flour
2 tsp. baking powder
1 tsp. baking soda
1 tsp. Kosher salt
2 cups Macadamia nuts
1 3/4 cup Bittersweet (or Semi-sweet) chocolate chips

Preheat oven 350F-degrees.  Brush with melted butter, a 12" x 17" or 13" x 18" rimmed baking, then, line with parchment paper and brush with the melted butter again.  Set aside
Coarsely chop, then, lightly roast the Macadamia nuts in the oven for 5 minutes.  Let cool.
Brown the 4 sticks of unsalted butter, using at least a 3-quart sauce pan.  Set aside to cool.

In a stand mixer, combine the sugars.  While the mixer is running, pour the browned butter over the sugar and mix until completely combined, 3 to 5 minutes.  Add the eggs, one at a time, beating well after each addition.  Mix in the Vanilla.

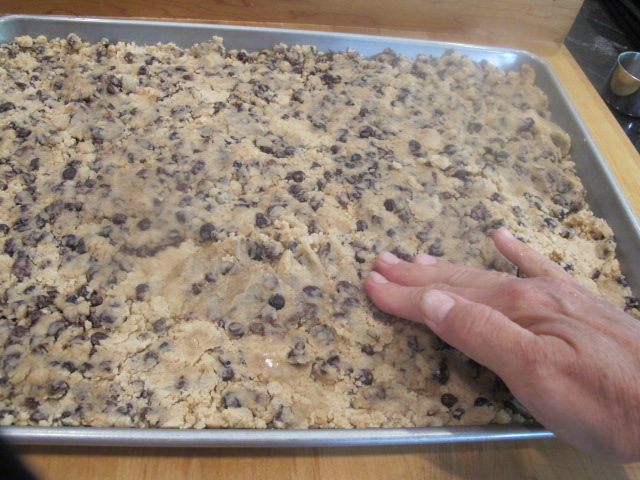
Combine the dry ingredients in a separate bowl and whisk.  Fold the dry ingredients into the sugar/butter/egg mixture.  Fold in 3/4 cup each of the Macadamia nuts and chocolate chips.  Blend until all the flour is incorporated.  Use an off-set spatula to spread batter onto the prepared baking sheet.  Sprinkle the remaining 1 1/4 cup of Macadamia nuts and 1 cup of chocolate chips on top.  Bake in the preheated oven for 10 minutes.  Lower temperature to 325F-degrees, rotate baking pan, and bake another 16 to 18 minutes.  (Mine went the full 18 minutes).

Cool in the pan for 30 to 45 minutes before cutting into bars.

My hips are a bit wider and I'm not sure I could dance on point in toe shoes anymore, but the experience will last a life time.  I'm forever grateful for wonderful parents that allowed me to follow my dreams...isn't that what we do as parents for our children.  Enjoy!