Showing posts with label RED VELVET. Show all posts

Tuesday, March 10, 2015

Red Velvet~Cherry Chip Oatmeal Cookies

There's nothing like a good cookie...and this is a good cookie!  I was inspired by a new product from Nestles'--Toll House "DelightFulls; a filled baking morsel.
It comes in several flavors (I've used the Peanut Butter filled already), but today, I decided on the Cherry flavored filling.  As my sister and I say, "I wonder how they did it?", but they did.  These chips are just a little larger than regular chocolate chips, so they must have used Elves:-D  Combined with the Southern flare of Red Velvet and the wholesomeness of oatmeal, these cookies are sure to Delight you too!

Red Velvet~Cherry Chip Oatmeal Cookies
1 cup (2 sticks) unsalted butter
3/4 cup granulated sugar
3/4 cup firmly packed light brown sugar
2 large eggs
1/2 tsp. Almond flavoring
1 tsp. Vanilla extract
1 T Red Velvet flavoring (or you can use red food coloring
2 T Cocoa (I used Cocoa Rouge to boost the flavor and color)
Both of these products can be found at King Arthur Catalogue  
1 1/2 cups King Arthur all-purpose flour
3 cups Old-fashioned Oatmeal
1/2 cup dried cherries, chopped
1 tsp. baking soda
1/2 tsp. salt
1 pkg. Nestles' Toll House Cherry-flavored baking chips

Preheat oven to 350F-degrees.  Line two baking sheets with parchment and set aside.

In a stand mixer, using the paddle attachment, cream the butter, then add the sugars and beat until fluffy.  Add the eggs, one at a time, beating well after each addition and scraping down the sides of the bowl with a rubber spatula.  Add the flavorings, extract, and cocoa and mix again.

Add the dry ingredients, dried cherries, then the chips and mix just until combined.

Scoop the cookies with a #20 scoop (about 1/4 cup) onto the lined baking sheets, leaving about two inches between them.  Use your fingers to press down slightly on the scooped dough.
Bake for 12 minutes in the preheated oven.  Allow the cookies to cool slightly, then remove to a rack to cool completely...or if you're like me, a warm cookie is almost like heaven!
Now, who cares what the weather brings--Enjoy!
 

Saturday, January 31, 2015

Red Velvet Shortbread


One of the best things about attending the Craft & Hobby Association (CHA) trade show is getting to see friends...and new products.  Susan Balfour of Katy Sue Designs has been a friend and over the last few years, she has been designing molds for use in baking and clay.  She's given several molds to form fondant in and place on cupcakes, but this year she expanded to some mat molds.
I loved these entwined sweet hearts, which she gifted to me to try with my baking...and I did. I used my favorite shortbread recipe and keep in mine a cookie that has no leavening is what you'd want to use.

Red Velvet is certainly a "Southern" thing--Adams Extract, a Texas company, is credited with bringing red velvet cake to American kitchens.  I've created lots of recipes with Red Velvet, so why not shortbread.

Red Velvet Shortbread
1 1/2 cup (3 sticks) unsalted butter, softened at room temperature
1 cup confectioners' sugar (icing sugar) + extra for dusting the mold
1 T Red Velvet flavoring or red food coloring
1 tsp. Vanilla Extract
1 T Dutch-processed Cocoa
3 cups King Arthur all-purpose flour (plain flour)

Preheat oven to 325F-degrees.  Line two baking sheets with parchment paper and set aside.

In a stand mixer, using the paddle attachment, cream the butter thoroughly.  Add the confectioners' sugar and cream again.  Add the Red Velvet flavoring (or food coloring) and vanilla and mix again.

Add the flour and cocoa and mix just until combined.  Form the dough into two disks and roll out between parchment paper.
Roll out to 3/8-inch thick between the parchment.  Remove the top sheet of parchment, dust the mold with additional confectioners' sugar, tap to remove the excess, and place on the dough.  Using your rolling pin to impress the image.
 
I used a 3-inch square cookie cutter to cut the dough, then transferred it to the baking sheet.  I also, used a skewer to add some "air holes" to ensure thorough baking.
I also scored a diagonal line across the cookie because I wanted the end result to be triangles. Bake in the preheated oven for 25 minutes.
Just in time for Valentine's Day, these Red Velvet cookies and a sweet card are sure to impress your loved ones.  Enjoy!
One of my new lines--CountryScapes!
  

Sunday, February 2, 2014

Red Red & White Cookies and January's Apron Winner

Would it surprise you that heart disease is the number 1 killer of women in the United States; claiming more lives than all forms of cancer (including breast) combined?  On February 7th, the "Go Red for Women" campaign is in it's 10th year to raise awareness in the fight against heart disease and celebrate National Wear Red Day.

My Grandma Gladys died of congestive heart disease in 1973, at the age of 72, and it's made me aware that taking care of myself--watching my diet, exercising, knowing my cholesterol levels and blood pressure, is very important.  Besides heredity, other risk factors are important as well.  You can go to their website and read all about them--https://www.goredforwomen.org/wearredday//

This is my twist on the traditional Black & Whites, with a Southern taste.  I'm such a devoted customer to King Arthur Flour and have found some incredible products that make these cookies perfect.
Red Velvet Bakery Emulsion and Cream Cheese Icing Flavor.  I love Black & Whites and these Red Red & Whites didn't disappoint my palette. The gorgeous deep red color in a soft, cake-like cookie, with a shiny, almost like fondant, icing, cream cheese flavored have probably surpassed my desire to have the traditional ones.

Red Red & White Cookies
1/2 cup shortening
1 cup granulated sugar
2 large eggs
1 tsp. Vanilla extract
2 tsp. Red Velvet Bakery Emulsion (or Red Food Coloring)
1/2 cup milk (do NOT use non-fat)
2 cups King Arthur all-purpose flour
3 T Dutch-processed cocoa
1/2 tsp. baking soda
1/4 tsp. salt


Preheat oven to 350F-degrees.  Line a baking sheet with parchment or use a "Whoopie Pie" pan sprayed with a baking spray.
In a stand mixer, using the paddle attachment, cream the shortening and sugar until fluffy.  Add the eggs, one at a time, mixing well after each addition and scraping the sides of the bowl as needed.
Add the flavorings (or red food coloring) and mix again.


Sift the flour, cocoa, baking soda, and salt together and add to the batter with the milk.  Mix on medium just until combined; again, scraping down the sides of the bowl as needed.
Use a 2-Tablespoon-size scoop to measure out the batter into the wells of the pan or onto the parchment-line baking sheet.  Bake for 12 minutes--test by lightly pressing your fingertips onto the cookie tops.
Transfer cookies to a rack to cool completely.  This recipe makes almost 3 dozen cookies using the Whoopie Pan.

Glaze:
1/3 cup water
1 T + 1 tsp. Light Karo syrup
2 1/2 cups confectioners' sugar
Scant 1/2 tsp. Cream Cheese Icing Flavor

Measure the confectioners' sugar into a large bowl.  In a small sauce pan, bring the water and Karo syrup to a boil.  Remove and pour over the confectioners' sugar, stirring to combine.  If needed, add more hot water, 1 Tablespoon at a time, until you have a glaze consistency. Add the flavoring and stir.

Divide the icing in half and color one bowl with Red Paste Color to get a deep red color without watering down the glaze.
Use an offset spatula to coat half of the cookie with the white icing.
White you are glazing the cookies with the white icing, cover the red icing with a damp paper towel to keep it from drying out.
Once you have finished with the white icing, now coat the other half of the cookie with the red.
The icing came out exactly, which for me is not always the case, but nice when it happens!
Not only is this cookie perfect for the Go Red Day, it would be great for Valentine's Day too...don't you agree? Enjoy!

Now, for the winner of January's apron...which is also in Red, Estelle!
Please email me with your address and I will get this apron out to you ASAP.  February's apron is sewn and will be up tomorrow (I'm really trying to stay ahead of things now, XOXO)
 

Wednesday, February 13, 2013

Red Velvet Pancakes with Maple Cream Cheese Butter

Red Velvet anything is one of my favorites--it must be my Southern roots or the fact we live close to the Canadian border!  For Shrove Tuesday, I made pancakes, just like my mother did, but different:-D

Red Velvet (cake) began it's popularity in the late 40s and 50s at Canada's Eaton's Department Store, where their employees were sworn to secrecy about the ingredients.  The insurgence of this cake in the United States came after the movie, "Steel Magnolias" when the groom's cake, made in the shape of an armadillo, was red velvet!

Red Velvet Pancakes
1/2 cup granulated sugar
2 large eggs
1/2 cup vegetable oil
2 T unsalted butter, melted
2 tsp. Red Velvet Emulsion (or 1 T. Red Food coloring)
2 T Dutch-processed cocoa
1 tsp. vanilla extract
2 1/2 cups King Arthur all-purpose flour
1 tsp. baking soda
1/2 tsp. baking powder
1/4 tsp. salt
1 1/2 cups buttermilk

In a stand mixer, using the paddle attachment, (or a hand-held mixer and large bowl) beat the sugar, eggs, oil and butter together until it emulsifies.  Add the Red Velvet Emulsion or food coloring, cocoa, and vanilla and mix once again.

Whisk briefly all the dry ingredients in a medium bowl and add to the red velvet mixture, alternating with the buttermilk.

Heat griddle on med/low.  To test if the griddle is ready, sprinkle some water on the surface (I run my fingers under water and splash the surface)--the drops of water should "dance!"

Scoop or spoon the batter onto the surface, using the back of the spoon to spread the batter slightly.
Cool until you see the surface dry slightly, then flip.  I have a warming drawer, but you could also use a pancake "steamer" to keep them warm while making the rest of the pancakes.
Maple Cream Cheese Butter
1-8oz package cream cheese
2 T unsalted butter, softened to room temp.
1/4 cup maple syrup

In a medium bowl, using a mixer, beat the cream cheese and butter together until creamy.  Slowly add the maple syrup, beating well after each addition.  Turn mixer to med/high and beat until fluffy.  Add a scoop of Maple Cream Cheese Butter to each plate, then, serve some additional warm syrup on the side.
Beautiful red color and the delicious taste of the maple cream cheese butter was all I needed for this tradition my mother started.  Let the good times roll...and the maple syrup. Enjoy!  


Wednesday, December 12, 2012

Red Velvet Snowballs

My mom and I made Russian Tea Cakes (or Mexican Wedding Cookies) every Christmas--in a crescent shape, just like clock-work.  These are another cookie that are not only easy, but keep a long time, especially in a cool, dry place or in the freezer.  This year, feeling my southern roots (I was born in Memphis at the Millington Naval Hospital) I decided to make a red velvet version.

Adams Extract, a Texas-based company is credited with bringing red velvet cake to America during the depression.  In Canada during the 1940s and 50s, Eaton Department Store swore their employees to secrecy when they started producing this cake with it's rich cream cheese icing.  A resurgence of this dessert's popularity came with the hit movie, Steel Magnolias in 1989 and it's found in almost every bakery in the United States.

Red Velvet Snowballs
1 cup (2 sticks) unsalted butter, at room temperature
1/3 cup confectioners' (icing) sugar
1 tsp. vanilla extract
2 tsp. Red Velvet Bakery Emulsion  or 1 oz. Red Food Colouring
1 T Dutch-processed Cocoa
pinch of salt
2 cups King Arthur all-purpose flour (spoon flour into the measuring cup and level off with a knife)
1 cup finely chopped pecans, lightly toasted for 5 minutes in the preheated oven

Additional confectioners' sugar for rolling the balls in

Preheat oven to 350F-degrees.  Line a baking sheet with parchment.

In a stand mixer, using the paddle attachment, cream the butter well.  Add the confectioners' sugar and cream thoroughly.  Scrape down the sides and add the flavoring or food colour, mix again.  

Add cocoa, salt and flour, then mix to combine.  Stir in the finely chopped pecans.
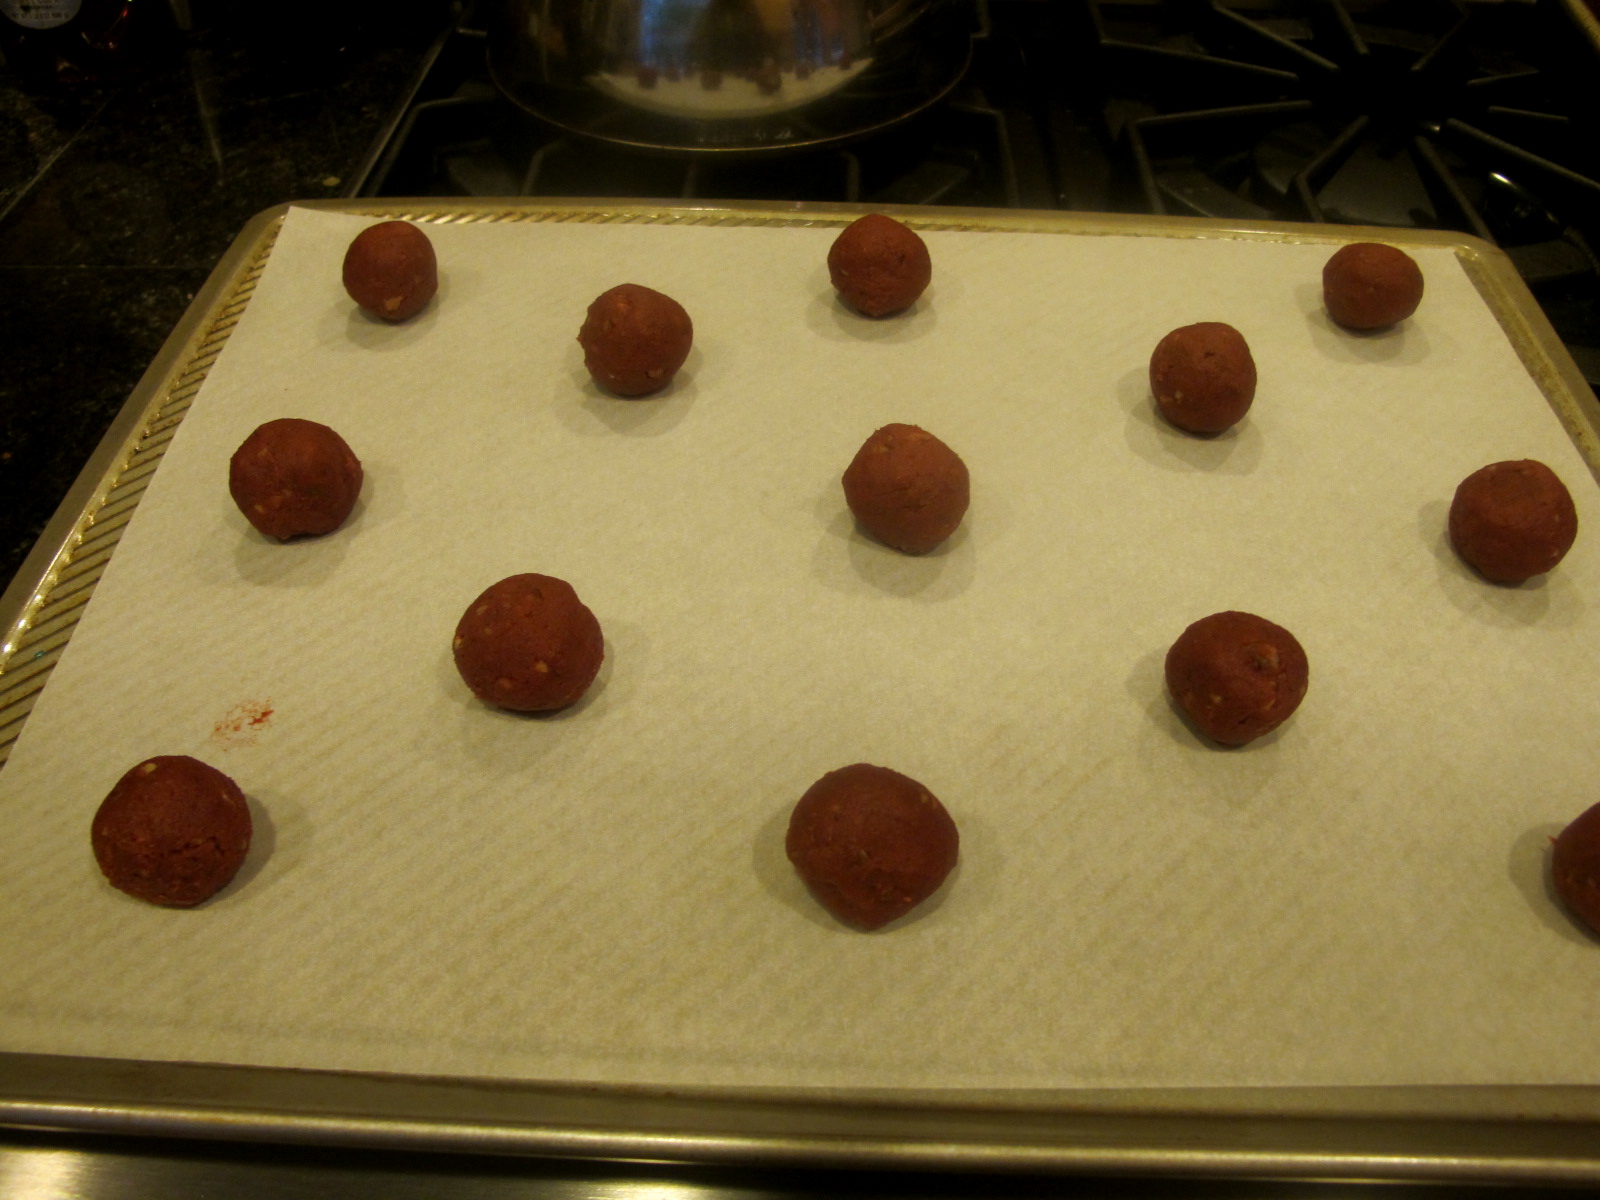
Use a tablespoon scoop to measure out the dough and roll into a ball.  Place on the parchment lined baking sheet.  Bake for 11 minutes.  Cool cookies slightly, then, transfer to a rack to cool further.

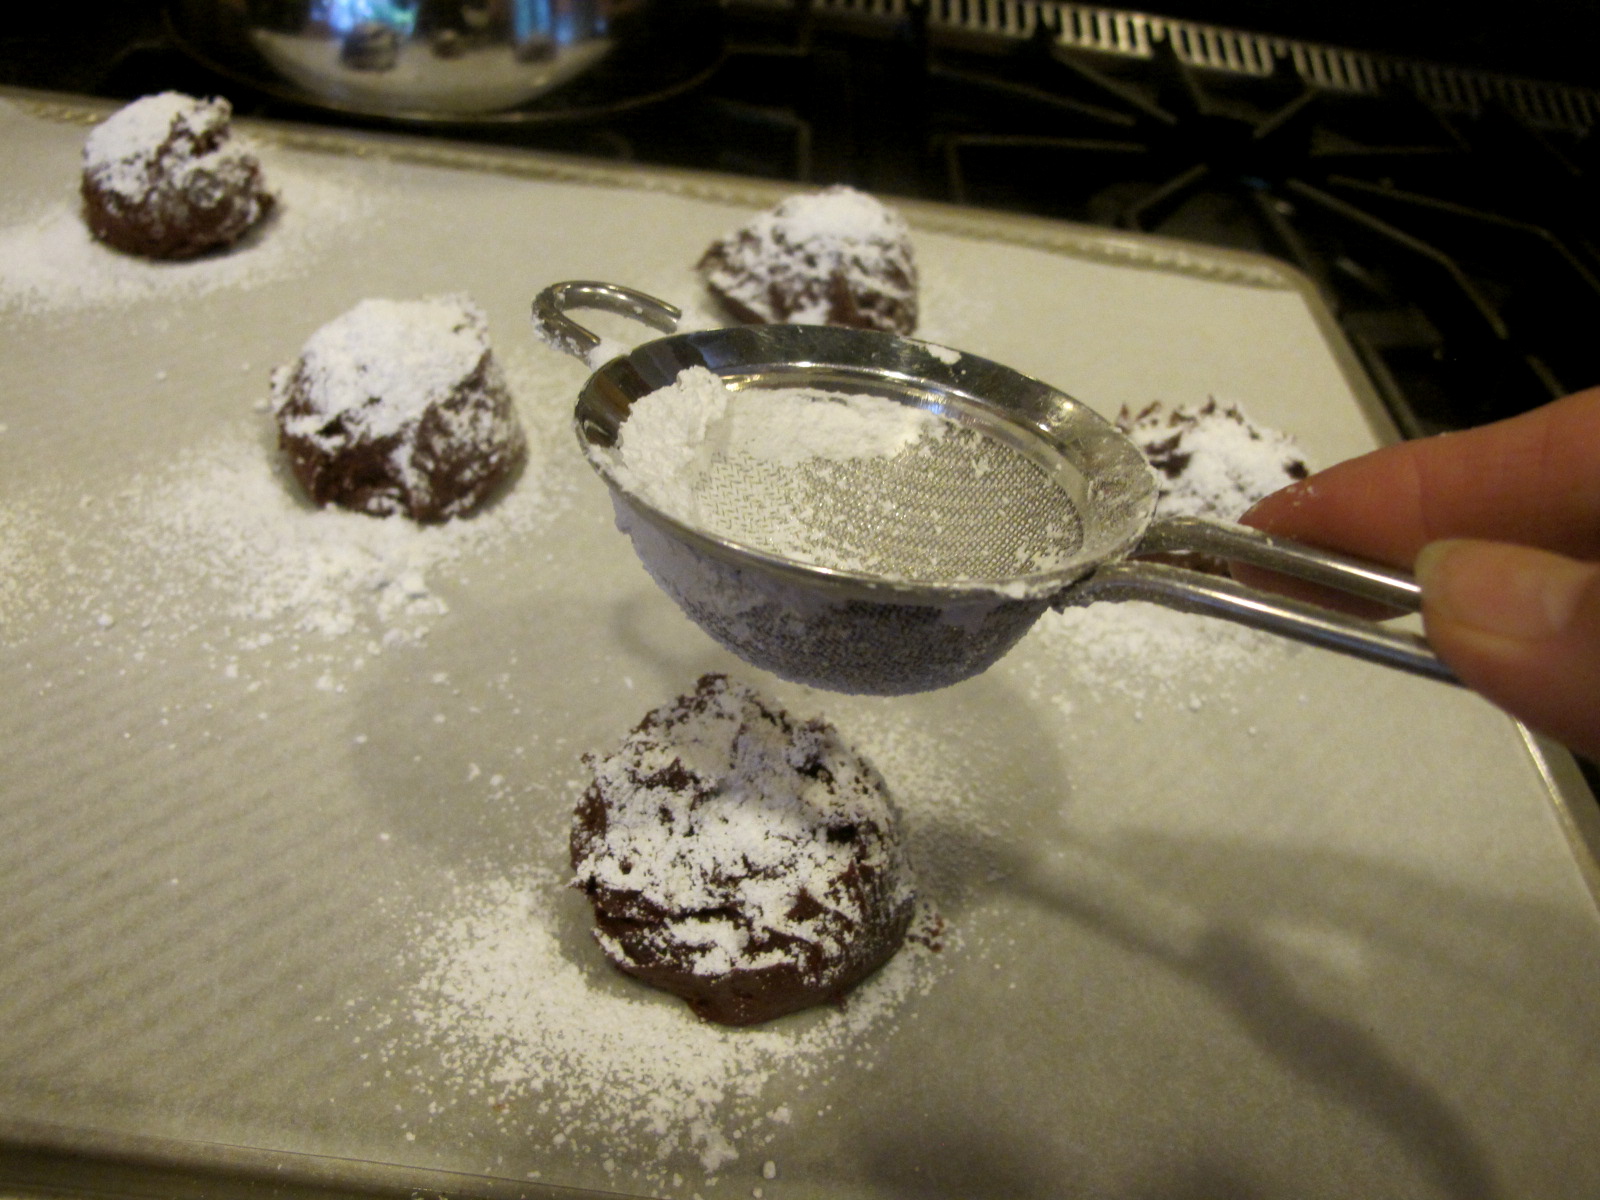
Roll warm cookies in a dish with additional confectioners' sugar in it.  Repeat 2 or 3 times to get a thorough coating.

These simple cookies with their deep red color are perfect for the holiday--I know we all looked forward to my mother placing them on trays for the dessert table on Christmas Eve.  Enjoy!

Rosie is settling in and has been sleeping most of the day after her long adventure yesterday-from Missouri to Washington.  With her eyes closed she is quite mysterious looking with her dark mask including her black nose, but the sweetest personality I've ever seen in a cat.  I'm in love with her:-D

Thursday, June 7, 2012

Red Velvet Crackles


When we lived in California, in the 80s, one of our favorite restaurants was called The Back Bay Rowing Company in Costa Mesa.  I'm not sure if it still exists, but it is the inspiration for my baking today.

It's decor was set around rowing, more specifically, sculls and crewing.  They hung from the ceiling and there were photographs and jerseys on the walls of crew teams and trophies on shelves.  The food was a bistro fare and the atmosphere, was casual.  What I was thinking about today was after the meal, as we were walking out, we passed the bakery case. Both my daughters and I stared at the cookies--chocolate chip, oatmeal and chocolate crackles.  They were jumbo sized and so the first time we bought the chocolate crackles, we thought we'd be "lady-like" and share it.  That only happened the first time--after that, we each had our own. LOL!

I'm not one to do the usual, so I thought, "how could I change this cookie to be mine?"  The answer, was creating a Crackle with one of my favorite flavors, Red Velvet.  However, I didn't use red food coloring, but a product I found in the King Arthur catalogue--Red Velvet Cake Bakery Emulsion.

The cookies have that deep, burgundy color, as in the famous Southern cake, and with just a "crackling" of confectioners' sugar on top, they seem to melt in your mouth.

Red Velvet Crackles
1/2 cup (1 stick) unsalted butter, at room temperature
1 cup light brown sugar, packed
1 cup granulated sugar
4 oz. unsweetened chocolate, melted
4 large eggs
1 tsp. Vanilla extract
1 T Red Velvet Cake flavor (or you could use red food coloring, but you'll only get the color, not the taste)
2 T Unsweetened cocoa (I used Cocoa Rouge)

1 3/4 cup King Arthur all-purpose flour
1 1/2 tsp. baking powder
1/4 tsp. salt
1 cup bittersweet chocolate chips

Confectioner's sugar

Preheat oven to 350F-degrees.  Line a baking sheet with parchment paper.

Chop the unsweetened chocolate, finely and place in the bowl atop a double boiler. 

In a stand mixer, using the paddle attachment, cream the butter until fluffy.  Add the sugars and continue to beat 3 to 5 minutes to combine.  Scrape down the sides with a rubber spatula.  Add the eggs, one at a time, beating well after each addition and scraping down the sides as needed.  Add the melted, cooled unsweetened chocolate.

Add the vanilla and the Red Velvet Cake flavor to the batter and mix well.  Whisk the dry ingredients in a medium bowl and then add to the batter, mixing just until the flour is incorporated.  Stir in the chocolate chips.

Use a 1/4 cup scoop to measure the cookie dough onto the prepared baking sheet.  Dust generously with the confectioners' sugar and allow the cookies to sit for 10 minutes before putting them in the oven.

Bake for 5 minutes, then, rotate the pan and bake an additional 5 minutes (10 minutes total).  Remove from oven and allow to rest a few minutes before transferring to a rack to cool completely.

The cookies have a lovely cake-like texture with the familiar red color and by adding the bittersweet chocolate chips, you get a gooey chocolate morsel with every bite.  

I know these would have been worth stopping for at a bakery case--even better homemade. Enjoy!


Friday, February 10, 2012

Red Velvet Scones

Valentine's Day is around the corner and while chocolate and roses maybe the most sought after, I like to start the day with breakfast, so I  came up with a special scone for the occasion. In addition, Go Red for Women in February has become as popular as the pink ribbon for breast cancer in October and I wanted to emphasize this as much as the one day we exchange gifts of love.

My Grandma Gladys died, at age 72,  of heart disease in 1973, the day before our daughter Kelly turned one year old.  Because of her condition, she never even got to hold her youngest great-granddaughter--something that made me extremely sad.  Awareness and prevention is the focus of various events that are held all over the country in hopes that one day heart disease and stroke will be a thing of the past;  heart disease still remains the #1 killer of women, ahead of the top three cancers.

Red Velvet Scones
4 cups King Arthur all-purpose flour
2 T. Dutch-processed cocoa
1 T. baking powder
1 tsp. baking soda
1/3 cup granulated sugar
1 tsp. salt
10 T unsalted butter, cut into 1/2-inch pieces
1 1/3 buttermilk
1 large egg
2 tsp. Red Velvet Cake Flavor (or 1 T red food coloring)

3 T. half & half
Sparkling Sugar
Preheat oven to 400F-degrees.  Line a baking sheet with parchment paper.

In a stand mixer, with a paddle attachment, mix all the dry ingredients.  Add the butter pieces, in batches, until it is mixed into the dry ingredients.  Whisk the egg and Red Velvet Cake Flavor (or food coloring) into the buttermilk.  While the mixer is running, slowly add the buttermilk mixture and beat just until the dough comes together.  Transfer the dough to a lightly floured bread board and knead a few times until the dough is smooth.  Roll out the dough to 3/4-inch thick and cut with a round or heart-shaped cookie cutter.
Transfer scones to a baking sheet and brush the tops with the half & half, then, sprinkle with the sparkling sugar.

Bake in the preheated oven 15 to 17 minutes until done.  Let cool while you make the Mock Devonshire Cream (optional, but sooooo good!)

Mock Devonshire Cream
8 oz. pkg. of cream cheese
1 cup heavy cream
1 cup confectioners' sugar
1 tsp. lemon zest
2 tsp. lemon juice

In a stand mixer, using the whisk attachment, beat the cream cheese until light and fluffy.  While the mixer is running, slowly add the heavy cream.  When the cream cheese and heavy cream are thoroughly combined, add the confectioners' sugar, lemon zest and juice.  Start the mixer on low and gradually speed up to high to whip the cream.  Place in a bowl and serve with the scones.  Additionally, you could also have some raspberry or strawberry jam to top the cream!
After breakfast, take a walk with the one you love for exercise...and some alone time--it's good for the heart.  Enjoy!