Sunday, August 28, 2011

Memorable Roasted Banana Pudding with Homemade Vanilla Wafers


Last year, when Kelly was transferred to a hospital in Louisville, Kentucky, our family and her closest friend took a break to get a bite to eat at a quaint bistro near the hospital.  After everyone had eaten, the waitress brought the dessert menu and we ordered several of their special Banana Puddings to share.  It was probably the best dessert I've ever tasted and was so satisfying--in fact, the dishes were "licked" clean!  We went back on another day and repeated the same routine...it was that good.

I haven't made banana pudding in a long time, but thinking back on those last days, it definitely put us all in a hopeful mood, longing for Kelly to beat this and come home with us.  Looking at ripening bananas on my counter, I thought back to this time and wanted to try to recreate this feeling; not to mention I'm tired of making banana bread.

Nilla Wafers are the brand name of Nabisco's biscuits that are used in this pudding--which made it's debut in 1967.  The "no-bake" dessert combined fresh bananas, vanilla pudding, and the Nilla wafers in layers to create a beloved dish that families looked forward to at the end of a meal.  My mother made it in a large glass bowl and when it was time to serve, she would spoon up this luscious concoction into a dessert cup.  In the time between when my mother made the dessert and we ate it, the Nilla wafers would soften and become cake-like.  It reminded me of a very simple trifle, of course, minus the booze!

In addition to roasting the bananas, I decided to make my own vanilla wafers.  They're so easy to make and if you have a craving for this dessert and the grocery store is closed, you have an alternative.  I was thinking about all the families affected by Hurricane Irene this weekend and how this dessert ranks up there as a Top Ten Comfort Food.  I know, being so far away from family and friends, who endured this Category 1 storm, I needed something special today to let me know it's going to be alright and we'll get through this--that's what family means to me.

Roasted Banana Pudding with Homemade Vanilla Wafers
Vanilla Wafers:
14 T unsalted butter, softened at room temperature
1 3/4 cups confectioners' sugar, sifted
4 large eggs
2 tsp. Vanilla Extract
1/2 tsp. Vanilla Powder
1 1/3 + 2 T King Arthur all-purpose flour, sifted

Preheat oven to 275F-degrees.  Use a Silpat on a baking sheet on lightly butter a parchment-lined baking sheet.
Put butter in a medium glass or stainless steel bowl over heated water.  Beat with a wooden spoon or a whisk until light and fluffy.

Sift confectioners sugar over the butter and whisk in until completely combined.

Add two of the eggs and whisk once more.  Add the final two eggs and vanilla and whisk again until combined.  Sift the flour over the batter and fold in.

You can use a small scoop or place batter into a piping bag fitted with a large round tip to place cookies on baking sheet, approximately 2 inches apart.

Bake in preheated oven for 20-25 minutes or until golden brown.  Let cool slightly on the sheet, then, transfer to a baking rack to cool completely.

Raise the oven temperature to 350F-degrees.  On a small baking sheet, lined with parchment, place five bananas (with their skins) on it.

Bake 20 minutes and remove three of the bananas to a cutting board to cool completely.  Continue to roast the last two bananas for another 20 minutes.

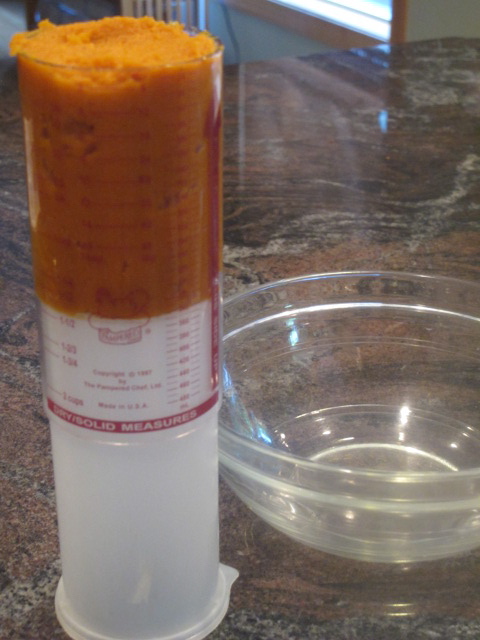
The first 3 bananas should be peeled and carefully sliced in 1/4-inch pieces.  Set aside.  Mash the remaining bananas to use in the pudding.

Pudding:
2 cups whole milk
1/3 cup granulated sugar

In a medium sauce pan, heat the milk and sugar, just to a simmer.
In a medium bowl blend:
1/3 granulated sugar
2 T cornstarch
pinch of salt
2 large eggs
Pour the hot milk mixture over this mixture, whisking the entire time so you don't "cook" the eggs.

Return mixture back to the sauce pan and bring to a soft boil.  After the mixture thickens, remove from the stove top and add 1 tsp. Vanilla extract and 1/2 tsp. Banana Flavoring.  Stir well.
Add:
Mashed bananas
2 T. unsalted butter, at room temperature

Pour the pudding back into the medium glass bowl and set that bowl on top of an ice-filled bowl.

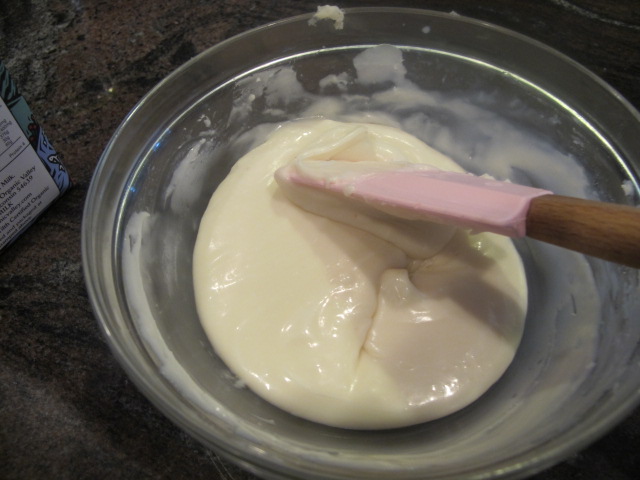
When the pudding cools down (about 30 to 45 minutes) add 1 1/2 cups of whipped cream.
(Whisk heavy cream in a copper bowl or use a hand held mixer.)

Assemble:
Place cooled banana pudding in the bottom of a dessert dish
Pace 3 vanilla wafers next, hen add the sliced roasted banana slices, distributing them among 6 dishes.

Add more pudding, then a few more vanilla wafers and finally whip enough cream to stread on top.  Chill dessert at least an hour before serving.

Likewise, you can make this dessert in one large dish and scoop out the amount for serving as my mother would do when serving it.

Banana Pudding is truly comforting and after a long weekend of worrying about our loved ones, it was just what "the doctor" ordered.  As Ari and Maddie would say..."All Done." Enjoy!


Friday, August 26, 2011

Lunch Box--Double Pistachio~Lemon~White Chocolate Chip Cookies


Children are heading back to school--some have already started and some next week, but it's a time to look over recipes and plan lunches.  For me, I could hardly sleep in anticipation.  New dresses my mother had sewn to choose from, new saddle oxfords, and school supplies I had purchased with my babysitting (or allowance) money.

My mother made our lunches that morning and the homemade cookies, usually the night before and I know I didn't appreciate her near enough until I was a mom doing the same thing for my daughters.  My mother went to work in the high school cafeteria as their baker when my youngest sister started junior high. It was the first time she had worked outside of the home since she got married in 1938.  She loved baking for the kids and enjoyed the compliments.  Our girls attended private schools, which didn't have a hot lunch program, so coming up with new and different lunches was always a challenge.  Likewise, for all the moms of home-schooled children, I think you can relate how tough it is to make  balanced lunches. 

These cookies maybe a little sophisticated in taste, but I believe the children today have been exposed to more things than us and will appreciate their unique blend of flavors.

Double Pistachio~Lemon~White Chocolate Chip Cookies
1 cup (2 sticks) unsalted butter, at room temperature
1 1/3 cups light brown sugar, packed
1/2 cup granulated sugar
2 large eggs
1/2 lemon--juice and zest
1 tsp. Vanilla extract
3 1/4 cups King Arthur all-purpose flour
1/2 cup pistachio flour*

1 tsp. baking powder
1 tsp. baking soda
1/2 tsp. Kosher salt
1 cup chopped pistachio
2 cups (11 or 12 oz) white chocolate chips
*You can grind your own pistachio flour in the food processor or VitaMix, but be careful not to let it go to "butter."  Alternatively, you can add a 1/4 to 1/3 cup more all-purpose flour instead of the Pistachio flour--you won't get the same intensity of flavor, but the cookies are still wonderful!

Preheat oven to 350F-degree.  Line a baking sheet with parchment paper.
In the bowl of a stand mixer, using the paddle attachment, beat the sticks of butter until creamy.  Scrape down the sides of the bowl.  Add the sugars, lemon juice, zest, and vanilla and beat well.  Add the eggs, one at a time, beating well after each addition.  Again, scrape down the sides of the bowl.  Add the dry ingredients, including the pistachio flour and chopped pistachios and beat until combined.  Stir in the white chocolate chips.  
Scoop out the dough, with a 1/4-cup scoop, leaving about 2-inches between for spreading.  I like to use my finger-tips to press down lightly on the tops before they go into the oven.


Bake 12 minutes, rotating the pan once to insure even browning.  Remove from the oven and cool 5 minutes before transferring to a rack to cool completely.  Makes 2 dozen.


The bright green pistachios and the white chocolate chips is a wonderful combination, but then, there's that hint of lemon that makes you take another bite and another bite and so on.  Your children will love these and Mom's--this makes a wonderful snack with a cup of tea or coffee when you get a break.  Enjoy! 
   

Monday, August 22, 2011

Black & White Whoopies


A couple of weeks ago, I went to the movies with one of my best friends and saw what I consider the best movie I've seen this year--"The Help."  It has an amazing cast of actresses--Viola Davis as Aibileen, Octavia Spencer as Minny and Emma Stone as Skeeter.

Based on a New York Times bestseller, the story takes place in Mississippi in the 1960s.  I remember this time, all too well and the rules that governed associations between whites and blacks, but this movie showed the courage it took these women to transcend those societal rules that defined them to form a remarkable sisterhood.

This movie also reminded me a lot of my mother, who was a strong-willed woman and stood up for what was right--after all, she raised 8 children, a lot on her own while my dad was on sea duty.  My Dad respected her for this strength and the independence she had for making decisions.  It was the partnership they had that I looked for when I got married.

These Black and White Whoopies meld two of my favorite flavors together, chocolate and vanilla--creating a dessert that's exemplifies opposites working together to make one delectable dessert.

Chocolate Whoopies 
1 1/2 sticks (12 T) unsalted butter, at room temperature
1 1/3 cups light brown sugar, packed
1 tsp. espresso powder
2 large eggs
1 T Vanilla Extract
2 cups King Arthur all-purpose flour
1 cup Dutch-processed cocoa

1 tsp. baking soda
1/2 tsp. Kosher salt
2 cups buttermilk
Preheat oven to 325F-degrees.  Lightly spray "whoopie pan" or line a baking sheet with parchment.
In a stand mixer, using a paddle attachment, cream the butter. Add the brown sugar and espresso and beat until fluffy.  Add the eggs, one at a time, beating until fully incorporated.  Sift the dry ingredients and add them alternately with the buttermilk.  Beat 1 more minute at medium speed.  Use a scoop to form the round cookies.

Bake in preheated oven for 9-11 minutes or until firm to touch on top.  Remove from oven and let cool a few minutes before removing to a rack to cool completely.  Repeat with remaining dough.  Makes approx. 2 1/2 dozen.

Vanilla Whoopies
1/2 stick (4 T) unsalted butter, at room temperature
4 T vegetable shortening
1/2 cup granulated sugar
1/2 cup light brown sugar, packed
2 large eggs
2 vanilla beans, split and scraped
1 T. Vanilla extract
2 1/4 cups King Arthur all-purpose flour
1 tsp. baking powder
1/2 tsp. Kosher salt
1/2 cup buttermilk
2 T milk
1 tsp. baking soda
1 tsp. white vinegar

Increase oven temperature to 350F-degrees.

In the bowl of a stand mixer, using the paddle attachment, cream the butter and shortening.  Add the sugars, vanilla bean "paste" and vanilla extract and cream together for 3 minutes.  Add the eggs, one at a time, then, the buttermilk and beat until combined.
Combine the milk, baking soda and vinegar in a measuring cup and stir.  Add the milk mixture along with the rest of the dry ingredients and beat on medium for about 2 minutes on medium speed.  

Use a scoop to measure batter onto the "whoopie pie" pan or a parchment-lined baking sheet.  Bake for 10 minutes or until the edges are lightly browned.  Cool on the sheet for 5 minutes before transferring to a rack to cool completely.

Filling:
1  cup (2 sticks) unsalted butter, at room temperature
1 pkg. (8 oz) cream cheese, at room temperature
4-5 cups confectioners' sugar
1 T vanilla extract

In the bowl of a stand mixer, using the paddle attachment, beat butter and cream cheese until fluffy.  Add the confectioners' sugar and vanilla and start speed on low.  When the dry ingredients are incorporated, push the speed to Med/Hi and beat for 1 to 2 minutes until fluffy.

Scoop filling onto the underside of the whoopie pie and top with the opposite flavor.

The Help is certainly worth seeing--especially with a special friend and these Black & White Whoopies are worth sharing too!  Enjoy!


Friday, August 19, 2011

Blueberry Pie Cookies


My Grandpa Frank planted nine blueberry bushes in the 70s, that produced a lot of good pies and jams through the years, but prior to this, our source for pies and jams, that mother would make, were to scour the woods for wild huckleberries.   My brothers and sisters would occasionally help gather the berries, but it was usually me who stayed with the task so we'd have enough for a pie or a batch of jam.

The huckleberry (blueberry) is one of the three fruits indigenous to North America (cranberry and Concord grape are the other two).  Although a kin of blueberries, they're color and taste are more distinctive--darker and a lot of people say, sweeter.  Also, it is much smaller than the cultivated blueberry, so you definitely need to pick a lot more to use in recipes.

I was created these cookies with my grandson-Ari, in mind.  He is the Blueberry King and whenever I ask him what kind of cookies he wants me to make for him, his answer is usually, "Blueberry."  These cookies are simple to put together and you'll notice I've left out eggs and leavening.  I wanted more of a shortbread-like cookie that would ship easily and still be fresh even if it took a week or more in transit.  Ari and his dad are headed for Spain in 10 days, where they'll live for the next nine months and I don't want them to miss out on any homemade treats while there.  Seems like a win-win cookie to satisfy Ari's blueberry fix!

Blueberry Pie Cookies
1 1/2 cups (3 sticks) unsalted butter at room temperature
1 cup light brown sugar, packed
3/4 cup granulated sugar
1/2 tsp. Almond extract
1 1/2 tsp. Vanilla extract
4 cups King Arthur all-purpose flour
1 cup dried blueberries

Additional granulated sugar in a small bowl


Preheat oven to 375F-degrees.  Soak dried blueberries in hot water for about 15 minutes.  

Line baking sheet with parchment paper and set aside.
In the bowl of a stand mixer, using the paddle attachment, cream the butter for 2-3 minutes.  Add the sugars and beat until fluffy.  Add the extracts and mix thoroughly.  
Add the flour, 2-cups at a time, beating well after each addition.  Once you have all four cups mixed in, you will notice the dough looks crumbly, but it should hold together when you gather some up in a ball.
(*Baking tip--When measuring flour, spoon the flour into the measuring cup, then level off.)


Drain the blueberries well, then stir into the dough to incorporate. 


Use a baking scoop or a large spoon to measure the amount of dough--the balls I did are about the size of a golf ball, but you could go smaller.  Place the scoop of dough in the palm of your hand and roll into a balls.  Next, roll the balls in the additional granulated sugar and place on the prepared baking sheet. 
To finish these off--I decided to use a tool my mother gave me over 40 years ago, a meat tenderizer.  

Admittedly, I haven't used it for that purpose for over 20 years, but it has come in handy to crush potato chips or pretzels for cookies or Fritoes for my Thanksgiving stuffing, but today, I used it to press down the balls with a beautiful pattern.  If you're not in possession of such a tool, the criss-cross of a fork will do the trick although, I think this pattern resembles a "lattice" pie top!

Bake in the preheated oven for 9 minutes or until golden brown around the edges.  Remove from the oven and let cool for 5 minutes before removing to a rack to cool completely.
This shortbread cookie, loaded with blueberries is a perfect bite with a cup of tea when friends drop by too.  Enjoy!


Tuesday, August 16, 2011

Chocolate Pumpkin Cake with a White Chocolate Glaze


We sure haven't had much of a summer...weatherwise, and today felt like fall is just around the corner.  I'm not complaining, but feel really badly how hot it's been from the Midwest to the east coast with temperatures in the triple digits in a lot of areas.  Our weather here in the Pacific Northwest was a definite influence in my decision to combine chocolate with Pumpkin! to create this unusual dessert.

Pumpkins have been around for thousands of years, with the earliest seeds showing up in Mexico.  The word pumpkin was adapted by American colonists from the British word pumpion, which came from the Greek word pepon meaning large melon.  The orange color comes from the pigments in the skin and the main nutrients of pumpkins are lutein and loaded with both alpha and beta carotene--the later generates Vitamin A in the body.

Chocolate has been around for at least three millenia in Mexico.  It is easily one of the most popular flavors known throughout the world.  Valentine's Day is devoted to chocolate as one of the special gifts given.  Chocolate contains alkaloids, which have physiological effects on the body and it's been linked to serotonin in the brain.  Dark chocolate has been singled out with positive effects on cholesterol and in moderation, some studies say it can lower blood pressure.

The other influence of this cake is definitely my girls--Erin loves chocolate, just like my mother, and will choose that flavor 99% of the time over anything else.  Kelly, on the other hand, loved pumpkin, just like my husband, and asked for pumpkin pie for her birthday each year.  Combining these two flavors may sound a little crazy, but I assure you, it works.

This is my 300th post!!

Chocolate Pumpkin Cake with a White Chocolate Glaze
16 T (2 1/4 sticks) unsalted butter, at room temperature
1 1/2 cups dark brown sugar, packed
1 1/2 cups granulated sugar
5 large eggs
1 T vanilla extract
2 1/2 cups King Arthur all-purpose flour
1 cup + 2 T high quality cocoa
1 T baking powder
1 1/2 tsp. baking soda
1/2 tsp. salt
1 1/2 tsp. cinnamon
3/4 tsp. freshly ground nutmeg
1/2 tsp. cardamon
1 1/2 cups pumpkin puree
3/4 cup buttermilk

Preheat oven 350F-degrees.  Spray a 12-cup bundt pan with a non-stick cooking spray.  Set aside.
In the bowl of a stand mixer, using the paddle attachment, cream the butter and sugars until fluffy.  Add the eggs, one at a time, beating well between the additions.  
In a medium bowl, measure out the pumpkin puree and blend it together with the buttermilk.  Set aside.

 Sift together the dry ingredients.  Combine the dry ingredients alternating with the pumpkin/buttermilk mixture, starting and ending with the dry ingredients.  Once all the ingredients have been added, mix on medium speed for 1 minute.
Spoon batter into the prepared Bundt pan and bake for 45-50 minutes or until a toothpick inserted in the center comes out clean (or you can lightly touch with your finger tips and it springs back).
 
Remove from the oven and allow to cool about 10 minutes before inverting onto a serving plate.  When completely cooled, pour glaze over top.   To add some color, I added some lime green Deco Drops for contrast.

White Chocolate Glaze:
3 oz. white chocolate, melted
1 cup confectioners' sugar
1 T light Karo syrup
1 tsp. vanilla
3-4 T milk

Melt the chocolate in the top of a double boiler.  Blend the melted chocolate with the confectioners' sugar, adding the syrup, vanilla, and milk.  Add enough milk to make a pourable glaze.


After tasting the cake, I was thinking this recipe would be great as a cupcake with a cream cheese icing as well. This incredibly moist cake, rich in flavor has a special place in my heart, thinking of my daughters and wishing they were both here to enjoy the combination.  Enjoy!

Sunday, August 14, 2011

August's Give-Away and a Special Jam Combination

It's mid-August and in spite of painting a cottage, erecting furniture, creating gifts for the Leo's in our family, and working on my 3-D flower projects, I manage to find the perfect summer-time fabric to sew an apron for this month's Give-Away.

Fresh berries are abundant in our Farmer's Markets--raspberries, blueberries, cherries, and of course strawberries,  so when I saw this fabric I knew it said summer.  The kind of summers I spent in my grandparent's garden picking strawberries and blueberries, but also a large variety of veggies.  Knowing I had been part of the harvest made me feel good and oh, did everything taste wonderful; both fresh and canned for the winter months.

The lucky recipient's name (at least I hope they feel lucky, LOL!) will be drawn from the names that leave comments during the month.  This handmade apron will be sent to you with love!

Now, for the jam.  This is not an idea I had for a recipe, but rather, a "request" from a dear friend...who said to me the other day, "You know what kind of jam I'd like to see you make?  Cherry~Cranberry!"  Well, now that's a challenge because these two fruits are abundant in very different seasons and I always like to make jam from fresh fruits.  However, living in the Pacific Northwest, this wasn't as impossible as I discovered it would be.
Our cherries are coming to an end, but the big, sweet Bing are still in season and so that was the easy fruit to get. However, for the cranberries, I had to rely on frozen. Our neighbor to the south, Oregon, produces this "bouncy" fruit (as does Massachusetts and Michigan) and I'm proud that I was able to answer this request and will be sending off several jars to my dear friend tomorrow!

Cherry~Cranberry~Vanilla Jam
1 10oz bag of frozen cranberries
1 1/2 - 2 lbs. fresh cherries, stemmed and pitted
1 box of Sure-Jel powdered pectin
2 Vanilla Beans, split and scraped (optional, but really makes the jam)
1/2 tsp. butter
5 cups granulated sugar

Wash and sterilize six 8 oz. size jars, lids and rings.  After washing the jars, I fill 3/4 full with water and microwave 3 at a time for 3 minutes 45 seconds.  Use jar tongs to remove from the microwave, dump the water and turn upside down on a paper-toweled line baking sheet.  In a medium sauce pan, cover rings with water and bring to a boil, reduce heat to low and had the lids.

Place the cranberries in a strainer and rinse them under hot water briefly, then, place drained cranberries in the food processor with the knife blade.  Next, stem and pit the cherries and place them in the food processor.
Pulse several times until the mixture is finely chopped, not pureed!  You should have about 4 or 4 1/2 cups of fruit.
Add the fruit, pectin, and butter to a large Dutch oven.  Split and scrape two vanilla beans and place the "seeds" into the fruit mixture.  Toss in the beans in the pot to extract added flavor.
Bring mixture to a boil, stirring occasionally.  When the mixture comes to a "hard" boil, remove the vanilla bean pods and add the sugar.  Bring the mixture to a rolling boil, stirring constantly, and boil for 1 minute.  Turn off he heat.  Skim off the "foam" before ladling into the sterilized jars.
Ladle the hot jam into the jars, wipe around the edges, then use tongs to place a lid then, screw on a ring tightly.  Turn filled jar upside down for 10 minutes so the lids will seal tightly.  You should hear a popping noise when they do.  Cover with a towel while you're waiting.
Jam is not only one of my favorite things to make, but it's one of my favorite "condiments."  I love to bake with it, but mostly I just love to spread it on homemade biscuits, warm bread, or as my grandson likes...dipping a cookie in it!
Thank you my dear friend for the challenge--this jam is really good and will certainly be added to my repertoire.  Enjoy!